
Your guide to crocheting Single Double Foundation Stitches ad the Magic Ring Stitch
Hello and thanks for stopping by today. I like to start new projects, but I hate crocheting the first row. Many times, if you begin with a chain, the stitches are tight and pull that edge of your project. Even if you use a larger hook and make your crochet stitches loose, the starting chain still pulls.
Crochet foundation stitches are crocheted in a way that they turn out nice and springy. Crochet foundation stitches also crochet the first row of your project so it’s like killing two birds with one stone.
Another favorite technique I use is the magic ring or magic circle. When you crochet in the round you normally chain three or more stitches and then join them with a slip stitch in the first chain. This form a small hole in the center of your project. To avoid that hole try using the magic ring. The magic ring closes up the center and gives a nice tight center to crochet in the round projects.
Single Crochet Foundation Chain
Chain 2, insert the hook into the first chain stitch
Yarn over and pull through the chain stitch
Yarn over and pull through the first loop on the hook. This creates the chain stitch you will need to begin the next stitch.
Yarn over and pull through the two loops on the hook to complete the foundation stitch.
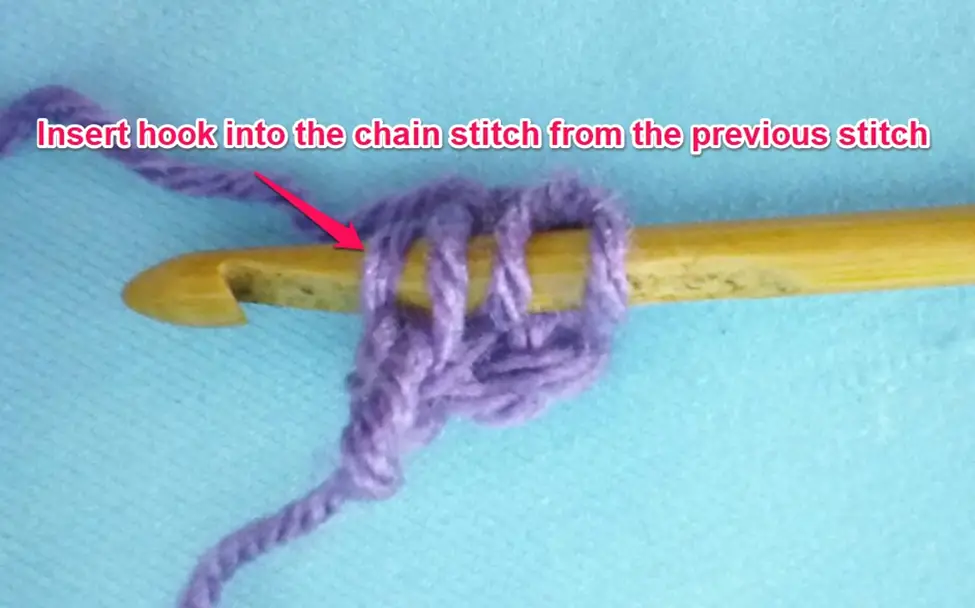
To begin the next stitch, insert the hook into the chain stitch you created, yarn over and pull through.
Yarn over and pull through the first loop on the hook. This is the chain stitch you will use for the next stitch.

Yarn over and pull through the two loops on the hook.
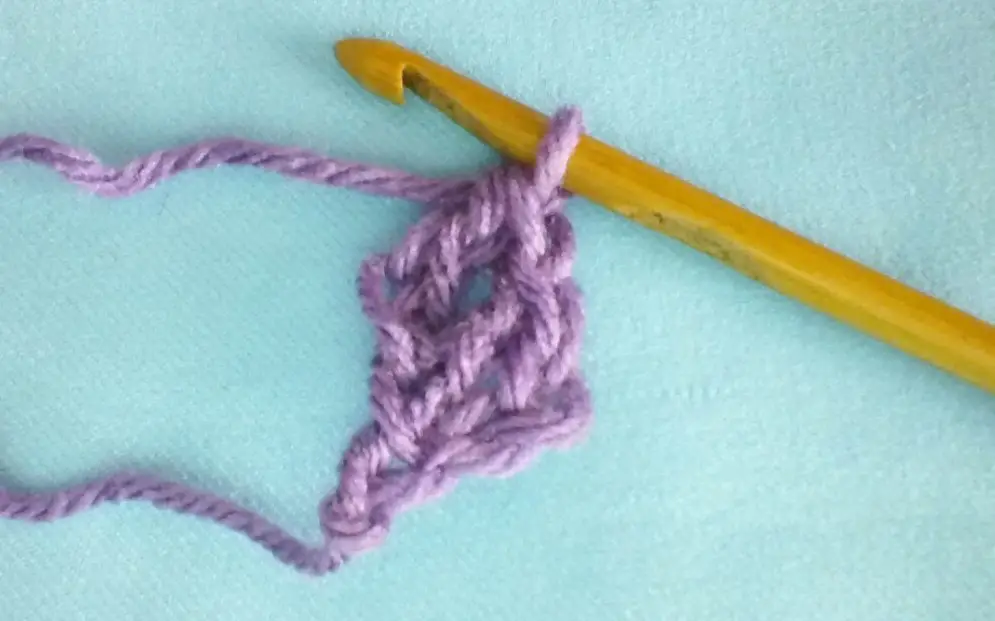
Continue to insert the hook into the chain stitch, yarn over and pull through the first loop, yarn over and pull through the two loops on the hook.
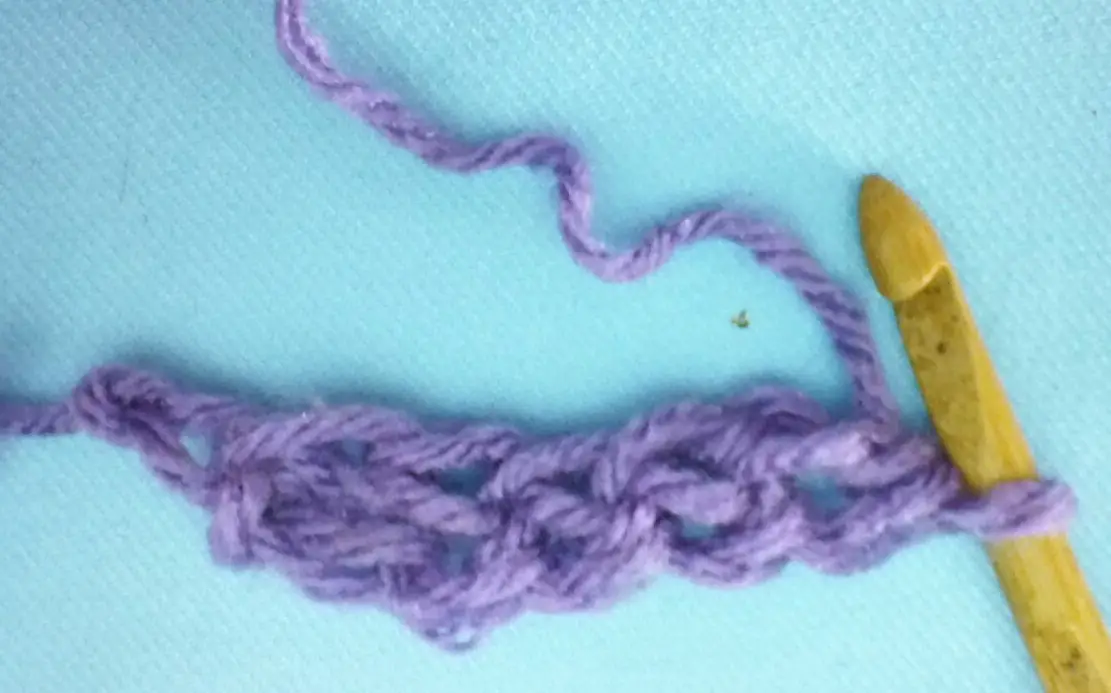
Once you have the correct number of foundation stitches, flip the row of stitches and begin row 2 of your pattern.

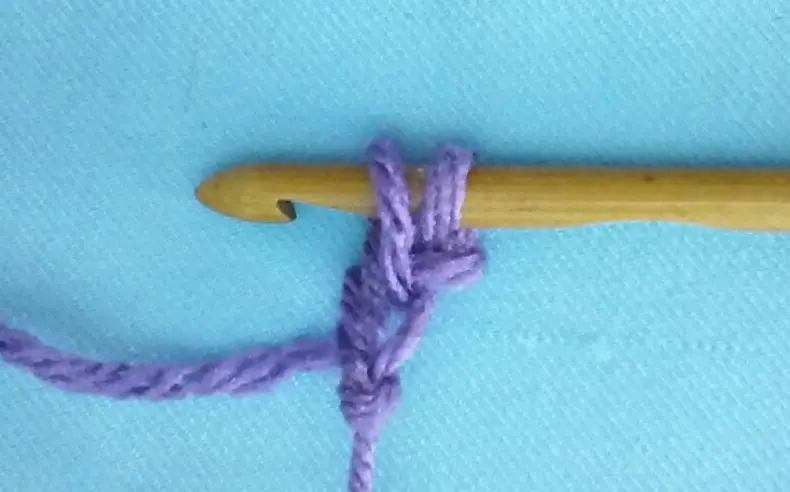
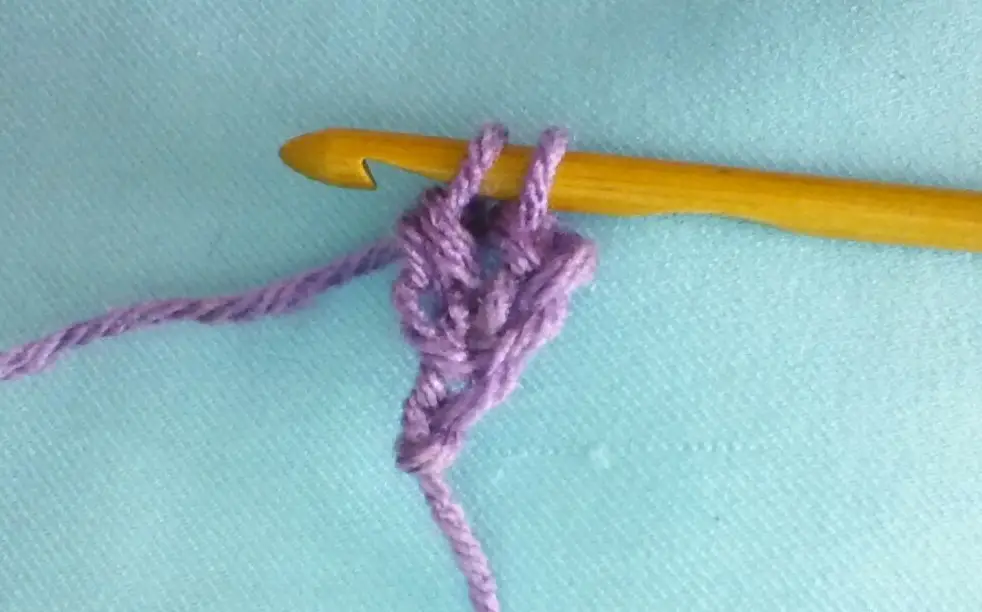
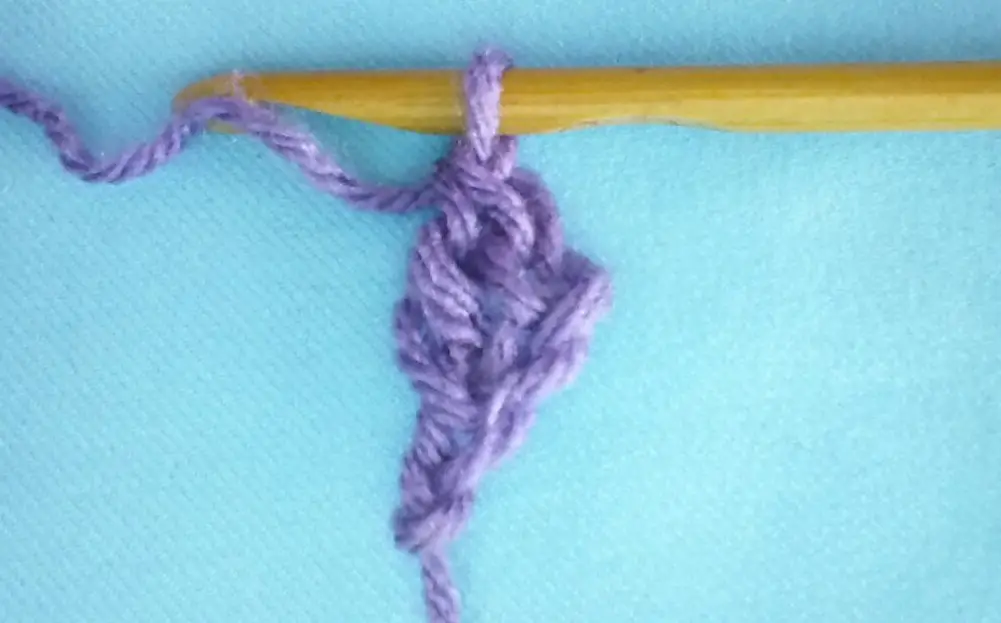
Double Crochet Foundation Stitches
Begin by chaining 3. Yarn over and insert the hook into the first chain stitch. Yarn over and pull through the chain stitch. There are now 3 loops on the hook.
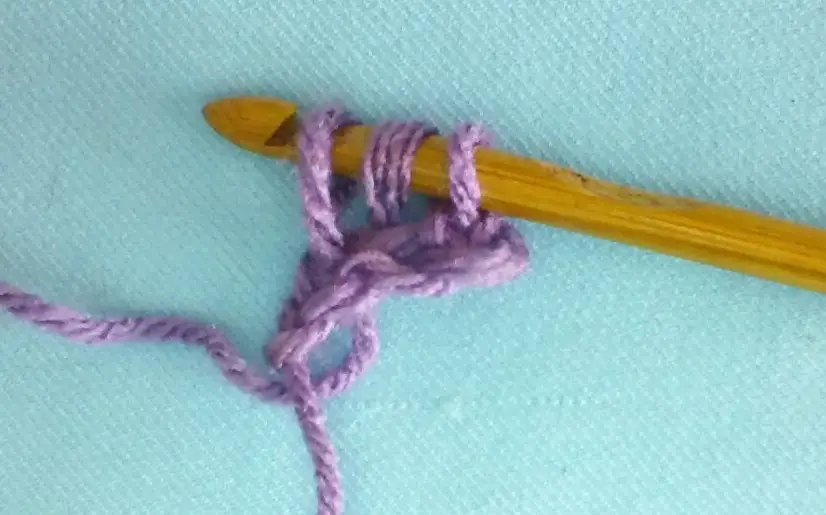
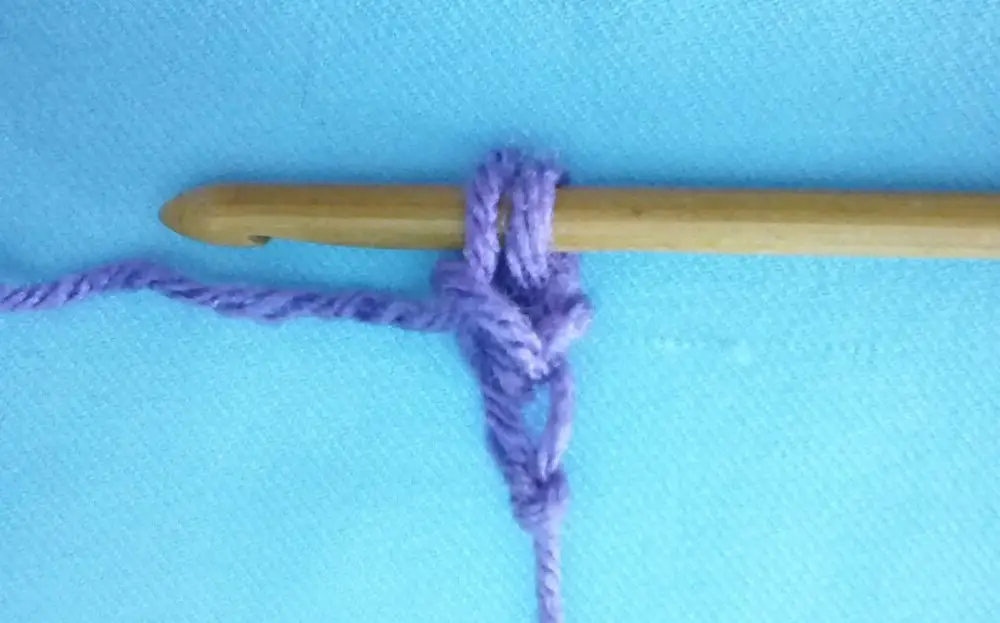
Yarn over and pull through the first loop. This creates the chain stitch you will need to begin the next stitch.
Yarn over and pull through the first 2 loops on the hook.
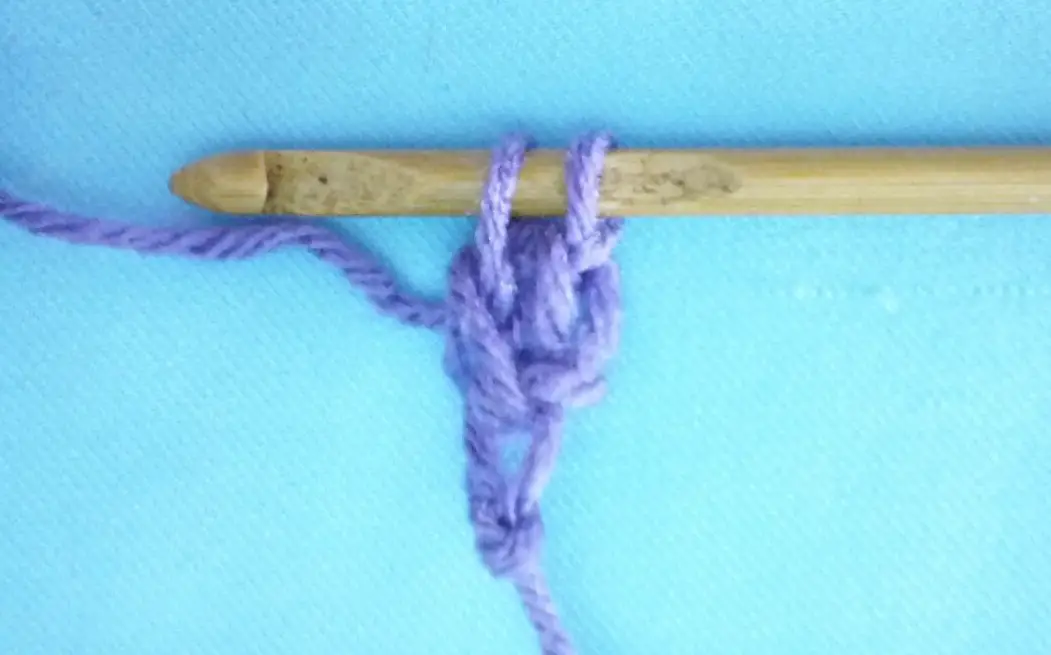
Yarn over and pull through the last 2 loops on the hook to complete the foundation stitch.
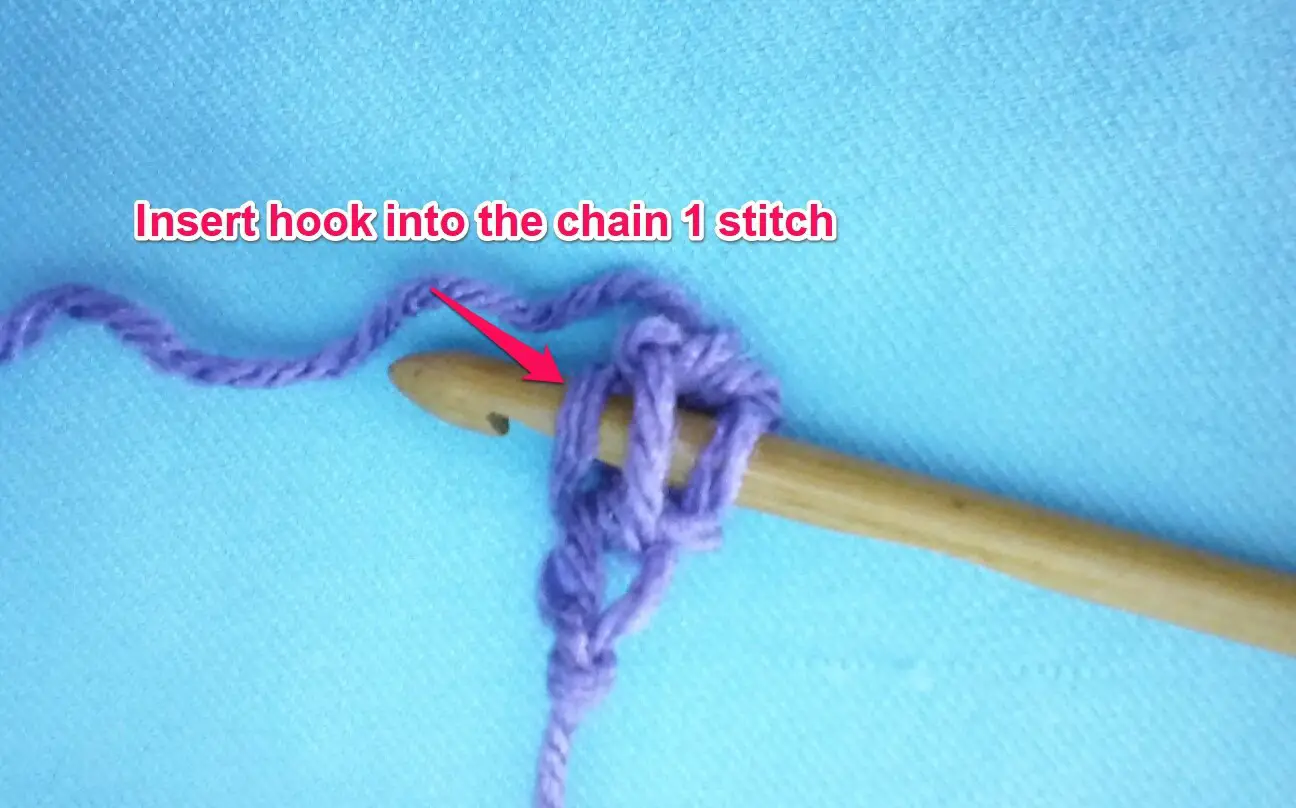
To begin the next stitch, yarn over and insert the hook into the chain stitch you created.
Yarn over and pull through the chain stitch. Yarn over and pull through the first loop on the hook to create the chain stitch. Yarn over and pull through the first 2 loops, yarn over and pull through the last 2 loops on the hook to complete the stitch.
Continue until you have the correct number of double crochet foundation stitches.
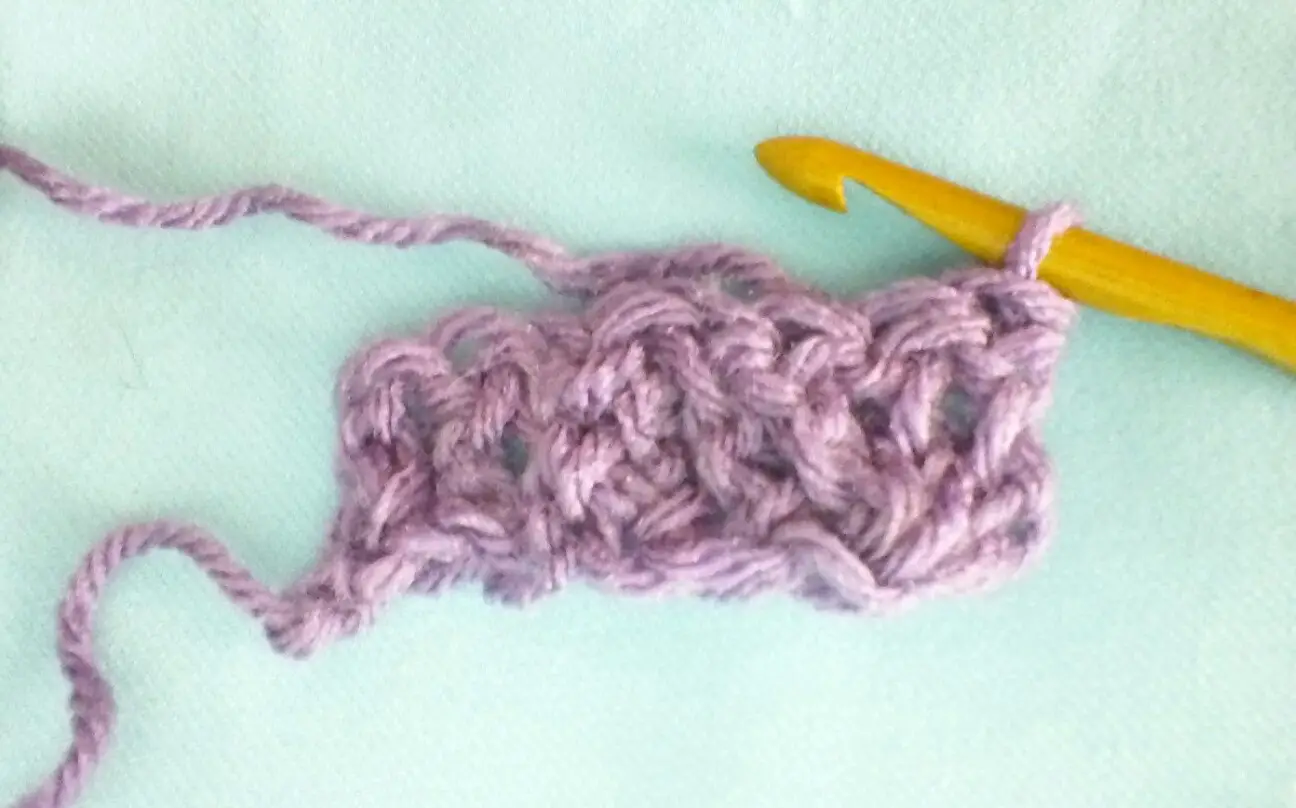
Flip your work and continue with the second row of the project.
You can use foundation stitches on almost all flat projects. It might seem like it takes longer, but remember you are crocheting the foundation and first row all at once. Once you master foundation stitches, you’ll see how much nicer your project lays and doesn’t pull on one side.
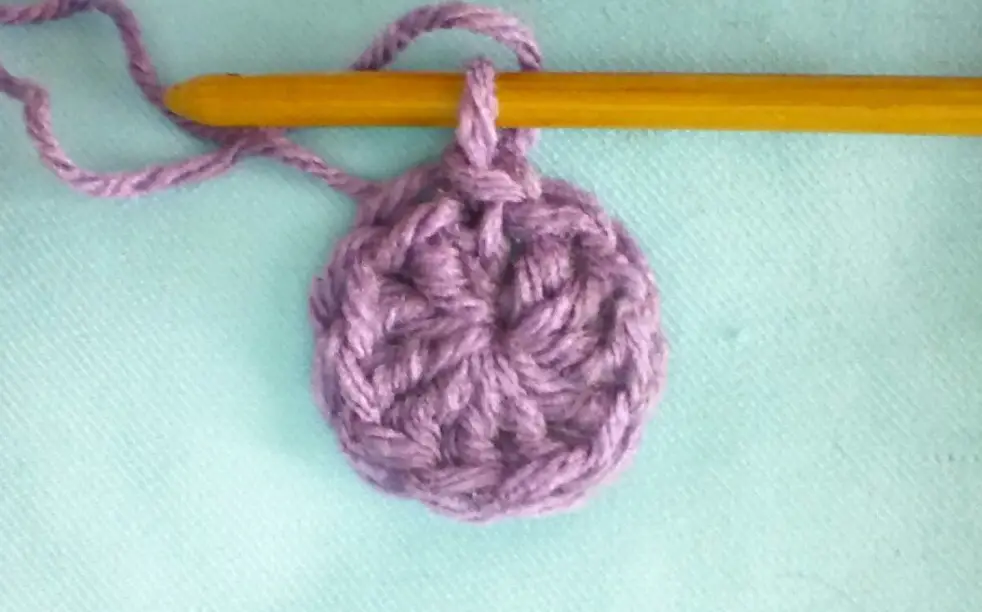
The Magic Ring
To begin wrapping the yarn around your index and middle fingers. The tail and the yarn coming from the skein should be in your palm.
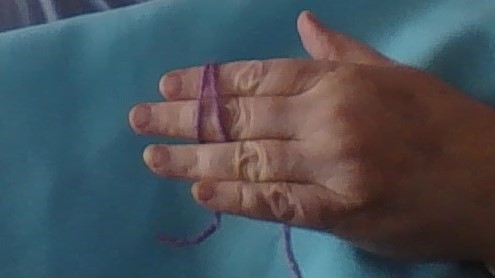
Insert the hook under the first loop, grab the second loop and pull it under the first one.
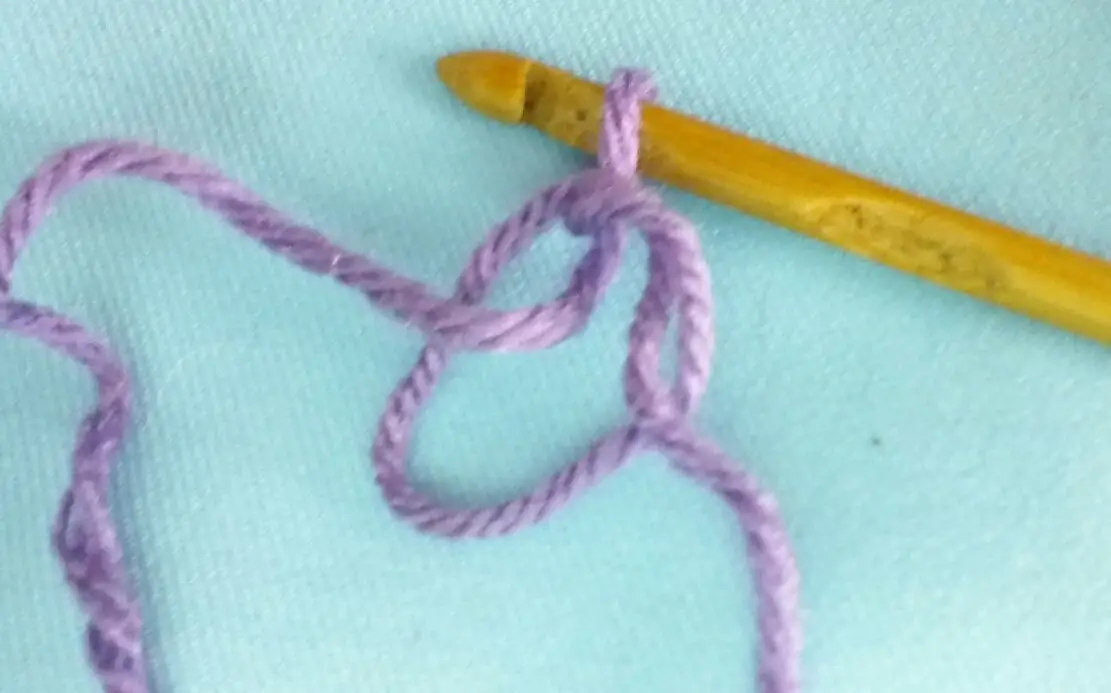
Yarn over and pull through the loop on the hook.
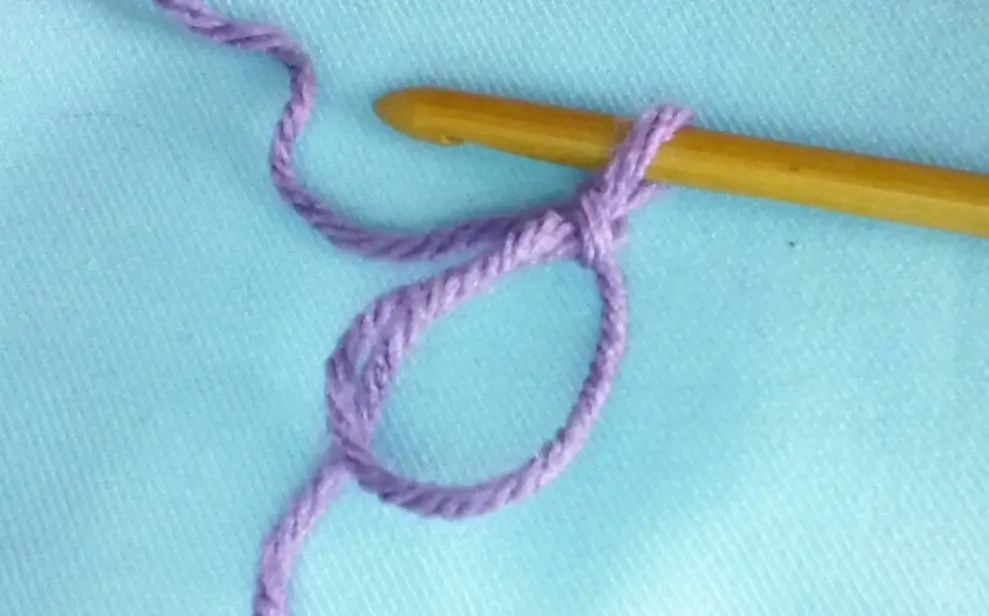
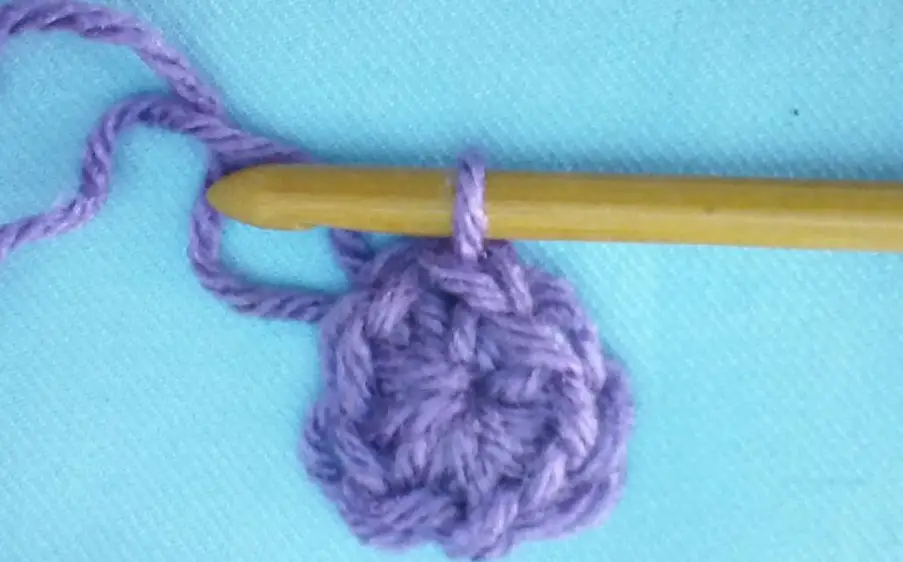
Insert the hook into the ring, yarn over and pull through. Yarn over and pull through the 2 loops on the hook. This is the first single crochet stitch. Continue to crochet single crochet stitches into the ring until you have the correct number of stitches.
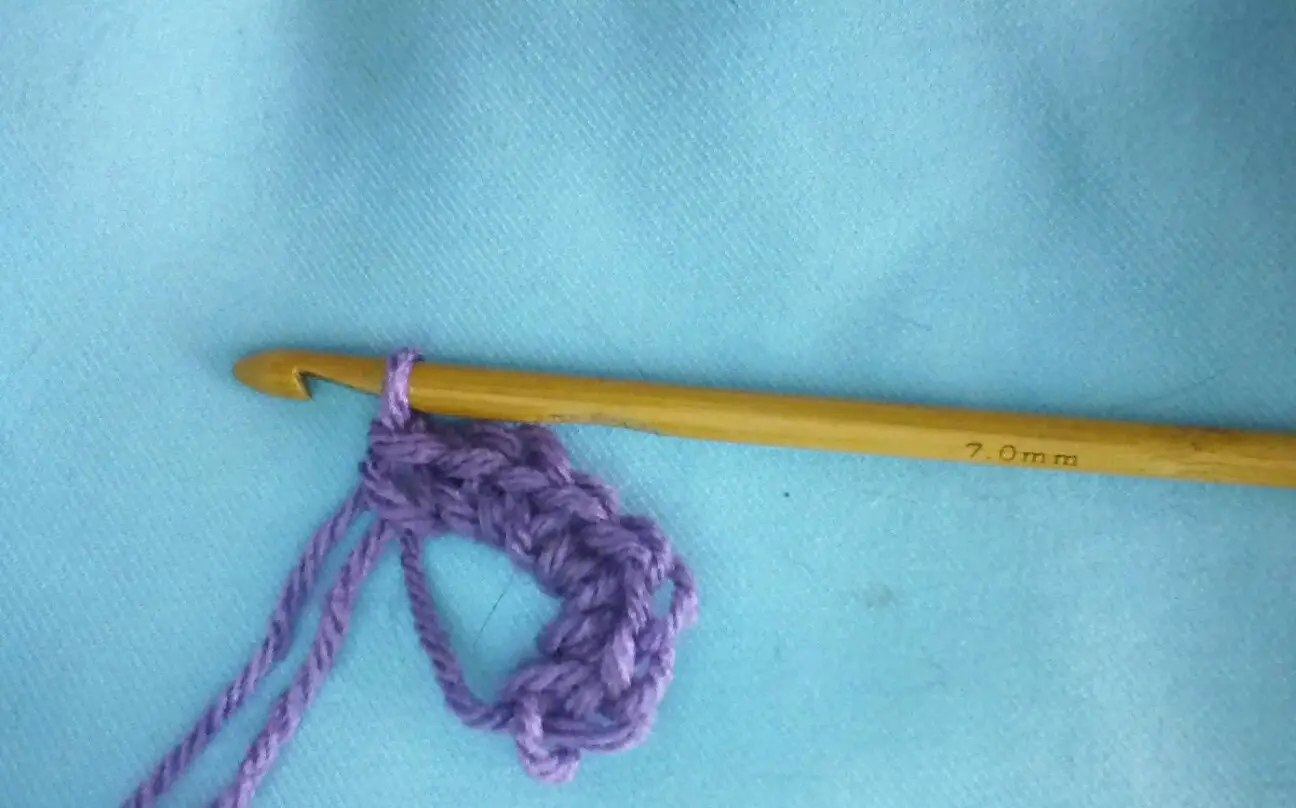
Grab the loose tail and pull the circle shut. Join with a slip stitch into the first stitch.
You can also use double crochet with the magic ring. Begin as before, wrapping the yarn around your index and middle fingers with the tails in your palm. Slip the hook under the first loop and grab the second loop and pull through. Yarn over and pull through both loops on the hook. Chain 2. Now just double crochet into the ring until you have the appropriate number of stitches. Join with a slip stitch into the second chain stitch.
Bonus Pattern!
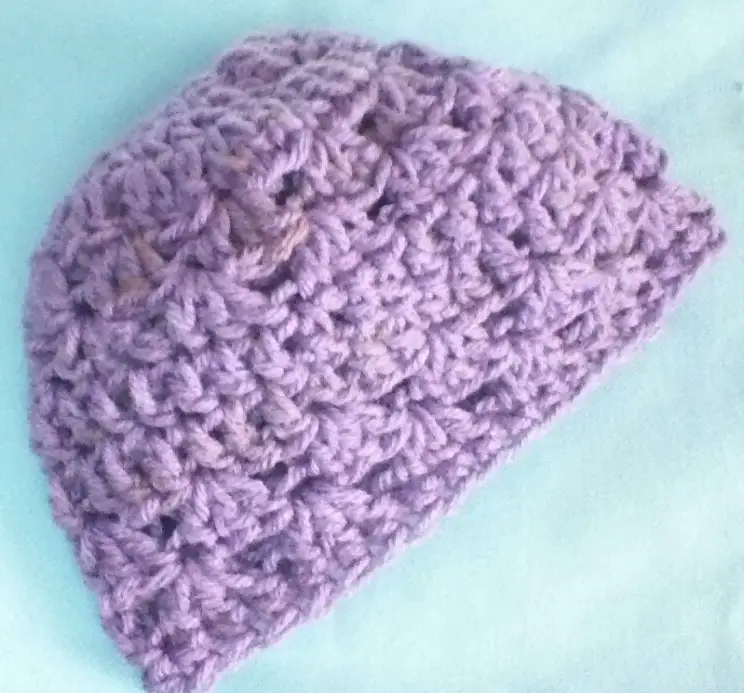
How about a free pattern to practice your skills? I have two new grandbabies and love to make hats and fun stuff for them. This pattern will fit from 18 months to 2 years. You’ll need a skein of yarn (the pattern doesn’t take an entire skein so it is a good way to use up some of your stash). I’ve used a medium-weight acrylic yarn, Red Heart Super Saver, but I can’t remember the color. I am also using a 7mm hook.
I used the invisible seam join for each round. Crochet according to the pattern and work one more stitch into the base of the starting chain. Join into the next full stitch. This hides the starting chain and creates an almost invisible seam.
Simple Shell Beanie
Stitches Used:
Sl st – slip stitch
Sc – single crochet
Ch – chain stitch
Dc – double crochet
Create a magic ring
Round 1: 10 dc into ring
Round 2: ch2, 2dc into each st around, 1 dc into base of starting chain, join in 2nd ch st with a sl st
Round 3: ch2, *2dc into next st, 1dc into next st* rep around, join in 2nd ch st
Round 4: ch2, 2dc into the same sp as ch2 *sk2 sts, 3 dc into the next st* rep around, join in ch2
Round 5: ch2, 2dc into the same sp as ch2 *3dc into the first st of the next 3dc shell* rep around, join in 2nd ch
Round 6 & 7: ch2, dc into each st around, join in 2nd ch
Round 8 & 9: Repeat Rounds 4 & 5
Round 10: ch1, sc into each st around, join in ch1, cut yarn and weave in tails.
If you enjoyed this article stop by and read our great detailed tutorial on how to crochet the Catherine Wheel.
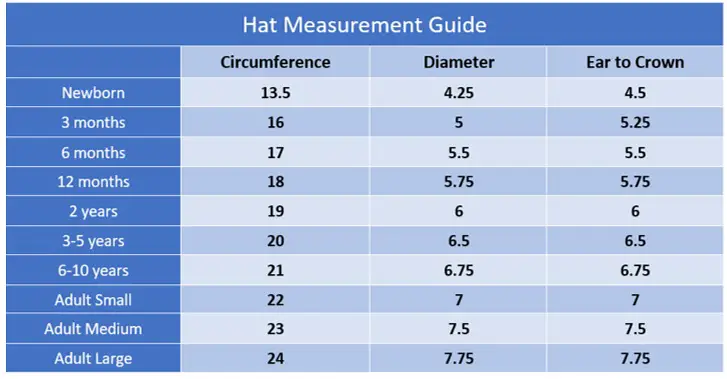
How to Adjust the Pattern Size
Use the following table to adjust the size of this beanie. The diameter measurement refers to the beginning rounds where you are increasing to get the right size. Lie down the project on a flat surface and measure across the circle. This is the diameter. Keep increasing until you reach the correct measurement. The circumference references the measurement around the brim of the hat when finished.
End Notes
Thanks again for stopping by. I hope the techniques I’ve shared today help you increase your skills. Feel free to sell any hats you make with the free pattern I’ve shared. The only thing I ask is that if you want to share the pattern, please share the link to this blog and not copy and paste the pattern.
Do you have any special techniques you like? If so, please share them in the comments and I’ll do my best to feature them in a future blog.
Until next time, take care and keep on hooking!


