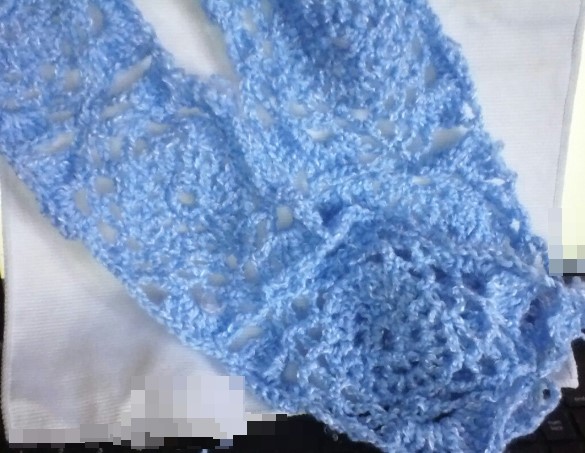
Hello and thanks for stopping by today! I just love the look of lacy patterns. There is something about that I have always found attractive. Irish lace is one of my favorite techniques. While I have yet to try Irish crochet, I like patterns that have the look of it. While on Pinterest (the great time stealer) I saw some motifs that were very pretty. There was a shawl pattern that really caught my eye and I have almost a full skein of a pretty light blue boucle yarn I received as a gift. I’m not sure of the exact brand, but I think it may be Lion Brand.

Anyway, I tried my hand at designing a lacy motif and wanted to make a shawl, but I didn’t have enough yarn. So, I decided to switch gears and make a scarf. I used the join as you go method to create a delicate lacy look that I really like. I was quite pleased with how the scarf turned out. If I can find the yarn I may add more squares and make it into a shawl but if not, it is still a good-sized crochet scarf.
My Adventures Designing This Crochet Pattern
Don’t get me wrong, I enjoy designing patterns very much but this one was a real challenge. I changed the outer edges of the pattern about three or four times. This means I’d crochet up the sample, look at it, not like it, and rip it all out. I did this several times. Designing patterns is one-third inspiration, one-third figuring out the pattern, and one-third ripping it out over and over until it is just right. I’d mention all the cursing and complaining, but this is a G rated blog.
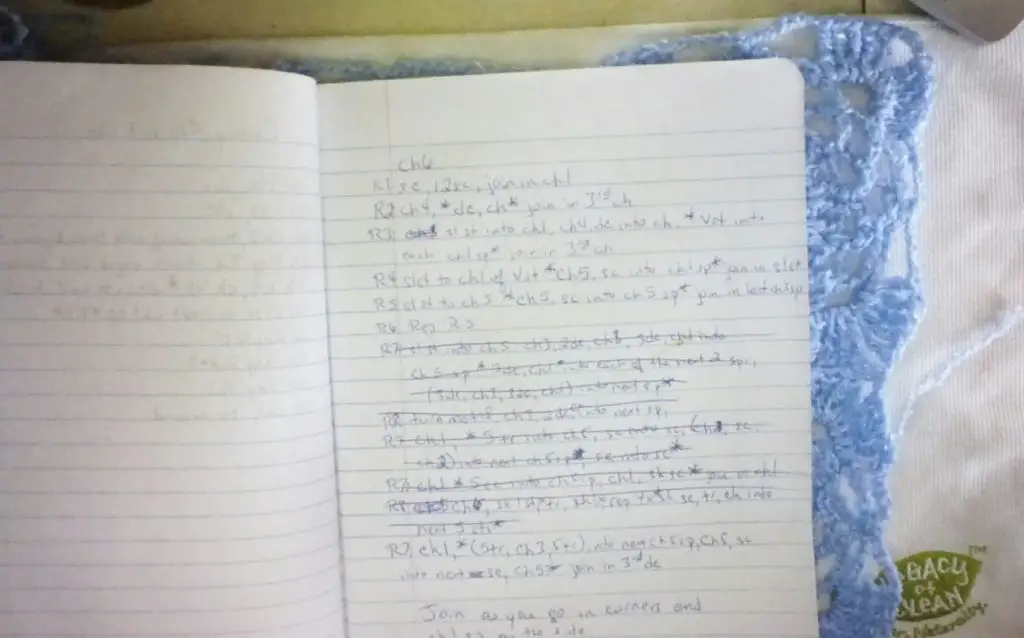
Look at my notes and you’ll have an idea of what we designers go through creating these patterns. I have a notebook full of pages like this. I enjoy the challenge and flexing my creative muscle. If you’ve ever thought about designing a pattern, go for it. You only need to know basic crochet skills to begin designing patterns so don’t feel intimidated just jump on in there.
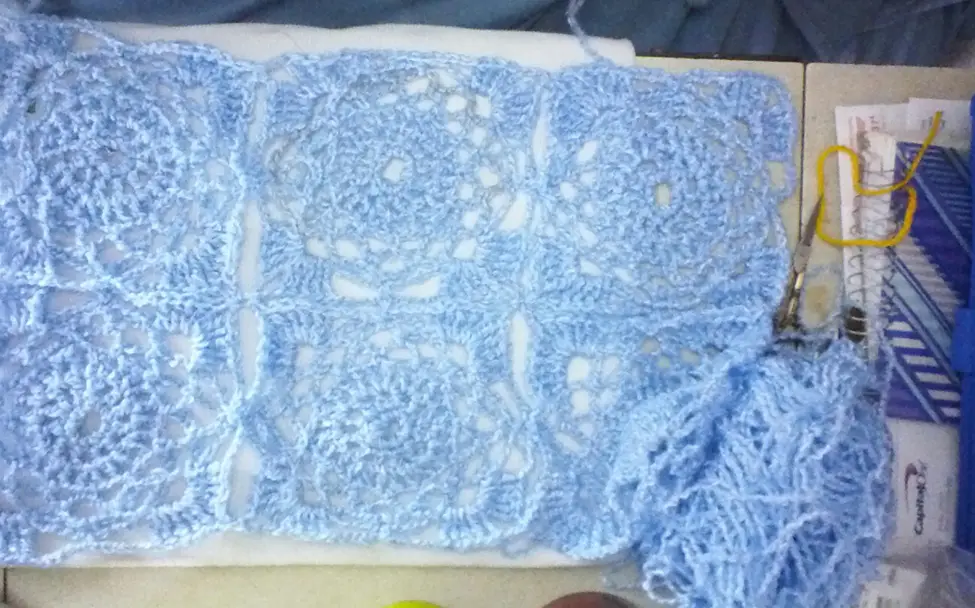
Lacy Medallion Crochet Scarf Pattern
So, after much crossing out and ripping out, here is the free crochet pattern.
Stitches Used in Pattern
Chain stitch – ch
Slip stitch – sl st
Single crochet – sc
Double crochet – dc
Treble stitch – trb
V stitch – Vst
Treble stitch: Yarn over twice and insert the hook into the next stitch. Yarn over and draw the yarn through the stitch. There are now 4 loops on the hook. Yarn over and draw the yarn through the first 2 loops on the hook. Yarn over and draw the yarn through the next 2 loops on the hook. Yarn over and draw the yarn through the last 2 loops on the hook to complete the stitch.
V stitch: Yarn over and insert the hook into the next stitch. Yarn over and draw the yarn through the hook. Yarn over and draw the yarn through the first 2 loops on the hook. Yarn over and draw the yarn through the last 2 loops of the hook (double crochet stitch), chain 1, double crochet into the same stitch.
You Will Need: 1 skein of a lightweight yarn, a size G/6 (4.25mm) crochet hook, and a tapestry needle.
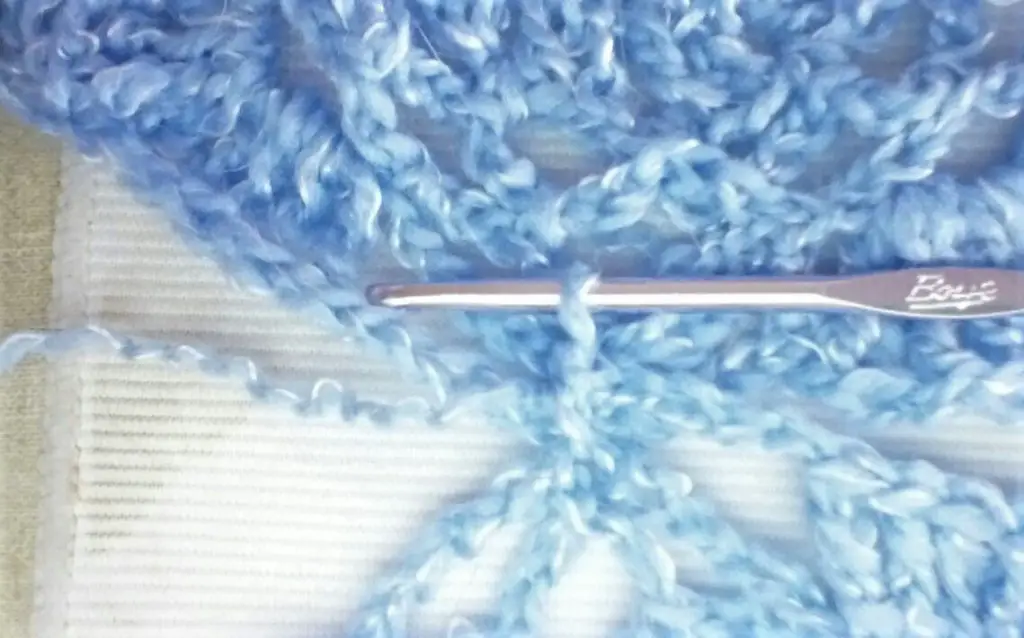
Notes: I used the join as-you-go method for this scarf. It gives more of a lacy look than other joining methods. You will join each motif to the previous motif at the last round in the corners and side stitches. When working the joining stitches, hold the squares with the right side together.
At a corner treble crochet 5 stitches, chain 1, insert the hook into the corner space of the motif you are joining to and slip stitch the two squares together. Chain 1 to complete the corner and then treble crochet 5 stitches to complete the corner stitches.
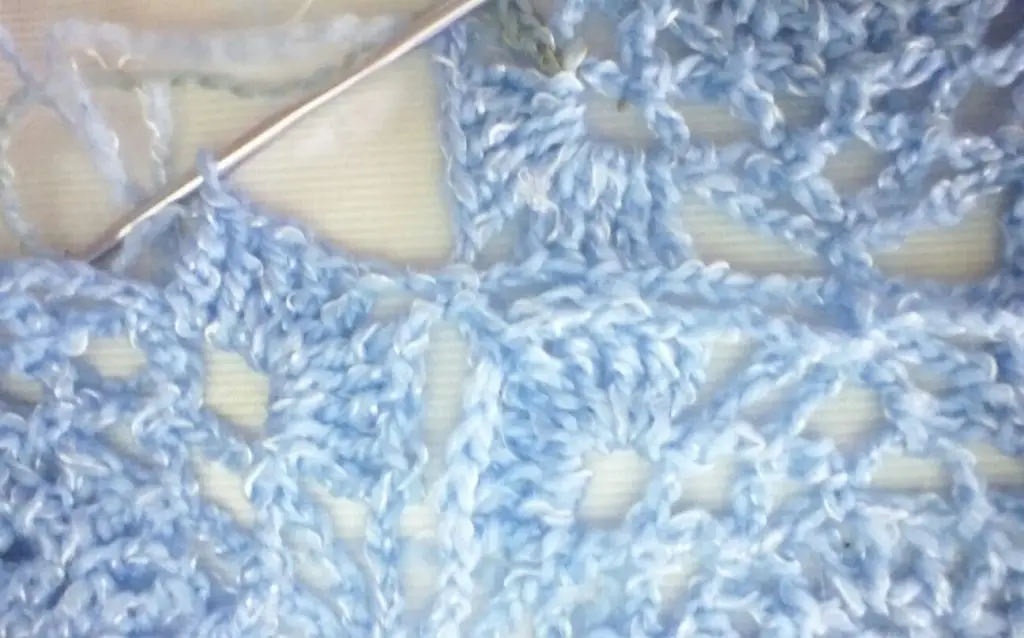
At the side, instead of working a single crochet, slip stitch into both single crochet stitches of the two squares to join them.
Always have the right sides facing each other when you join the squares. Be careful to join the with the right sides facing each other so that when you finish the right sides of the square shows.
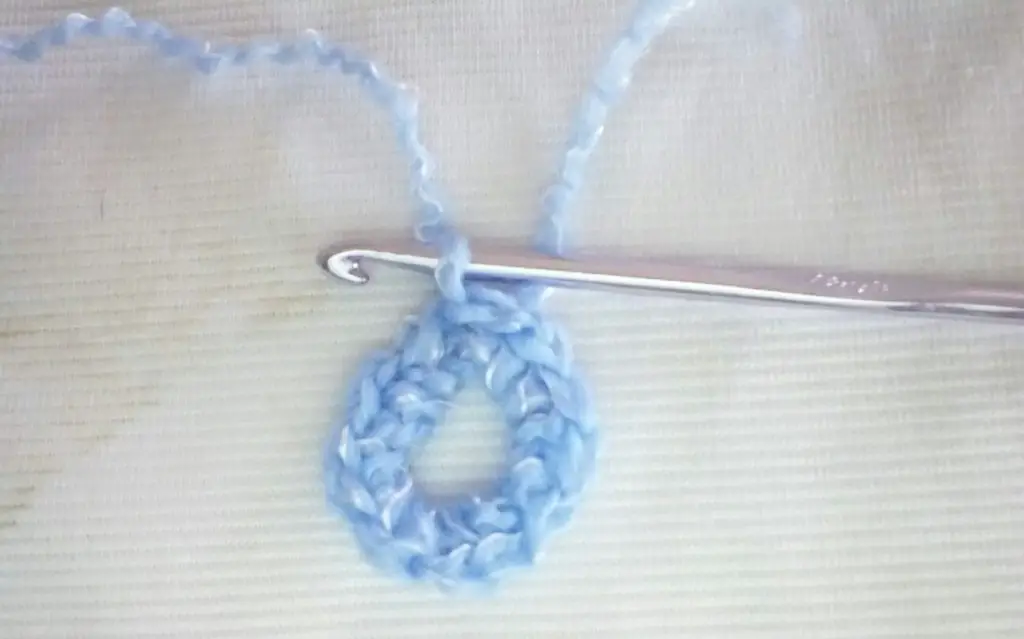
Chain 6, join with a sl st
Round 1: ch1, 12 sc into ring, join in ch1
Round 2: ch4, *dc into next st, ch1* rep around, join into 3rd ch
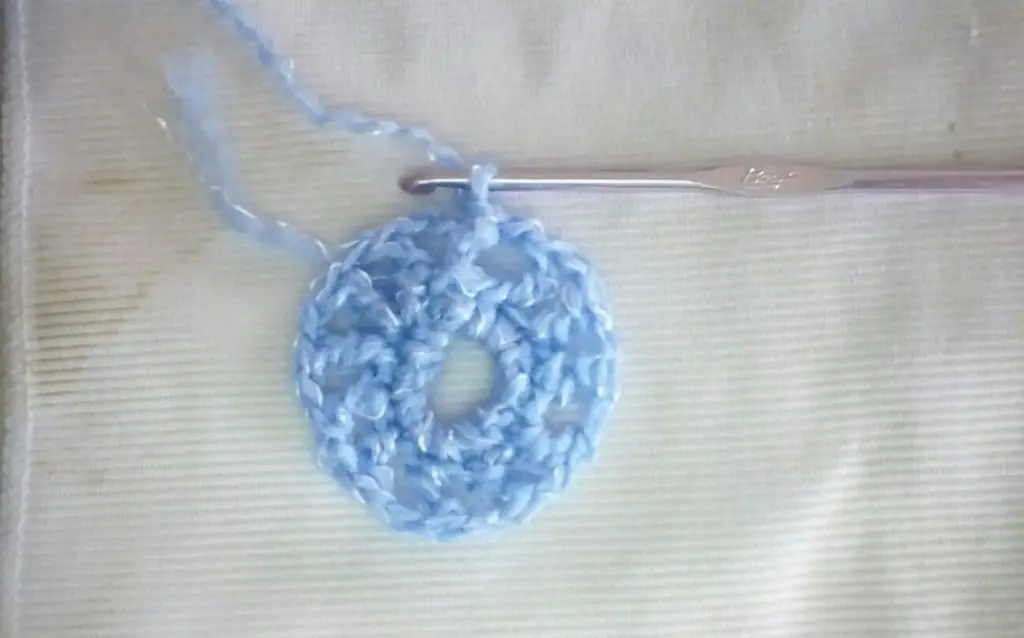
Round 3: ch4, dc into the same sp, Vst into each ch1 sp, join in 3rd ch.
Round 4: sl st into ch1 sp *ch5, sc into ch1 sp of next Vst* rep around, join into sl st
Round 5: sl st into next ch5 sp *ch3, sc into next ch5 sp* rep around, join in sl st
Round 6: Repeat Round 5
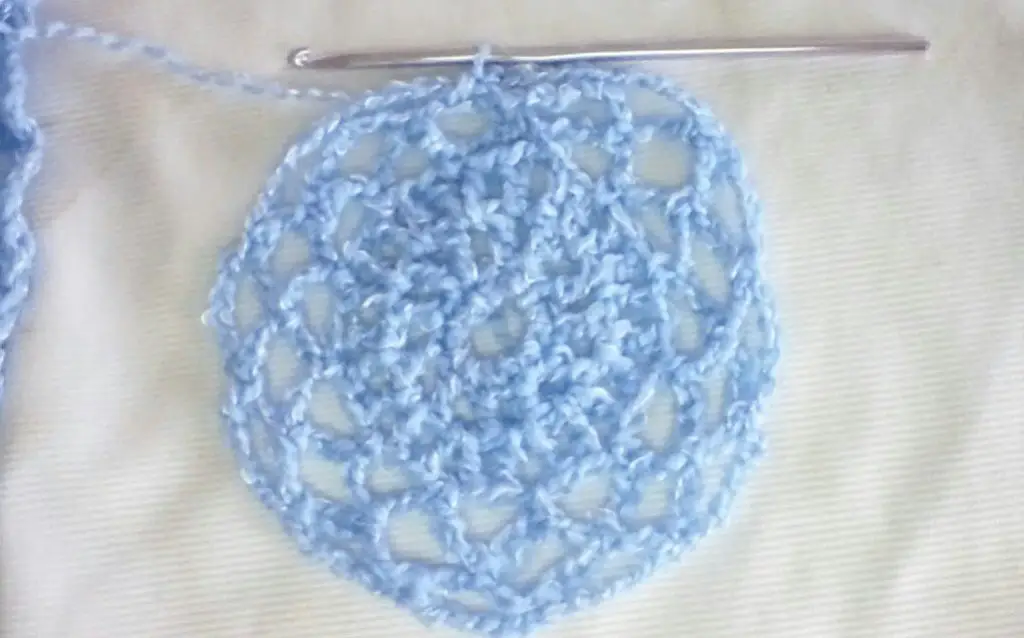
Round 7: sl st into next ch5 sp, (ch5, 4trb, ch3, 5trb) into ch5 sp, sk next ch5 sp, sc into next ch5 sp *sk next ch5 sp, (5trb, ch3, 5trb) into next ch5 sp, sk next ch5 sp, sc into next ch5 sp* rep around, join in 5th ch
(On this round you should end up with 4 corners and a sc at each side.)
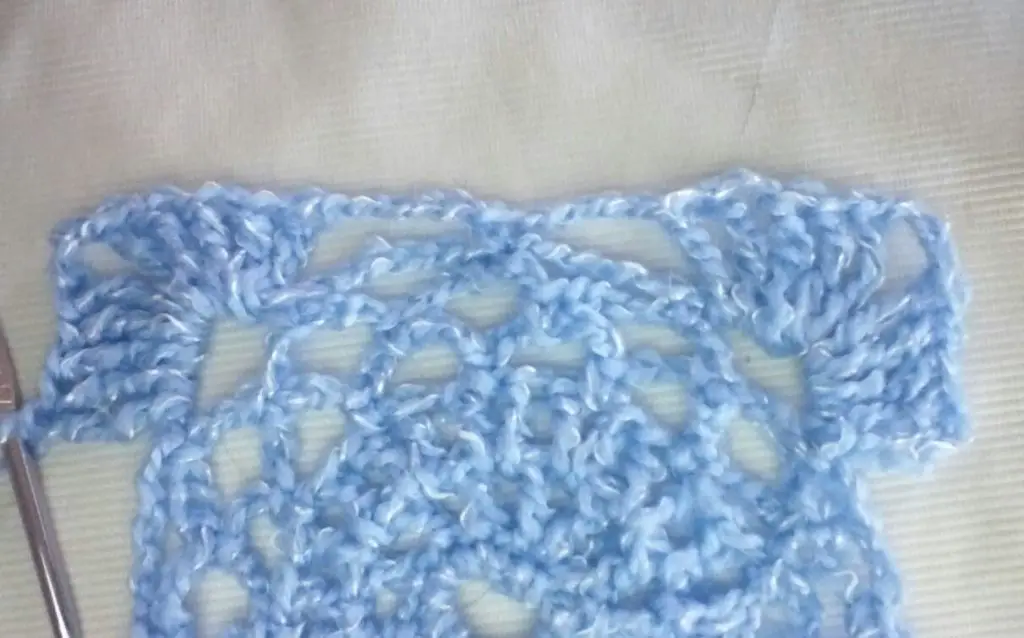
Join the squares on the ends as you crochet them. Make your scarf as long as you like. Mine turned out to have 8 squares and was about 52 inches before it was blocked.
If you’d like to make a cowl, here is what the squares look like doubled up.
You could also make a triangle shawl if you’d rather. Another option is to use more than one color. Instead of slip stitching into the next stitch on a new round, simply join the new yarn.
End Notes
I hope you enjoy crocheting and wearing the Lacy Medallion Crochet Scarf. I enjoyed designing it for all of you. I have made every effort for this pattern to be error-free and easy to understand. Please let me know in the comments if you have any questions or find any errors. I will get back to you as soon as I can.
Feel free to sell anything you make with my crochet patterns. But if you want to share the pattern, please share the link to this blog. Do not copy and paste the pattern.
Until next time, take care and keep on hooking!


