
New to crocheting but still looking to add a bit of texture to your project? Learning the back and front post double crochet stitches are great way to begin. Both these stitches create ridges in your work, perfect for adding just the right amount of interest and depth.
In this article, we’ll walk you through how to do the back and front post double crochet stitches. We’ve got videos and pictures to help guide you, so even if you’re fairly new to crocheting, we’ll have you doing these stitches like a pro in no time!
Let’s get to it!
What is a Front Post Double Crochet Stitch?
The front post double crochet stitch (FPdc) is just like a regular double crochet stitch (dc), but instead of putting your hook through the top loops of the stitch in the row below, you insert it around the post of the dc from the previous row.
This helps to form ridges and can help add some texture and interest to your project.
What is the difference between front post double crochet and back post double crochet?
The difference between a front post double crochet (FPdc) and a back post double crochet (BPdc) is where you insert the hook when working the stitch.
For the front post double crochet, you insert your hook from the front to around the post of the dc from the row below. For a back post double crochet, you insert your hook from behind to around the post of the dc from the previous row.
Project Ideas
The back and front post double crochet stitches are great for simple projects where you want to add a little texture. Here are some ideas:
- Scarves
- Blankets
- Pillow covers
- Shawls
- Pot holders
- Dishcloths
- Cowls
- Hats
Related Patterns and Stitches
The back and front post double crochet stitches are also frequently used in other more complicated stitches. Here are some patterns that use variations of these stitches:
Back & Front Post Double Crochet Stitch Pattern Notes
If you haven’t tried the back and front post double crochet stitches before, you can practice them with this simple pattern.
Supplies Needed
- Yarn: you can use any yarn weight. For this tutorial, I used Craftiss Acrylic yarn in teal.
- Crochet hook: Be sure to match the size of your hook to the yarn. For this tutorial, I used a 5.00 MM hook.
For this pattern, I will be using the Craft Yarn Council U.S. abbreviations.
- yo: yarn over
- ch: chain stitch
- dc: double crochet
- FPdc: front post double crochet
- BPdc: back post double crochet
Back & Front Post Double Crochet Stitch Video Tutorial
Finding the post
Before you get started working on these stitches, it helps to familiarize yourself with where the post of the stitch in the row below is. This is the space that you will be working your stitches into rather than the top loops.
For the front post double crochet stitch, you will be inserting your hook from the front to around the post of the dc in the row below. To find it, simply use your finger and gently push the back of the stitch forward.
It should look like this:
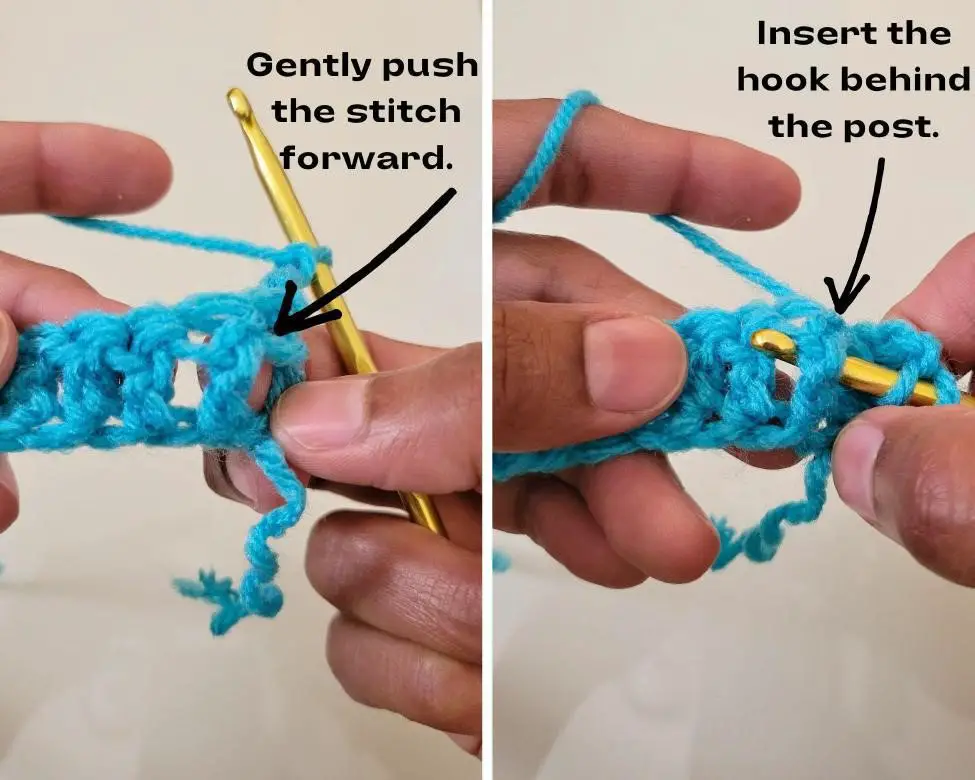
Once you have located the post, insert your hook and complete your stitch as instructed.
For the back post, double crochet stitch you use your finger to gently push the front of the stitch backward. It should look like this:
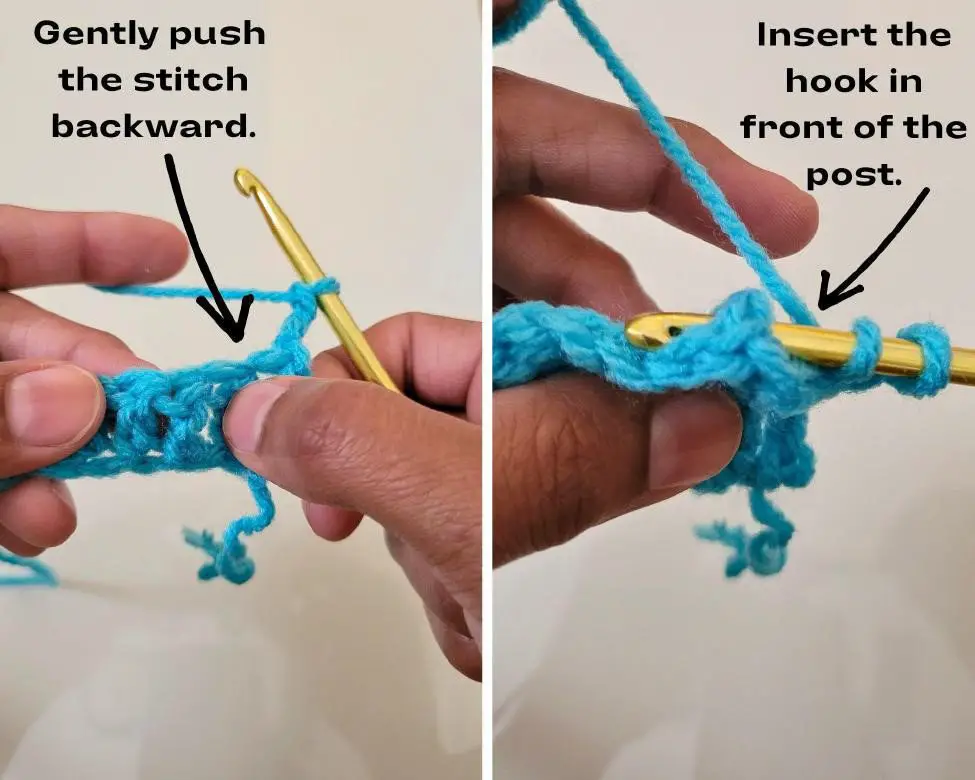
Once you have located the post, insert your hook and complete your stitch as instructed.
Front Post Double Crochet Stitch
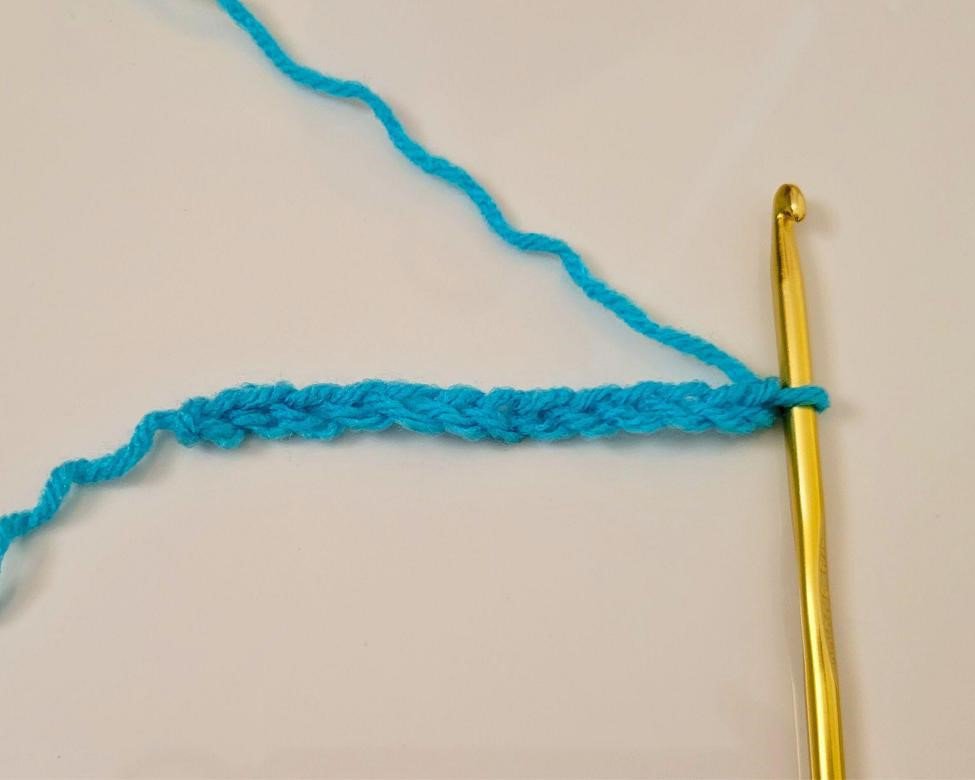
Step 1: Ch an odd number of stitches. For this tutorial, I started with 13 stitches.

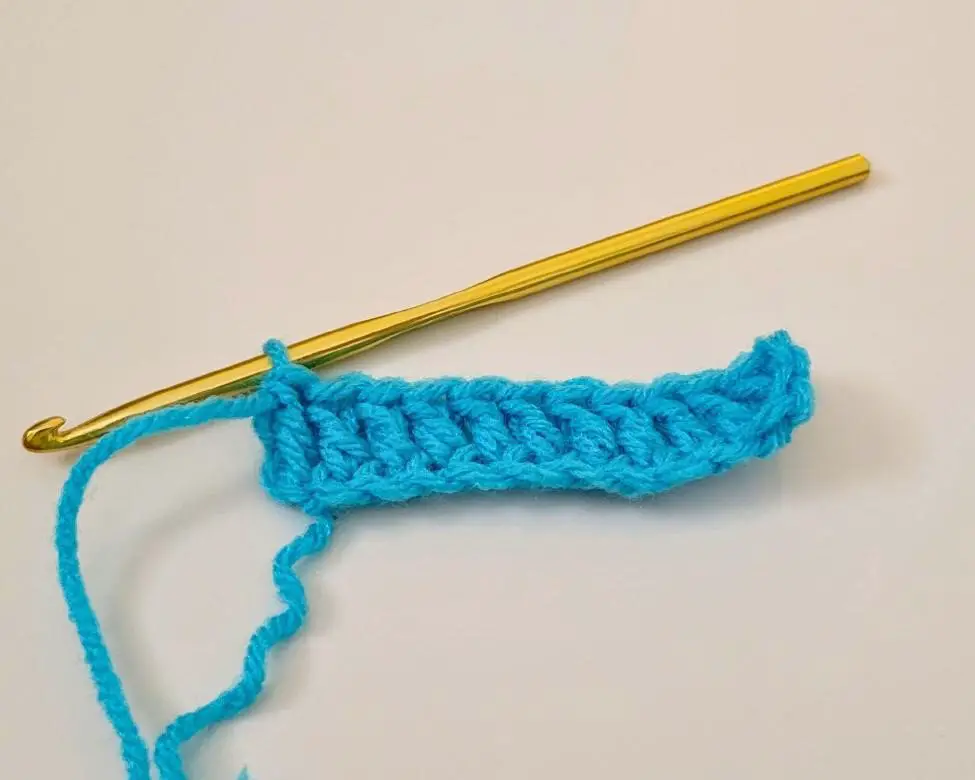
Step 2: Dc in the fourth stitch from the loop and in each stitch to the end of the row.

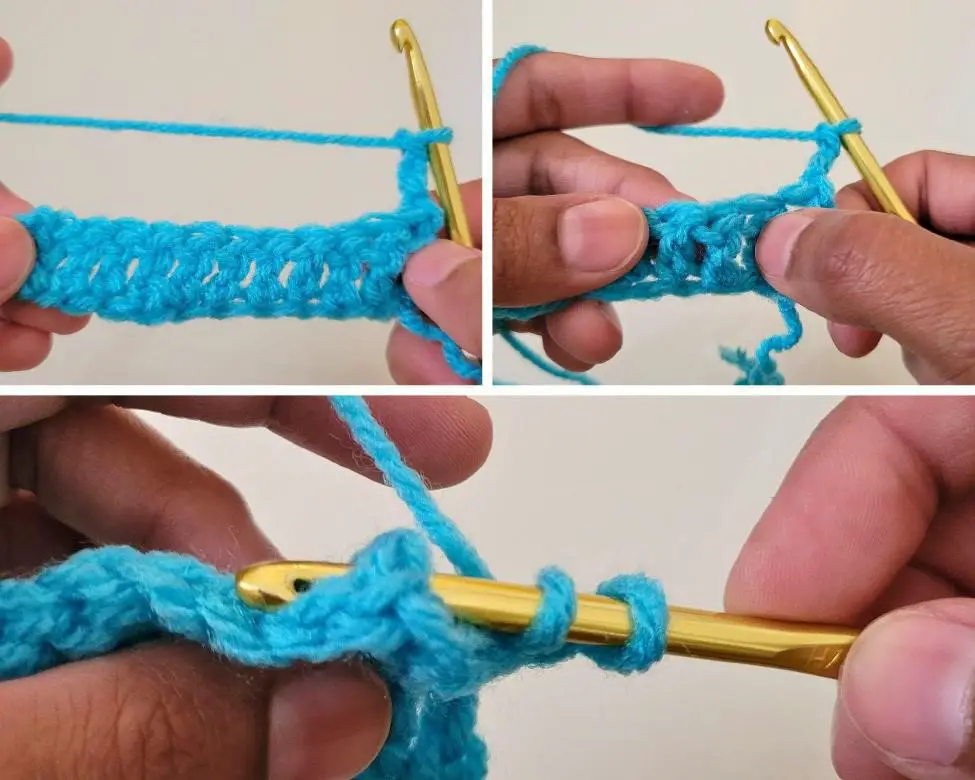
Step 3: Turn and ch 3. Yo, push the post of the next stitch in the previous row forward, and insert the hook behind the post.
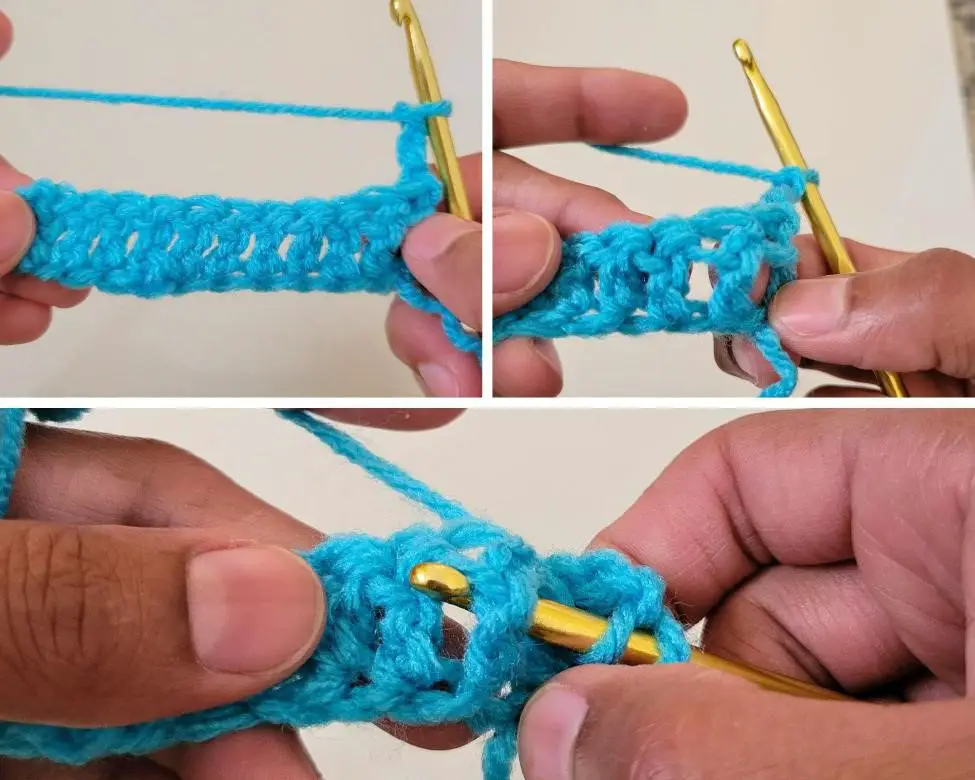
Step 4: Yo and pull up a loop. You should have 3 loops on your hook.
Step 5: Yo and pull through 2 loops.
Step 6: Yo and pull through the remaining 2 loops.
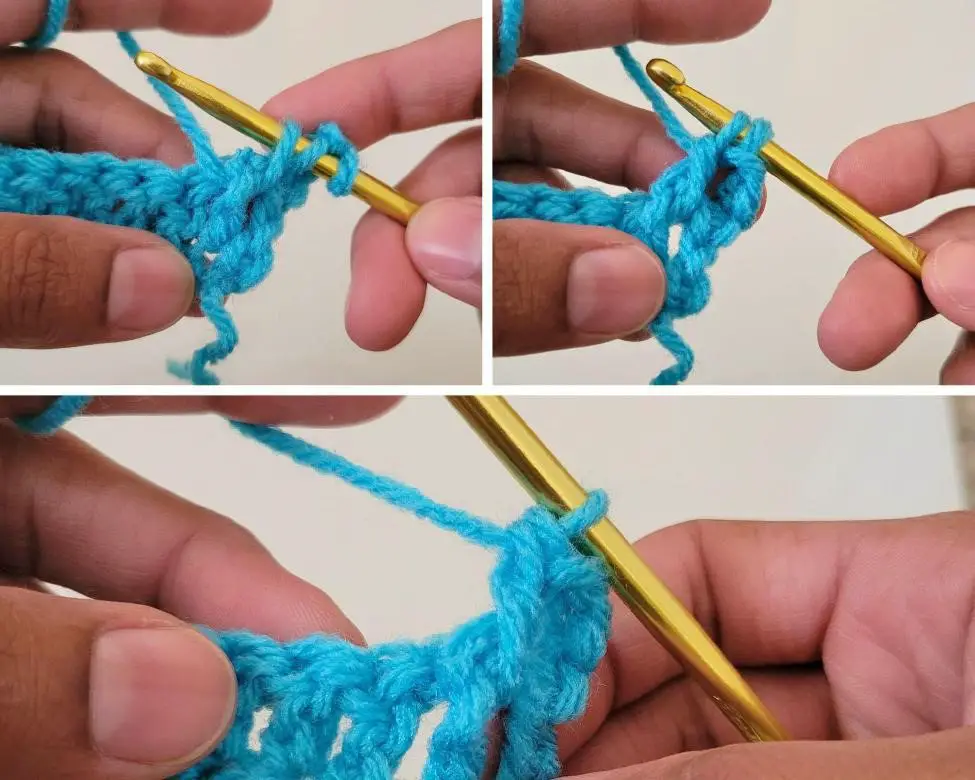
Here is what a row of finished front post double crochet stitches looks like:
Back Post Double Crochet Stitch
Step 1: Ch an odd number of stitches. For this tutorial, I started with 13 stitches.
Step 2: Dc in the fourth stitch from the loop and in each stitch to the end of the row.
Step 3: Turn and ch 3. Yo, push the post of the next stitch in the previous row backward, and insert the hook in front of the post behind the existing row.
Step 4: Yo and pull up a loop. You should have 3 loops on your hook.
Step 5: Yo and pull through 2 loops.
Step 6: Yo and pull through the remaining 2 loops.

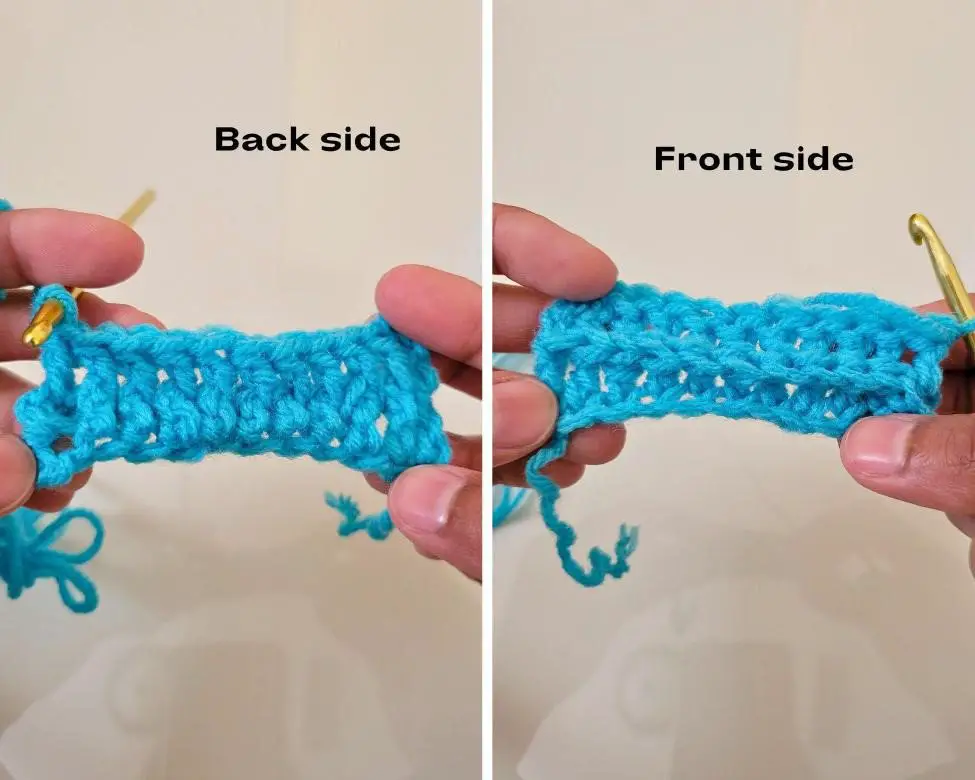
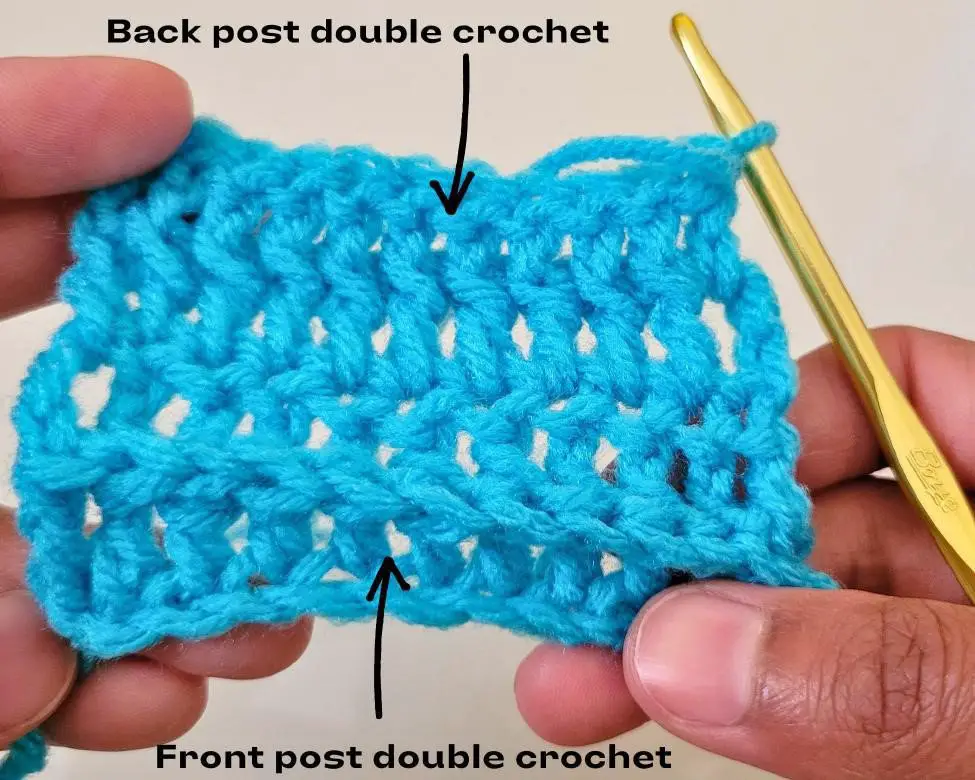
Here is what both stitches look like together:
Tips for Working the Back & Front Post Double Crochet Stitches
When working with front post and back post double crochet stitches, be sure to keep your tension even throughout the project. Too much tension can distort the shape of the fabric or cause it to bunch up.
It’s also important to count your stitches carefully before and after each row to make sure that you have the right number of stitches. This will help ensure that your project turns out exactly as planned.
FAQs About the Back & Front Post Double Crochet Stitches
What is a front post in crochet?
A front post is the body of the stitch in the previous row when it’s pushed forward. When pushed gently it can separate a bit from the stitches next to it and create a small space on either side.
What does the front post half double crochet mean?
Front post half double crochet (abbreviated as fphdc) is a stitch that you can use to create texture in a pattern. This stitch consists of inserting the hook around the post of the stitch in the previous row and then working a half-double crochet.
What is the post of a double crochet stitch?
The post of a double crochet stitch is the tall body of the stitch in the previous row. This post can be used to create texture when making front and back post stitches.
I hope you found this tutorial on back and front post double crochet stitches helpful! Now that you know how these stitches work, try using them in your next project to add texture and interest.
Happy crocheting!


