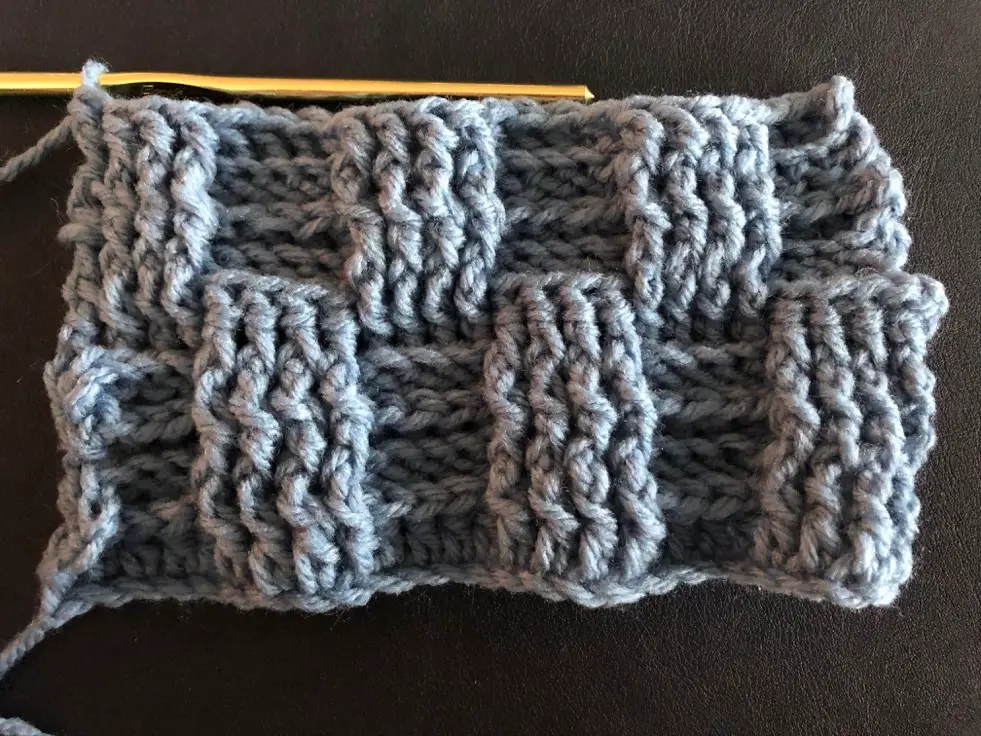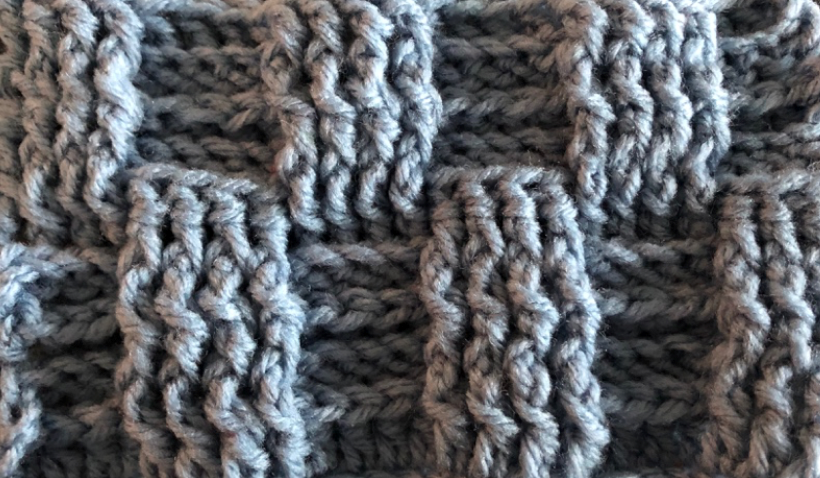
The basket weave stitch is such a cool textured stitch! I love using this stitch for washcloths but it can also be used for blankets, bags, scarfs, and so much more! This stitch is so neat because it gives the allusion of a woven look when it is all done even though it is just one continuous stitch.
For this stitch, all you will need to know is how to do a chain, do a double crochet, a front post double crochet, and a back post double crochet. If you can do these stitches you can do the basket weave stitch! Remember that when doing a stitch around a post you are making the stitch around the body of the stitch in the previous row instead of in the top like you would normally do a stitch.
What I will be using for this stitch
- Size H hook (5.0 mm)
- Medium weight yarn
Stitches that you need to know for this pattern are
Ch – Chain
Dc – double crochet
Fpdc – front post double crochet
Bpdc- back post double crochet
The pattern below is a simple test swatch for a stitch. The test swatch allows you to get practice with a stitch before committing the stitch to a larger project. If you fall in love with the stitch and want to manipulate the pattern into a size for a larger project that can be done! This stitch is worked in multiples of eight plus two. Meaning that to make the pattern larger all you need to do is chain out a multiple of eight to get your desired length and then chain two more. When adjusting this pattern it is also important to know that you should increase it in row sets. Each “weave” looking stitch is in row sets of four. This means that if you want to make the pattern longer you will need to add on either rows 2-5 altogether or rows 6-9 altogether. Don’t stop in the middle of one of these row sets or the “weave” will be smaller than all the other “weaves”.
How the pattern can be manipulated
8 + 2
Pattern
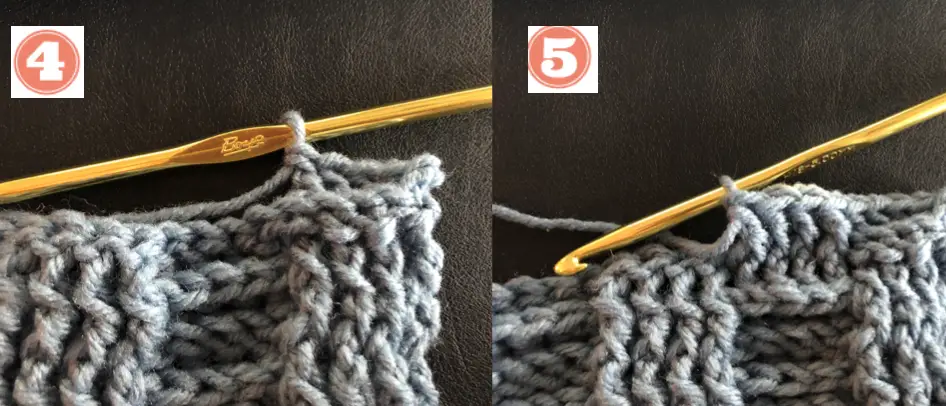
There is a visual representation of each part of the pattern below the instructions for each row.
Start by chaining 26

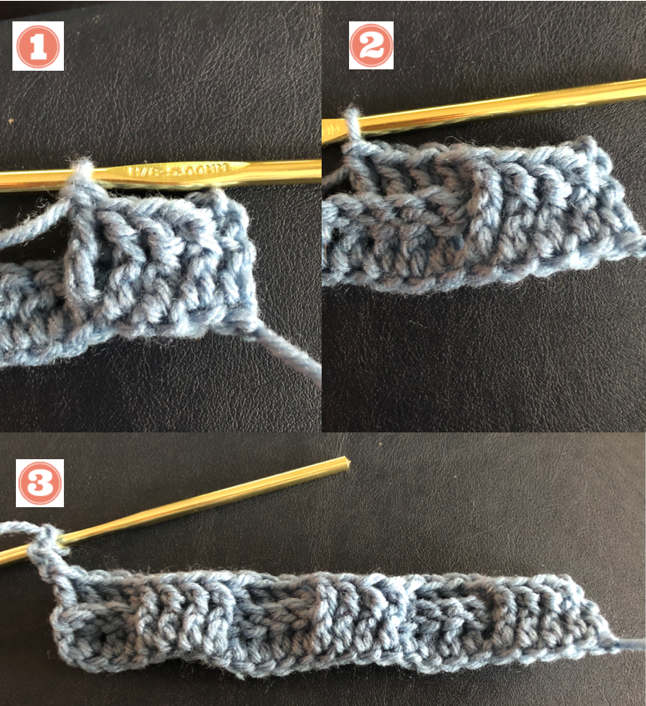
Row 1
Make one dc in the third chain from the hook. Make 1 dc in each of the following stitches until the end of the row. Ch 2. Turn.

Row 2
Make one fpdc in the second stitch from the hook. Make 1 fpdc in each of the next 3 stitches. Make 1 bpdc in each of the next 4 stitches. *Make 1fpdc in each of the next 4 stitches. Make 1 bpdc in each of the next 4 stitches. Continue from the * until you have reached the end of the row. Ch 3. Turn.
Row 3-5
Repeat row 2.
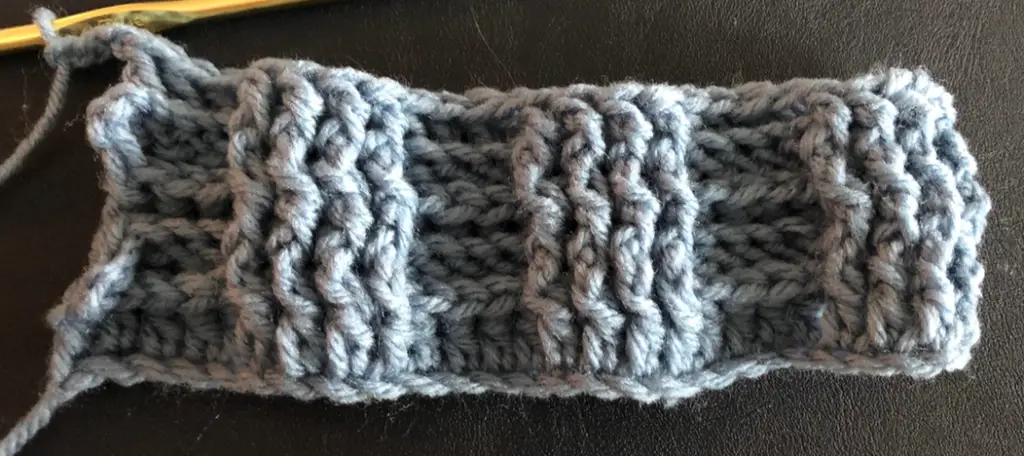
Row 6
*Make 1 bpdc in each of the next 4 stitches. Make 1 fpdc in each of the next 4 stitches. Continue from the * until you have reached the end of the row. Ch 3. Turn.
Row 7-9
Repeat row 6.