Learn how to work the Elizabeth crochet stitch with this easy guide! Pictures and a video tutorial are included to help you follow along.
It’s time! If you’ve mastered the basic crochet stitches like chain stitch, slip stitch, and single crochet, you’re ready to try out the Elizabeth crochet stitch. This stitch is a great choice for beginners who are ready to move on to something a little more challenging.
It creates a beautiful pattern that will add some texture and design to your projects, but it’s very simple and easy to crochet. With this easy Elizabeth crochet stitch tutorial, you’ll be creating gorgeous projects in no time.
Let’s dive in!
What is the Elizabeth Crochet Stitch?
The Elizabeth crochet stitch, also known as the mini bean stitch, is a mix between the double crochet stitch and the single crochet-together stitch. By adding in a chain stitch and skipping a stitch it creates a lovely rippled or scalloped effect that is perfect for all sorts of projects.
Depending on the weight of the yarn you use, will determine how dense the finished pattern will be. With thicker yarn, the Elizabeth stitch will be more tightly woven, while with thinner yarn, you’ll have more open spaces.
Project ideas
Because the Elizabeth crochet stitch is so simple and you repeat the same stitch throughout, it makes it perfect for a variety of crochet projects. You can easily adjust the width of your starting chain and how many rows you crochet to adapt this stitch for different patterns.
A few ideas of what you can make with the Elizabeth crochet stitch are:
- gloves
- hats
- boot cuffs
- sweaters
- hoodies
- ear warmers
- blankets
- coasters
- potholders
- pillowcases
- bags
- scarves
- cowls
Elizabeth Crochet Stitch Pattern Notes
Here is a quick breakdown of what you will need to know before getting started.
Supplies Needed
- Yarn: you can use any yarn weight. For this tutorial, I used Craftiss Acrylic yarn in yellow.
- Crochet hook: Be sure to match the size of your hook to the yarn. For this tutorial, I used a 5.00 MM hook.
Abbreviations
For this pattern, I will be using the Craft Yarn Council U.S. abbreviations.
- yo: yarn over
- ch: chain stitch
- ch-sp: chain space
Variations
Because the Elizabeth crochet stitch has been around for a while, slight variations have developed on how to work the stitch. The most common variation you’ll see for this stitch is how to start it.
In this pattern, I suggest starting with a chain in a multiple of 2 plus 4 additional chain stitches. You then start crocheting in the 4th stitch from the hook.
Other patterns will recommend starting with a multiple of 2 plus 1. So you will start with an odd number of chains instead of an even number.
From there, you will start crocheting in the 3rd stitch from the hook. This variation is minor and will result in the same pattern and texture overall.
Elizabeth Crochet Stitch Video Tutorial
Prefer to follow along? Watch this video on how to work the Elizabeth crochet stitch.
Elizabeth Crochet Stitch Photo Tutorial
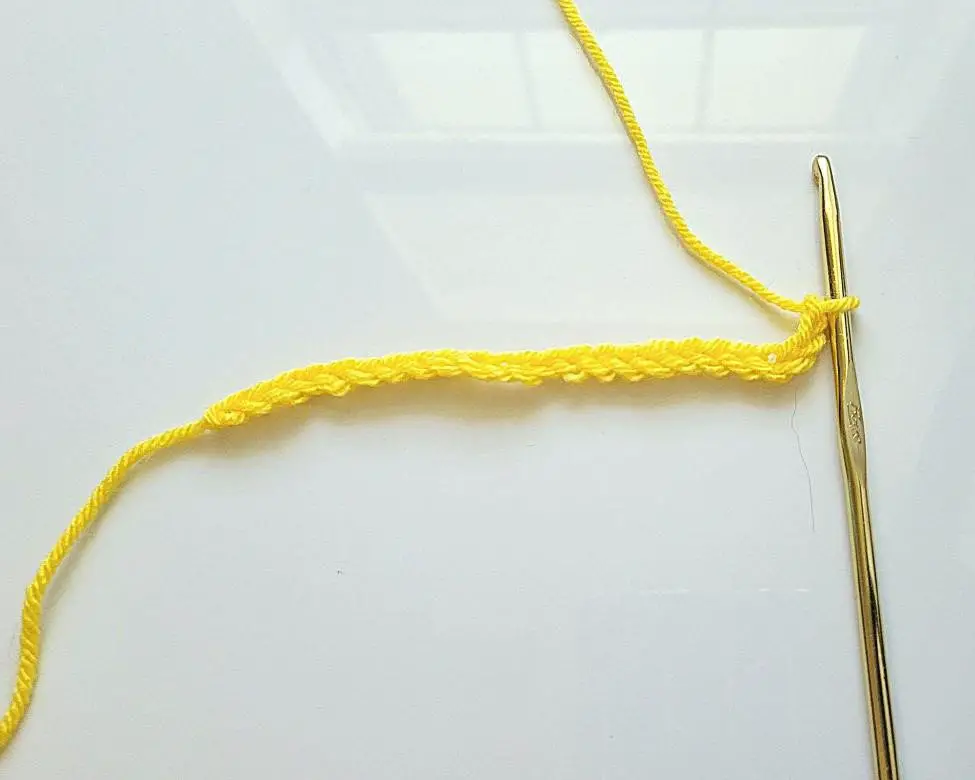
Row 1: Ch a multiple of 2 + 4 more chain stitches. For this tutorial, I did ch 24.
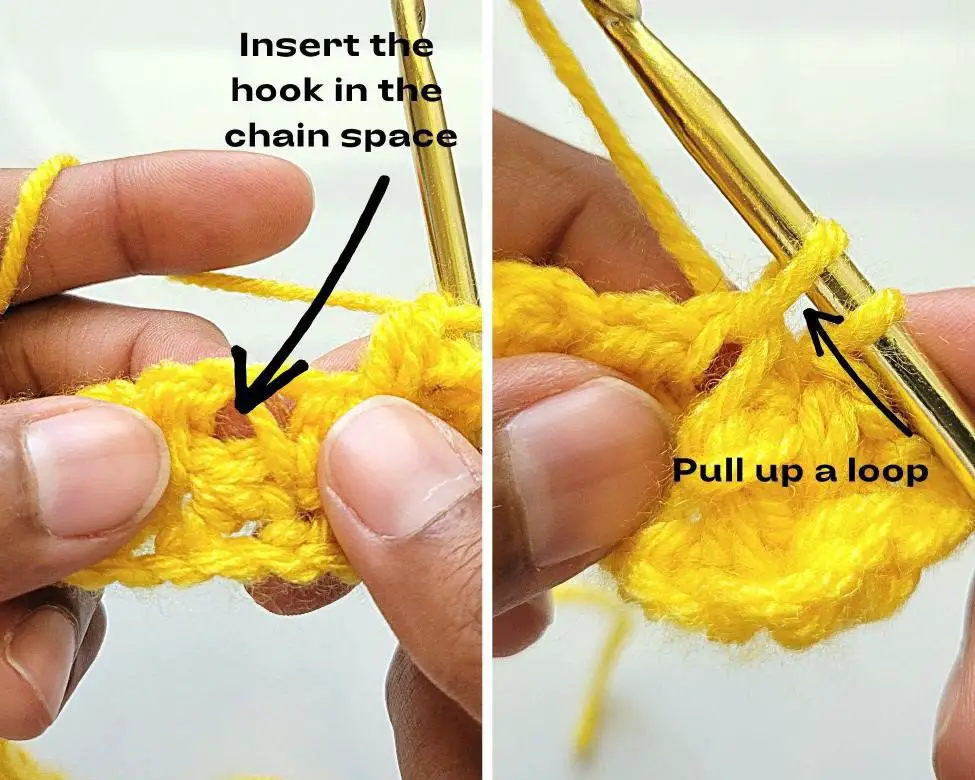
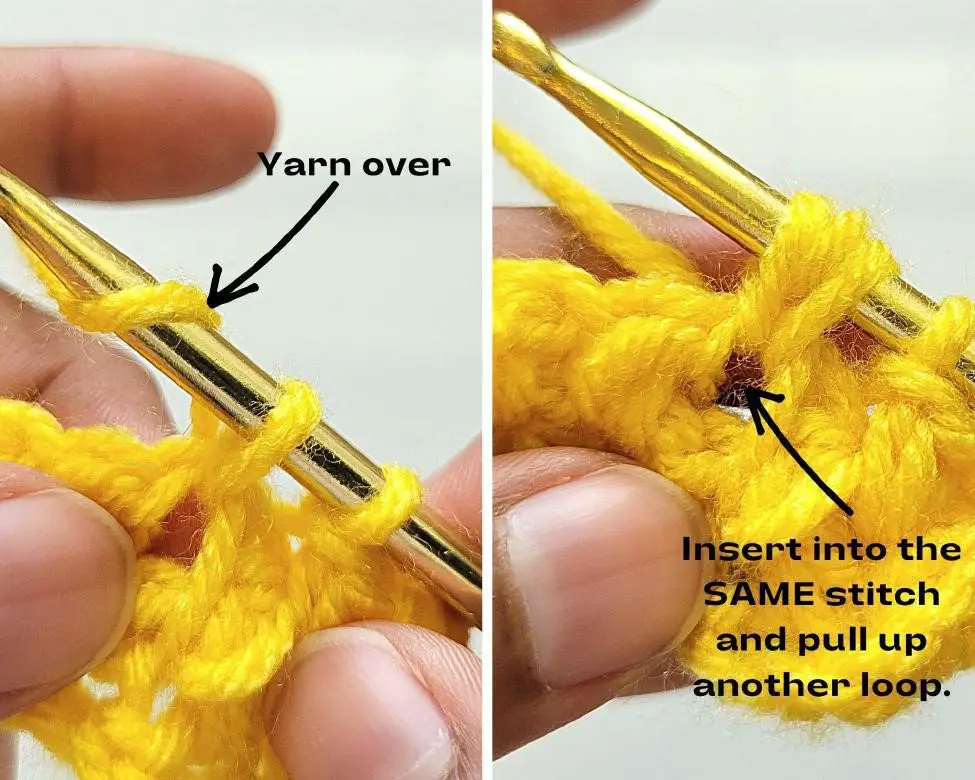
Row 2: Inset your hook into the 4th stitch from the hook. Yo and pull up a loop. Yo insert your hook back into the same stitch, yo, and pull up a loop. (You should have 4 loops on your hook.)
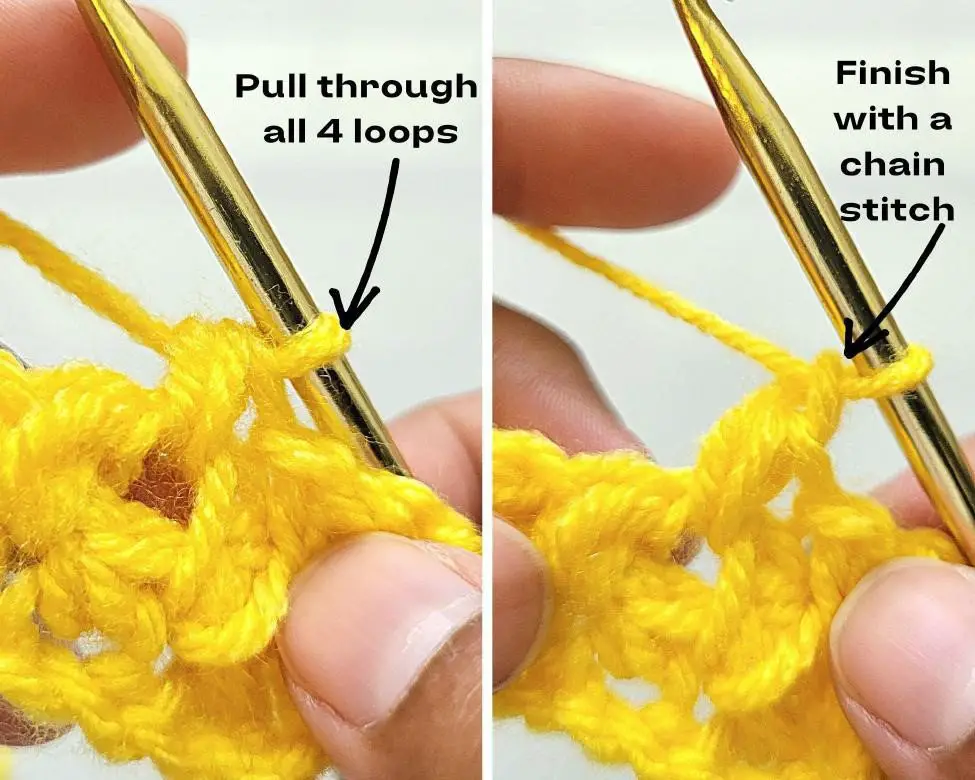
Yo and pull through all 4 loops. *Ch 1, skip 1 stitch. Insert your hook into the next stitch, yo, and pull up a loop. Yo, insert your hook back into the same stitch, and pull up another loop. (You should have 4 loops on your hook.) Yo and pull through all 4 loops.
Repeat from * to the end of the row and turn.
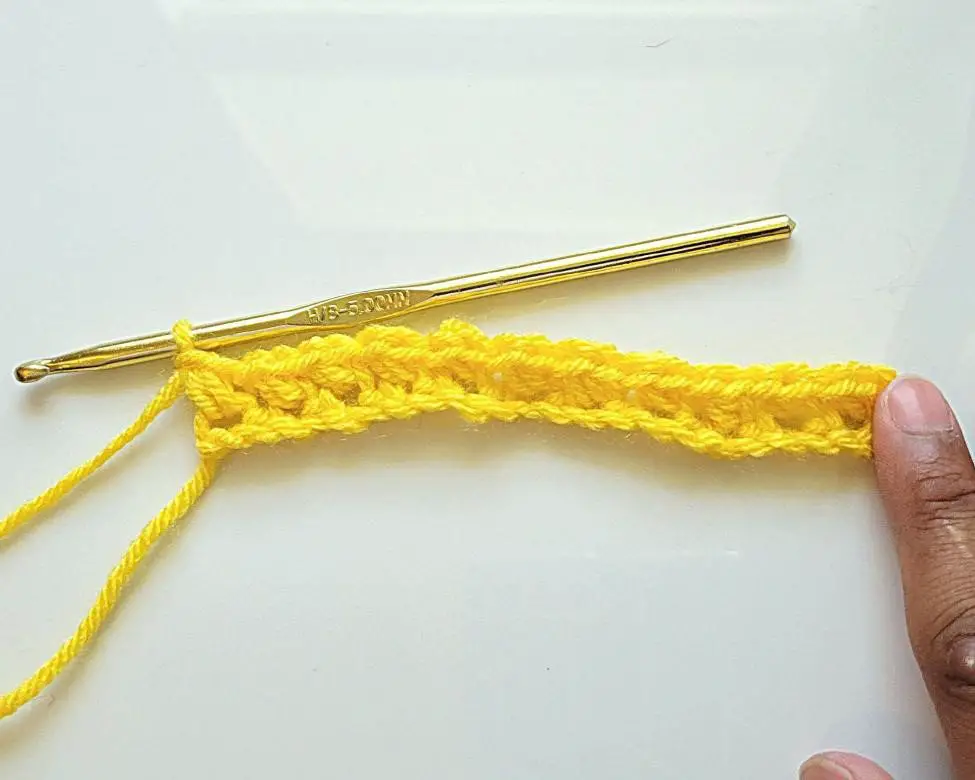
Row 3+: Ch 3. *Insert your hook into the next ch-sp, and pull up a loop. Yo, insert your hook back into the same ch-sp pull up a loop, yo, and pull through all 4 loops on the hook. Ch 1.
Repeat from * to the end of the row. Work the last stitch into the turning chain and turn.
Repeat row 3 until you reach the desired length of your project.

Tips for Working the Elizabeth Crochet Stitch
- Don’t yarn over too tightly in the middle of your Elizabeth stitch. This will make it tough to pull your hook through all 4 loops.
- End each row with a chain stitch. This will ensure that you have enough chain stitches to create a loop at the end of each row.
- Avoid yarn that separates easily. It will be easy to get the hook stuck as you pull through your loops.
FAQs About the Elizabeth Crochet Stitch
Here are some frequently asked questions about the Elizabeth crochet stitch:
How many chains do I need to start the Elizabeth stitch?
You will need a multiple of 2 plus 4 additional chains. Or you can start with a multiple of 2 plus 1 additional chain stitch.
Can I use any yarn weight with this stitch?
Yes! You can use any yarn weight you like. Just be sure to match it with the appropriate crochet hook size.
How do I make the Elizabeth stitch less rippled?
If you want your fabric to lay fatter, use a thicker yarn. Using a thinner yarn will create more ripples in your fabric.
I hope you enjoyed learning how to work the Elizabeth crochet stitch! If you have any questions, please feel free to leave a comment below. And be sure to tag me (@crochetgasm) in your photos on Instagram so I can see what you make!

