
Looking for a simple stitch to create some warm cozy projects? Try the waistcoat crochet stitch for your next winter craft!
Different stitches work well with different types of projects. If you’re crocheting something that requires a dense, tightly woven design but still has some interesting texture and pattern to it, then the waistcoat crochet stitch is a great choice.
In this tutorial, I’ll walk you through how to work this stitch with a few quick and easy steps.
Let’s get to it!
What is the Waistcoat Crochet Stitch?
The waistcoat crochet stitch, also known as the center post stitch or knit stitch, is a variation of the single crochet stitch. However, instead of inserting your hook into the top of the next stitch, you insert your hook into the post of the next stitch.
It’s a pretty simple stitch that when done, creates very shallow rows that are tight together. This makes this stitch perfect for projects that provide a lot of warmth and hold up well with lots of use.
Project Ideas
Here are some project ideas that work well with the waistcoat crochet stitch:
-
Dishcloths
-
Pot holders
-
Coasters
-
Mittens
-
Hats
-
Shawls
-
Bags/totes
-
Sweaters
-
Baskets
I would personally avoid using this stitch for any really big projects simply because the stitches are so shallow it can take a long time to crochet. Also, it does tend to take up a bit more yarn than other stitches.
Waistcoat Crochet Stitch Pattern Notes
Here are some notes about the waistcoat crochet stitch pattern to help you as you read through this tutorial:
Supplies Needed
- Hook: I suggest you use a hook one or two sizes bigger than normal for this stitch. For this tutorial, I used a 5.50 MM hook.
- Yarn: You can use any type of yarn you prefer. For this tutorial, I used Craftiss Acrylic in light blue.
Abbreviations
For this pattern, I will be using the Craft Yarn Council U.S. abbreviations.
- yo: yarn over
- ch: chain stitch
- sc: single crochet
Waistcoat Crochet Stitch Video Tutorial
If you prefer to follow along instead, check out this waistcoat crochet stitch video tutorial.
Waistcoat Crochet Stitch Photo Tutorial
Here is how to work the waistcoat crochet stitch:
Row 1: Ch any number of chain stitches to start. I used 15 stitches.
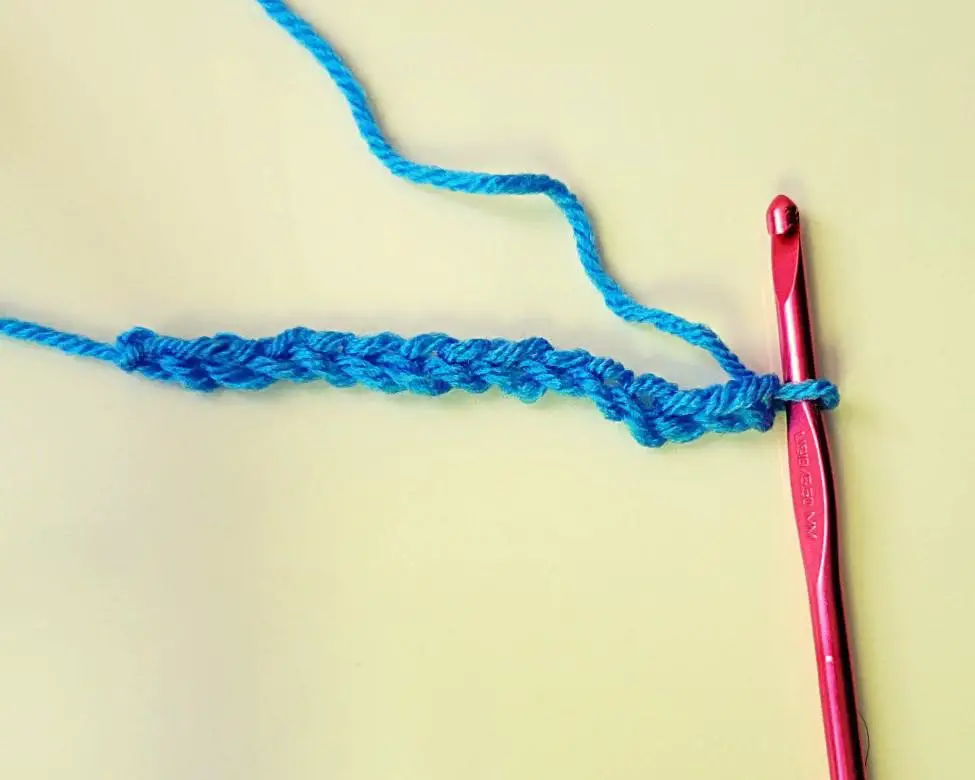
Row 2: Turn and sc in the 2nd chain from the hook. Sc to the end of the row.
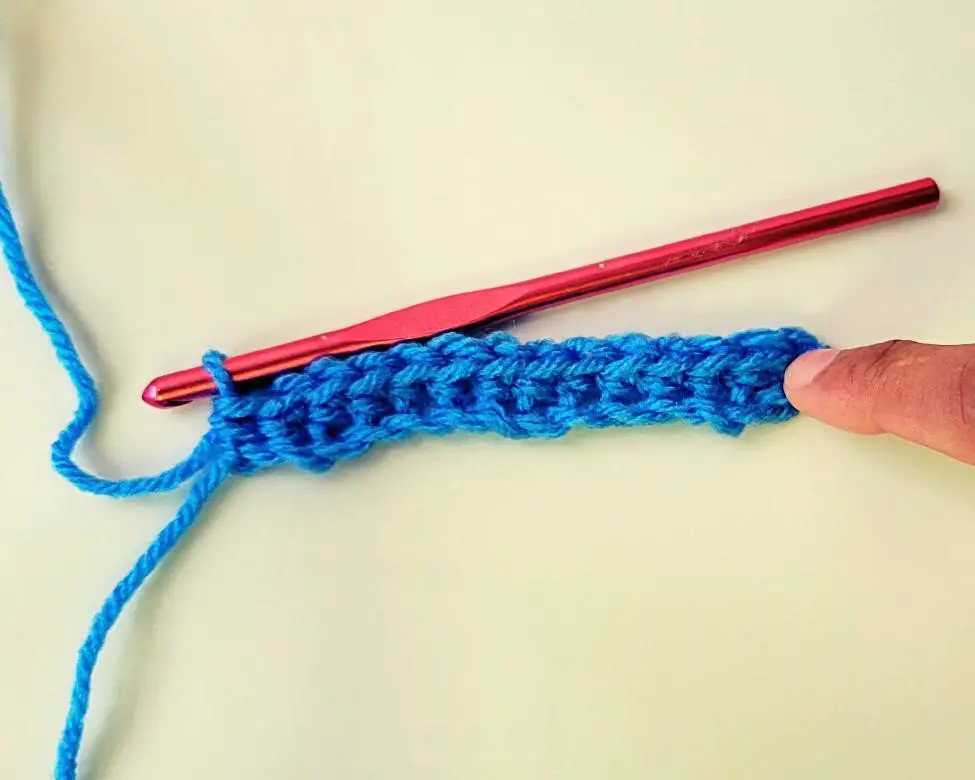
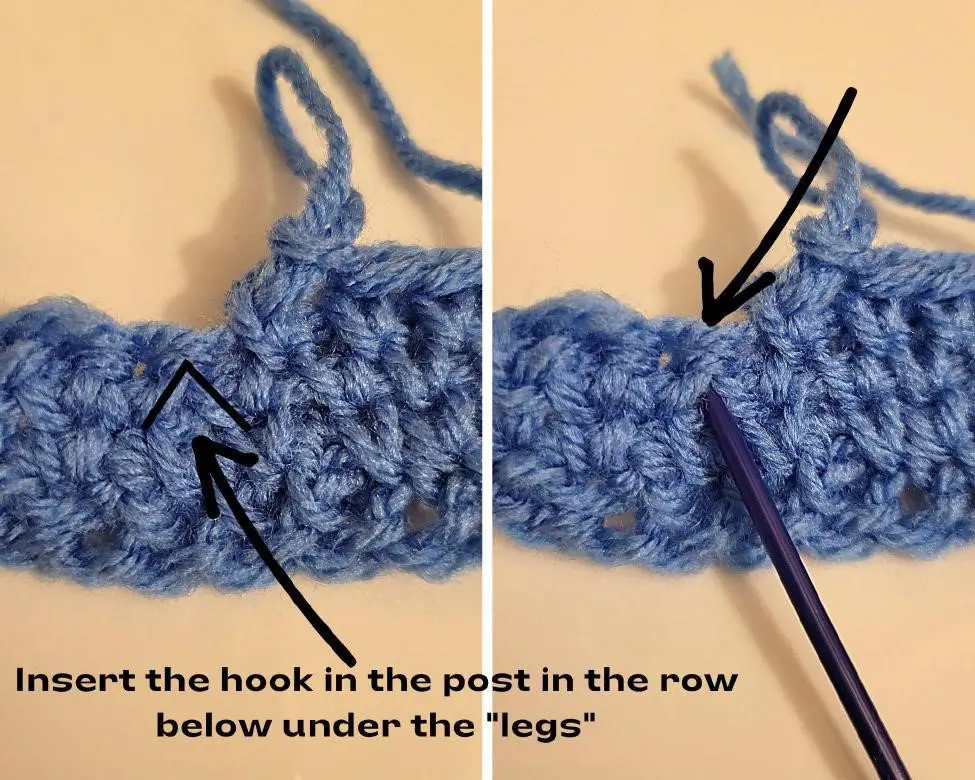
Row 3: Ch 1 and turn. Sc in the first stitch. *Insert the hook into the post of the next stitch in the previous row. Yo and pull up a loop. Yo and pull through both loops on the hook. Repeat from the * to the end of the row. Sc in the last stitch.
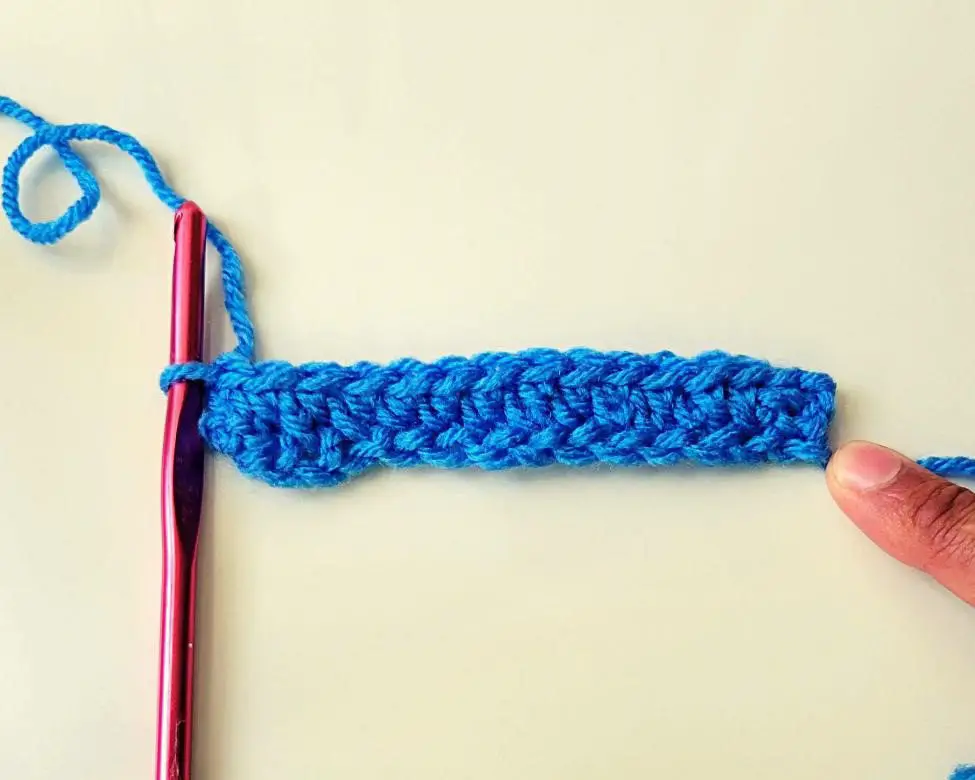
Row 4+: Repeat row 3 until you reach the desired length of your project.
Tips for Working the Waistcoat Crochet Stitch
The waistcoat crochet is fairly simple to work, but there are a few things that will make it go a little more quickly:
-
Use a bigger hook: This will make it easier to insert the hook through the post of the stitch below.
-
Stay loose: If your stitches get too tight it will be really hard to insert your hook for each stitch.
-
Use a pointy hook: Using a crochet hook that’s a little extra pointy on the end will also make it easier to insert your hook into the post of the stitch below.
FAQs About the Waistcoat Crochet Stitch
Here are some common questions that come up about working the waistcoat crochet stitch.
Is waistcoat stitch hard?
No, the waistcoat stitch isn’t hard to work. However, it can be a little tricky to insert your hook into the row below.
Be sure to follow the tips I mentioned above to help make it easier and your crochet project move along more quickly.
How do I work the waistcoat crochet stitch in the round?
You’ll work the waistcoat crochet stitch in the round the same way you do in fat rows. The only difference is how it looks while crocheting.
In the round, you’ll insert your hook into a space that looks like two vertical bars. On the back side, it will resemble the upside-down V legs that you see when crocheting in fat rows.
All the rest is the same.
Thanks for reading through this tutorial on how to do the waistcoat stitch. I hope it was helpful! If you have any questions, feel free to comment below.


