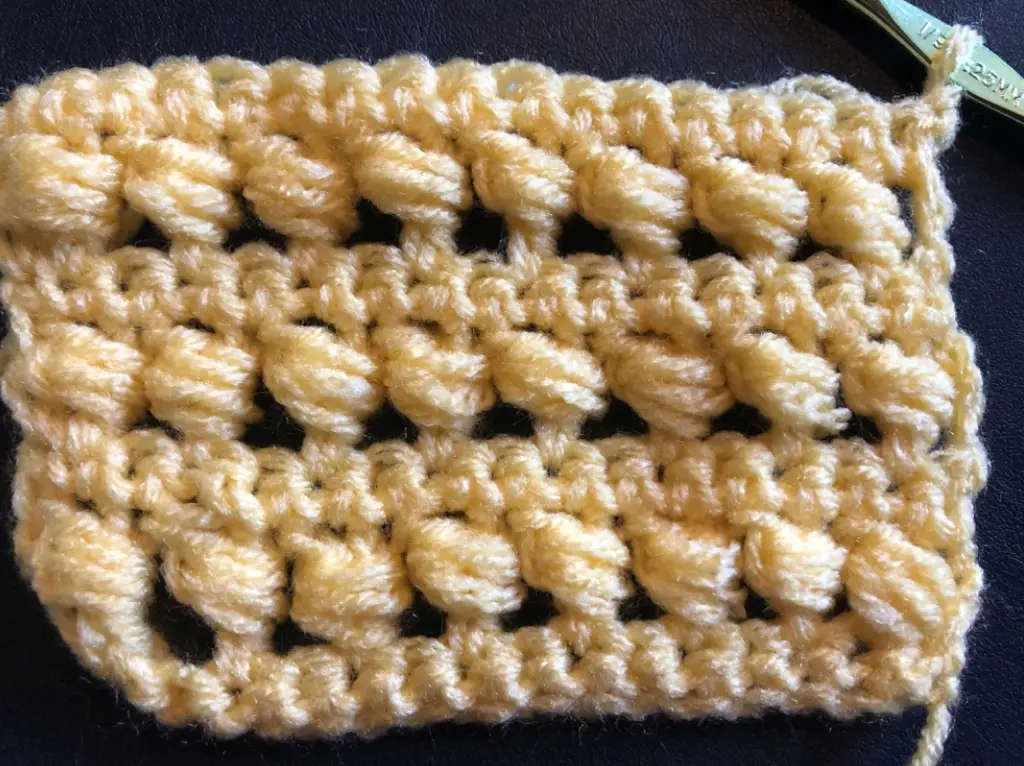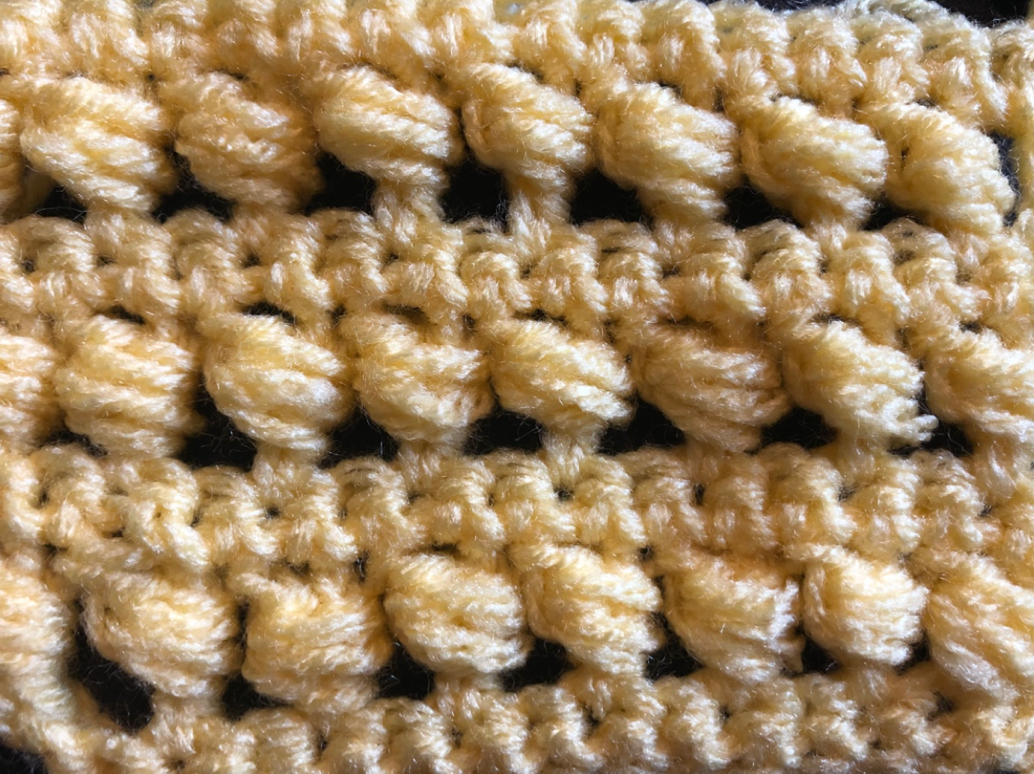
The bead stitch is such a fun little stitch! I love using this stitch for baby blankets but it can also be used for hats, bags, scarfs, and so much more! It is a truly unique stitch that will add a nice touch to any kind of crochet project you could be working on.
Even though this looks like a really hard stitch to accomplish once you get the hang of it is quite easy! All you need to know how to do is a single crochet and a double crochet! If you can do those stitches well, you can do the bead stitch!
What I will be using for this stitch
Size I hook (5.25 mm)
Medium weight yarn
Stitches that you need to know for this pattern are
Ch – Chain
Sc – single crochet
Dc – double crochet
Bst- bead stitch [you will learn how to do this in the pattern]
Before using this stitch in a larger project, it is smart to make a test swatch. The pattern that is listed below is just a test swatch and will give you a good handle on the stitch before expanding your pattern or project. If you would want to manipulate the pattern to make it into something lager you could do this by using an even number of stitches plus one. Meaning you can chain out any odd number to begging with.
How the pattern can be manipulated
Even number + 1
Pattern
There is a visual representation of each part of the pattern below the instructions for each row.
Start by chaining 17
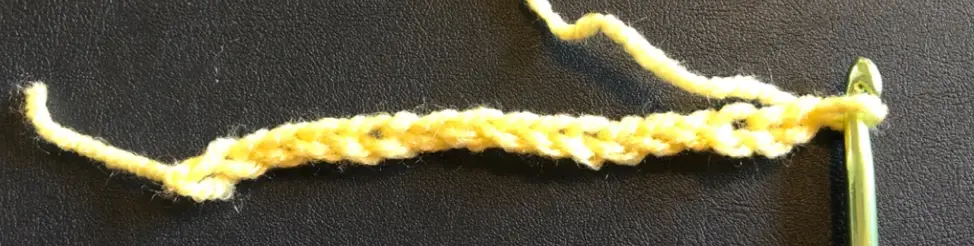
Row 1
Make one sc in the second chain from the hook. Continue to make one sc in each chain until the end of the row. Ch 3. Turn. (you should have any even number of sc)
Row 2
Make one dc in the second stitch. * You will now start working AROUND the dc that you just made. Yarn over. Insert hook behind dc and pull up the working yarn to have 3 loops on the hook. Yarn over. Insert hook behind dc and pull up to have 5 loops on the hook. Yarn over. Insert hook behind dc and pull up to have 7 loops on the hook. Yarn over and pull yarn up through SIX of the loops. Yarn over and pull up through last two loops. [you have just made a bst bean stitch]. Skip the next stitch. Make a dc in the next stitch. Repeat from the * until you have reached the end of the row making a dc in the last stitch of the row. Ch 1. Turn.

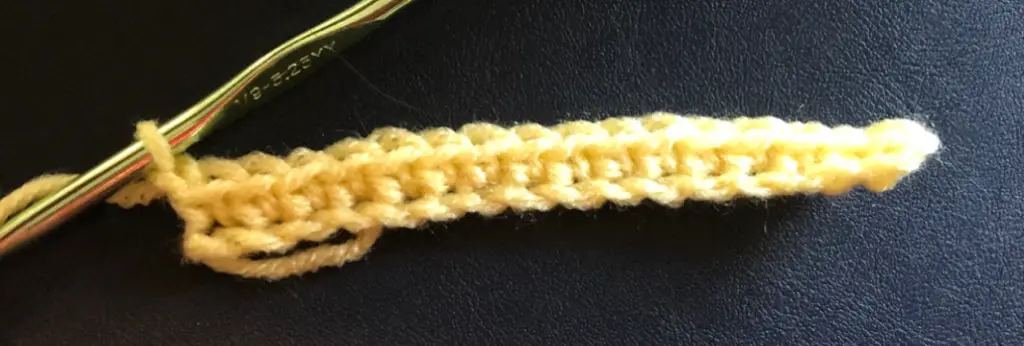
Row 3
Starting in the second stitch make one sc in each of the stitches until the end of the row. Ch 3. Turn.

Continue to repeat rows 2-3 until you have reached the desired length of your project. For the sake of practice and for this pattern repeat rows 2 and 3 two more times.