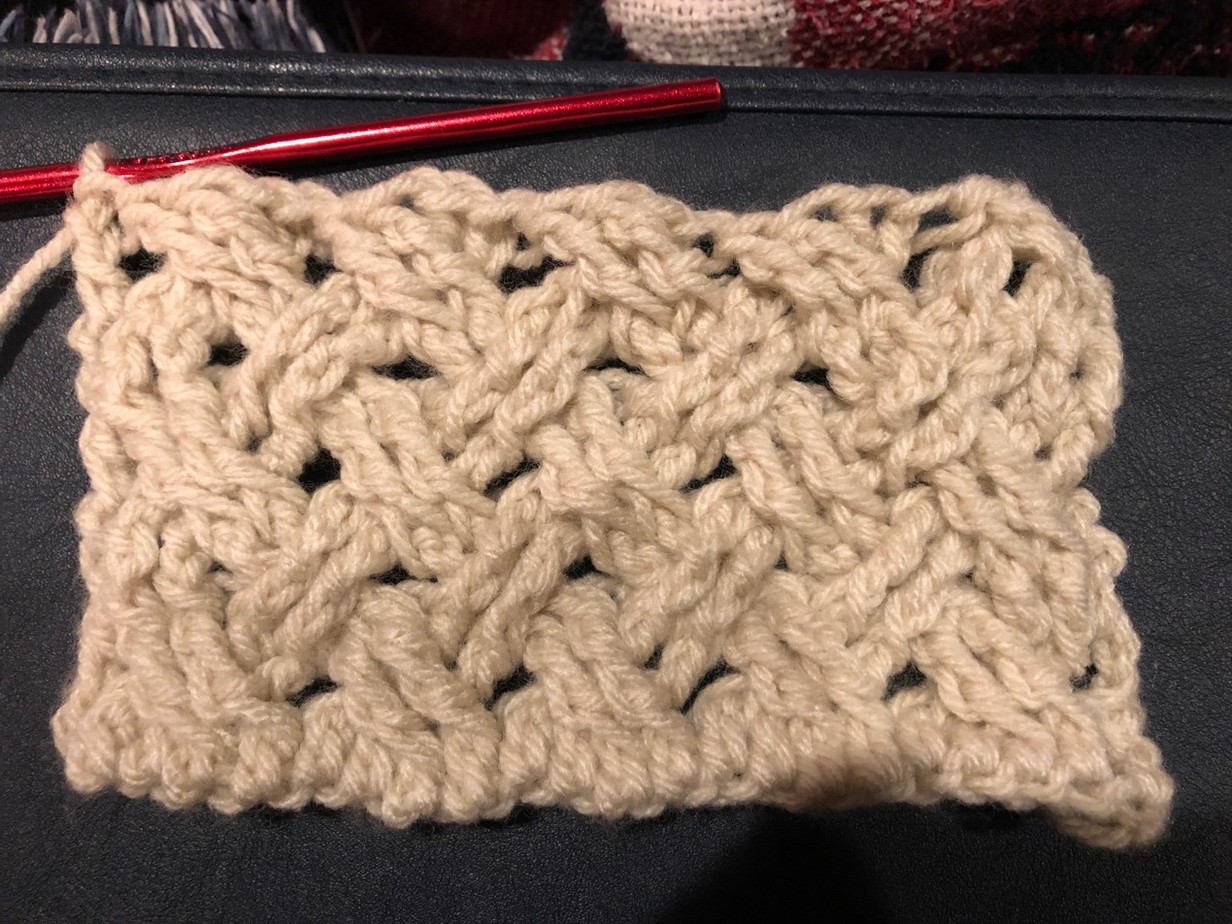
The Celtic stitch is a classic stitch that can be used for a wide variety of crochet projects! It can be used for blankets, hats, scarfs, knitwear, and so much more! This stitch is so unique because it gives your crochet project a woven look. This is a fairly simple stitch once you get the hang of it! If you have a basic understanding of a treble crochet stitch you will be able to get the hang of this stitch in no time at all!
This pattern will use what is called a post stitch. A post stitch is achieved by doing a double crochet stitch or treble crochet stitch around the stitch in the previous row instead of the loops that are created by the stitch that you would usually use to make your stitch in. A post stitch can be done from both the front and the back and for this pattern, we will be using both a back and a front post stitch.
What I will be using for this stitch
- Size I hook (5.5 mm)
- Medium weight yarn
Stitches that you need to know for this pattern are
Ch – Chain
Dc – double crochet
Tc- treble crochet
Fptc – front post treble crochet (you will learn this in the pattern)
Bptc – back post treble crochet(you will learn this in the pattern)
The pattern below is just a test swatch pattern but can be expanded into a larger project if you find that you like this stitch. This stitch can be manipulated in multiples of four plus two more stitches. That means you can chain out any multiple of four to get your desired length and then chain just two more.
How the pattern can be manipulated
4 + 2
Pattern
There is a visual representation of each part of the pattern below the instructions for each row.
Start by chaining 24.
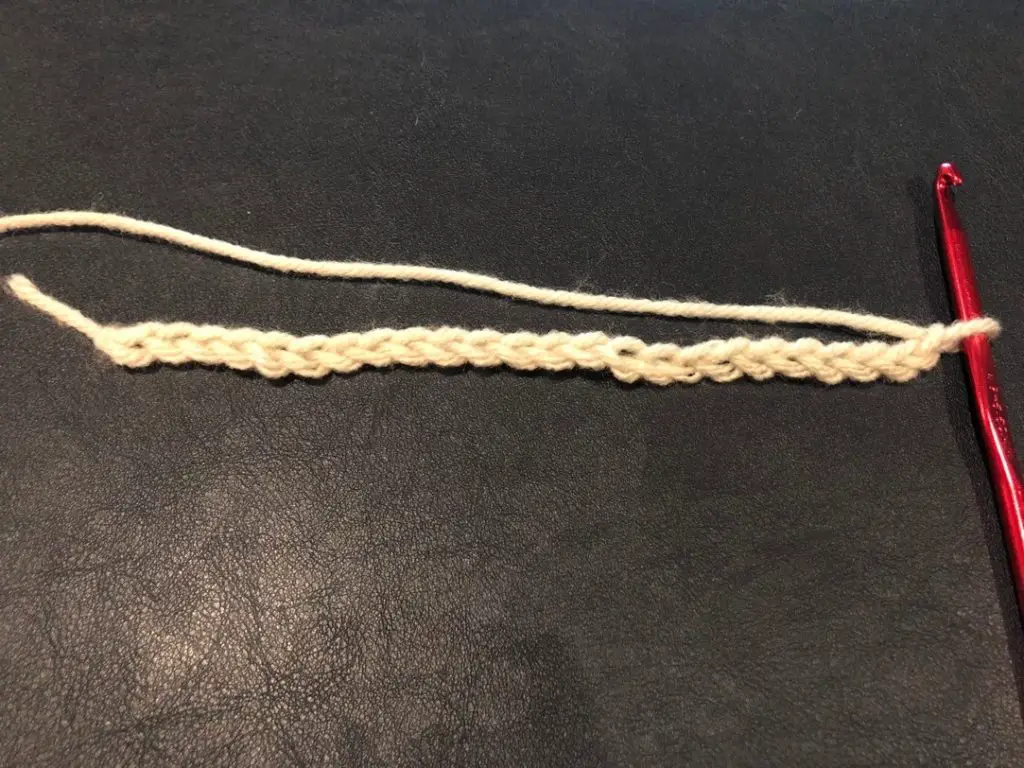
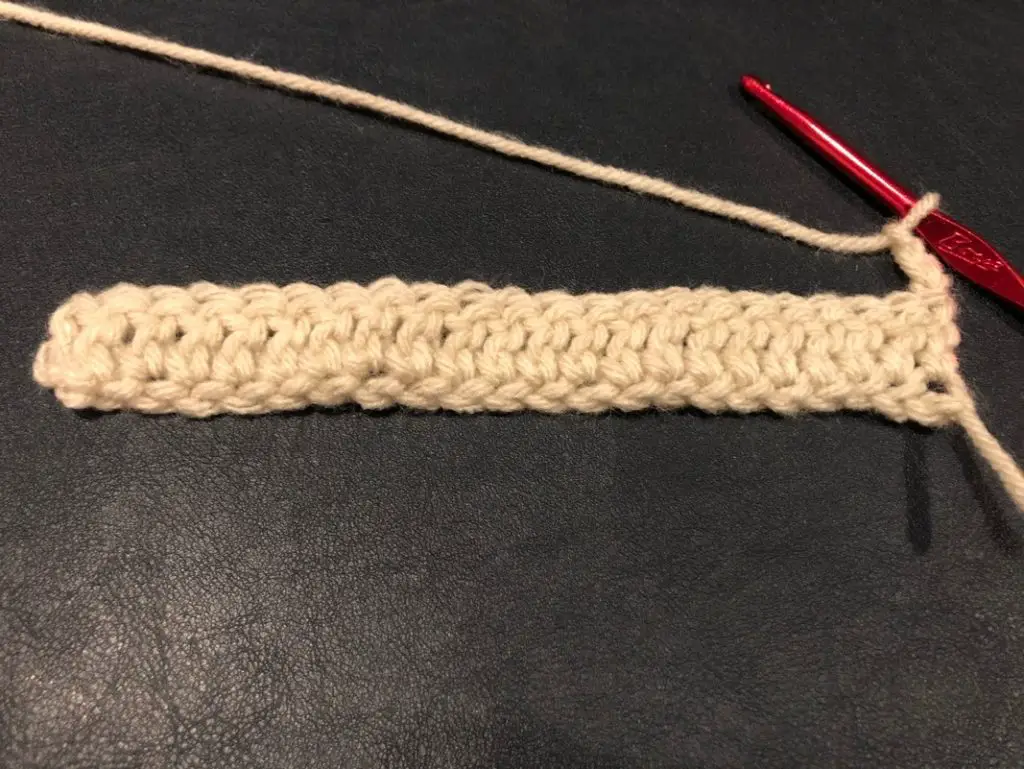
Row 1
In the fourth chain from the hook make one dc. Make one dc in each stitch all the way down the row. Ch 3. Turn.
Row 2
Skip the first two stitches. Make a fptc [front post treble crochet] in the next stitch (for the fptc insert hook behind the dc of the previous row and do the stitch around this post in the front). Make another fptc in the next stitch. Working in the two skipped stitches make one fptc in each of the skipped stitches starting with the stitch furthest back. (this should make an X). *Skip two stitches. Make a fptc in the next two stitches. Working in the two skipped stitches make one fptc in each of the skipped stitches Repeat from the * until you have reached the end of the row. You should have 5 X’s. Once at the end of the row make one dc in the last stitch. Ch 3. Turn.

Row 3
Make a bptc [back post treble crochet] in the next two stitches. (for the bpdc insert hook behind the dc of the previous row and do the stitch around this post in the back). *Skip two stitches. Make a bptc in the next two stitches. Working BEHIND make a bptc in each of the skipped stitches starting with the furthest back. Repeat from the * until you have reached the three stitches at end of the row. You should have 4 X’s. Make two bptc in the next two stitches. Once at the end of the row make one dc in the last stitch. Ch 3. Turn.
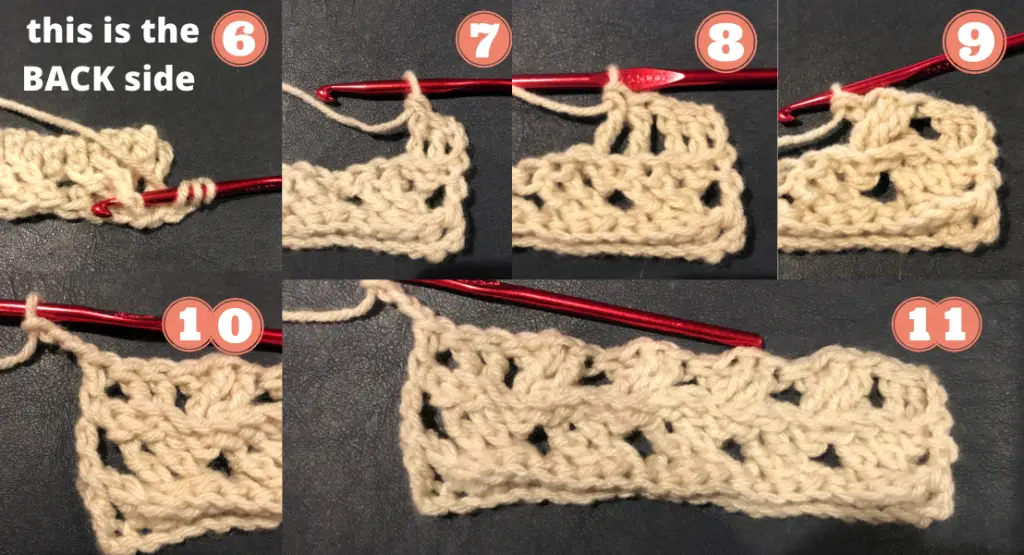
Row 4
*Skip two stitches. Fptc around the next two stitches. Going in FRONT of the stitches you just made make a fptc in each of the skipped stitches starting with the one furthest back. Repeat from the * until you have reached the end of the row. You should have 5 X’s. Once at the end of the row make one dc in the last stitch. Ch 3. Turn.

Continue to repeat rows 3 and 4 until you have reached your desired. For the sake of the pattern repeat each theses row one more time.


