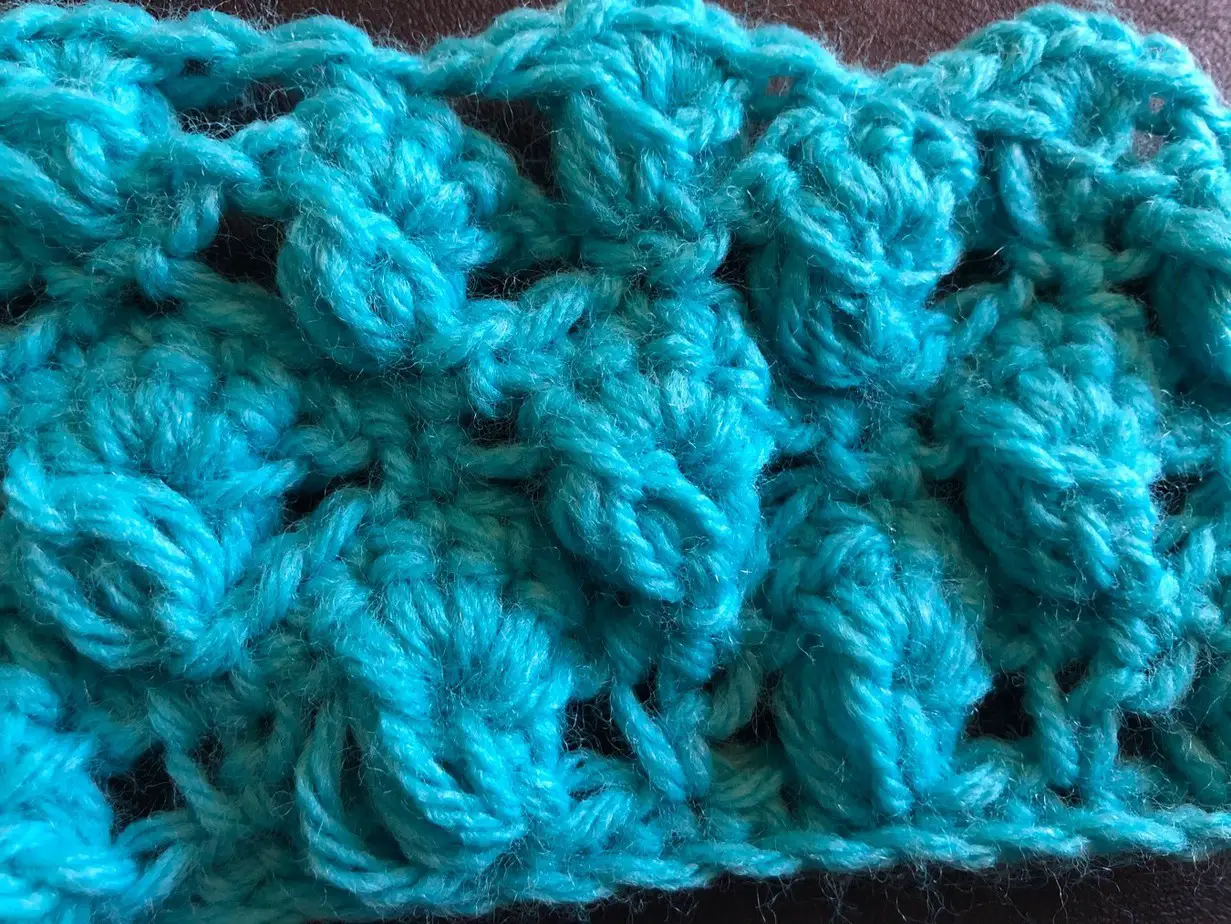
The long loop is a truly unique stitch! This stitch requires some previous crochet stitch knowledge but by using just a few stitch styles combined in a specific fashion you can achieve a look that is sure to impress! This stitch can be used for a variety of projects such as blankets, scarves, hats, wash rags, clothes, and plenty more! This stitch is a bit difficult but as long as you can do a single crochet and a chain stitch you have the skills needed to properly execute this stitch.
What I will be using for this stitch
- Size H hook (5mm)
- Medium weight yarn
Stitches that you need to know for this pattern are
Ch – Chain
Sc – Single crochet
Llps – long loop stitch (you will know how to do this stitch by the end of the pattern)
Hllps – half long loop stitch (you will know how to do this stitch by the end of the pattern)
The pattern that follows is a test swatch to give you the skills and confidence to properly do this stitch. Once you have become proficient in the test swatch you can move onto bigger patterns an projects. You can also manipulate the test swatch pattern to accommodate a larger project. This pattern is worked in multiples of eight plus two. So however big you want to make your project, chain multiple of eight to start and then once you have reached your desired length add two more chains.
How the pattern can be manipulated
8+ 2
Pattern
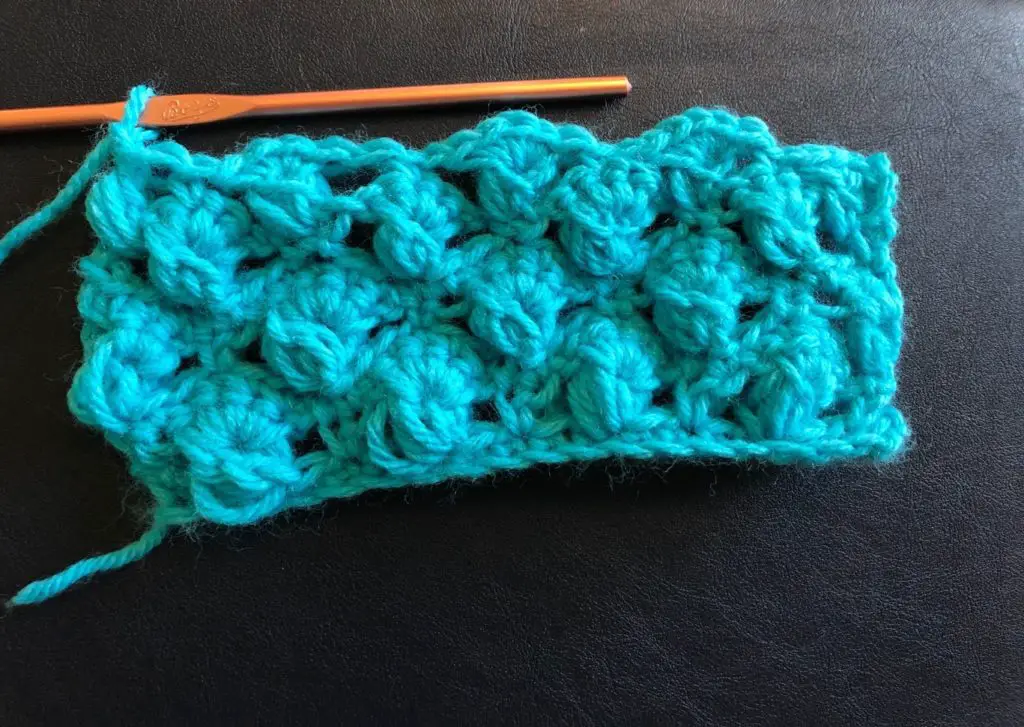
There is a visual representation of each part of the pattern below the instructions for each row.
Start by chaining 18.
Row 1
Make one sc in the second chain from the hook. Continue to make a sc in each of the chain spaces until you reach the end of the row. Ch 1. Turn.

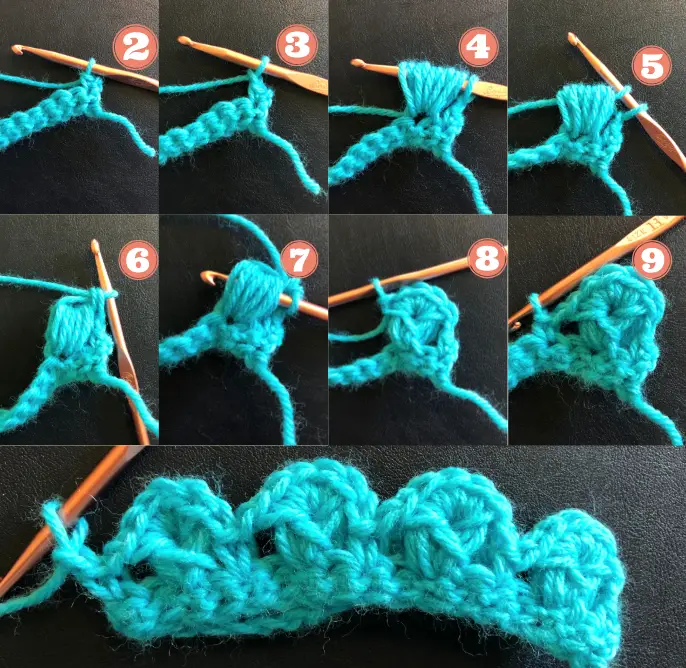
Row 2
In the first stitch from the hook make one sc. *Ch 1. Skip next stitch. **Yarn over and insert hook into stitch, yarn over and pull up a long loop onto your hook. Without completing the stitch do this 4 more times in the next four stitches. ( You should have 11 loops on your hook). Yarn over and pull through the first 10 loops on your hook. (You should now only have 2 loops on your hook). Yarn over and pull through the last two loops on your hook. Insert the hook into the middle of the space created by your long loops. Make 4 sc in the long loop space.** [You have now completed one llps long loop stitch.] Ch 1. Skip the next stitch. Make 1 sc in the next stitch. Repeat from the * 3 more times until you have reached the end of the row. You should have 4 llps in total. Ch 1. Turn.
Row 3
Make one sc in the first stitch. Continue to make sc all the way down the row until you have reached the end. Ch 3. Turn.
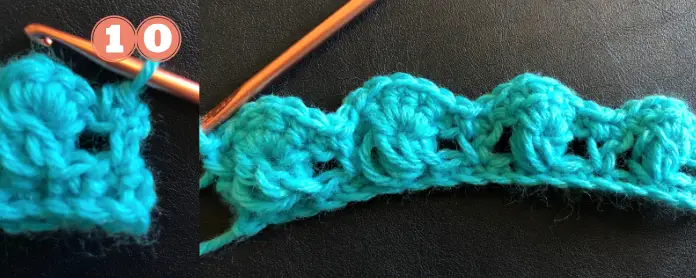
Row 4
[Yarn over and insert hook into the first stitch, yarn over and pull up a long loop onto your hook. Without completing the stitch do this 2 more times in the next stitches. ( You should have 7 loops on your hook). Yarn over and pull through the first 6 loops on your hook. (You should now only have 2 loops on your hook). Yarn over and pull through the last two loops on your hook. Insert the hook into the middle of the space created by your long loops. Make 2 sc in the long loop space.] You have now completed one hllps half long loop stitch. *Skip 2 stitches Make one llps [instructions between ** in Row 2]. Skip two stitches. Make one sc. Repeat twice more from the * Make one more hllp in the last stitches of the row. (You should have 3 llps and 2 hllps at the end of this row). Ch 1. Turn.
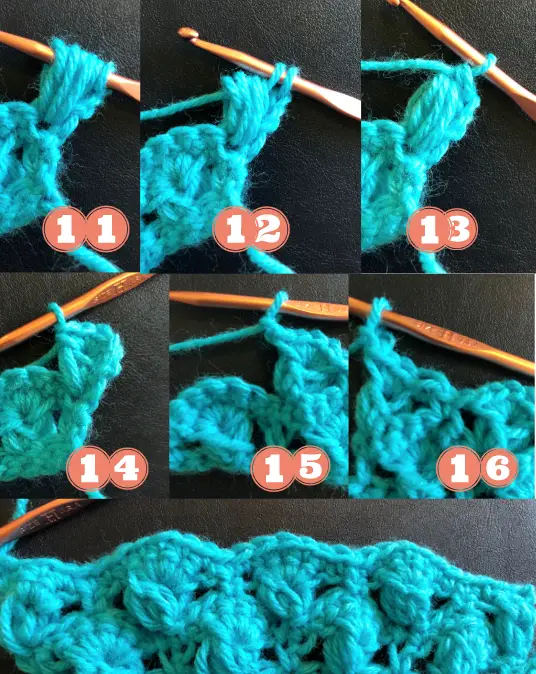
Row 5
Make one sc in the first stitch. Continue to make sc all the way down the row until you have reached the end. Ch 1. Turn.
Row 6
*Make 1 sc in the peak of the hllps of the previous row. Ch 1. Skip 2 stitches. In the valley in between the hllps and the llps of the previous row make 1 llps. Ch 1. Skip 2 stitches. Continue to work from * until the end of the row. You should have 4 llps by the end of the row.
Continue to repeat Row 3-Row 6 until you have reached your desired length. For the sake of practice and for this pattern repeat this once more.
Now that you have a good understanding of this one-of-a-kind stitch you can go onto a bigger pattern using it. It will be sure to give your crochet project a look like no other!


