Want to make your next crochet project pop? Try using the alpine crochet stitch to add texture and interest. This beautiful stitch is perfect for blankets, bags, accessories, and more!
If you’re anything like me, once you’ve mastered the basic crochet stitches, you start looking for something a little more interesting. I love a quick project, but sometimes I want something that makes people stop and ask “How did you make that??”
The alpine crochet stitch is perfect for that. It’s simple enough to work up quickly, but the results are impressive and will definitely turn heads. Ready to give it a try? Read on for the full tutorial!
What is the Alpine crochet stitch pattern?
The alpine crochet stitch pattern is a 4-row pattern that alternates front post treble crochet and double crochet stitches with single crochet stitches. All together it creates a pattern of alternating raised stitches that offer a lot more texture to your project.
This stitch is perfect for beginner to intermediate crocheters who are looking to expand their crochet repertoire, as it mainly uses basic stitches that you likely already know. And once you’ve got the hang of it, it’s easy to work up quickly!
There is one special stitch that might be new, but I’ll walk you through how to do that one step-by-step.
Project Ideas
The Alpine crochet stitch is pretty versatile in that you can use it for a variety of projects. All you need to do is adjust the width on your starting row to create whatever you need!
Here are a few ideas for projects that work well with the alpine stitch:
- Blankets and throws
- Scarves and cowls
- Baby blankets
- Wraps and shawls
- Bags and purses
- Dishcloths
- Pillows
Alpine Crochet Stitch Pattern Notes
Here is a quick overview of what you need to know before you get started.
Supplies Needed
- Yarn: you can use any yarn weight. For this tutorial, I used Craftiss Acrylic yarn in grey.
- Crochet hook: Be sure to match the size of your hook to the yarn. For this tutorial, I used 5.00 MM hook.
Abbreviations
For this pattern, I will be using the Craft Yarn Council U.S. abbreviations.
- yo: yarn over
- ch: chain stitch
- sc: single crochet
- dc: double crochet
- FPtr: front post treble crochet
Variations
As with many other stitches, there are variations to the alpine crochet stitch. Some patterns suggest you start with an odd number of stitches or that you use a front post double crochet (FPdc).
For this tutorial, I started my pattern off with an even number of stitches because I found it easier to maintain the alternating pattern the stitch requires.
I also chose to use a front post treble crochet (FPtr) because it created less tension on the pattern and allowed it to lay fatter. If you prefer a shorter stitch, you can use a front post double crochet (FPdc) instead.
Special Stitches
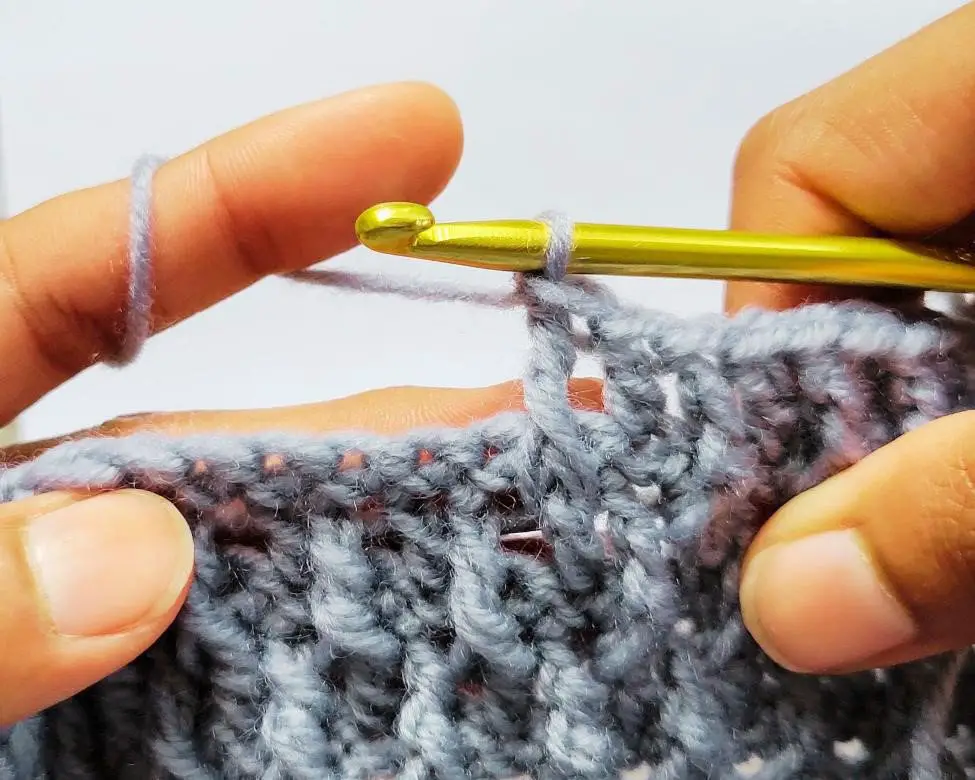
The alpine crochet stitch mainly uses simple stitches like the single crochet and double crochet, but it does use one special stitch called the front post treble crochet (FPtr). If you’re unfamiliar with it, here is a breakdown of how it’s done.
1. Yo 2 times.
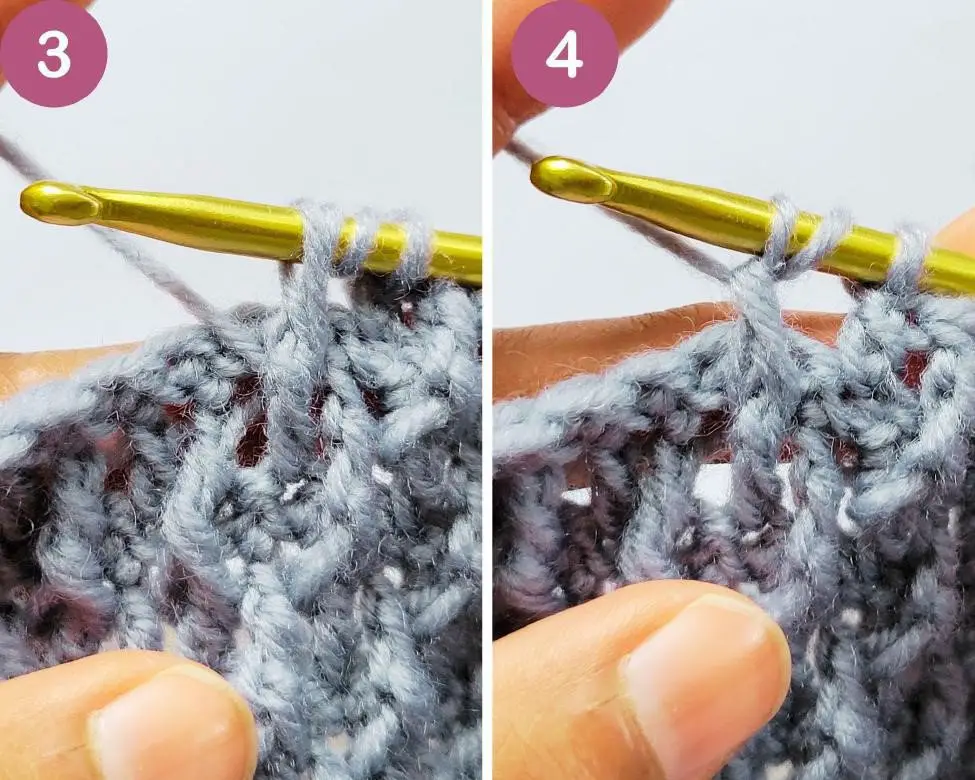
2. Insert the hook behind the dc 2 rows below.
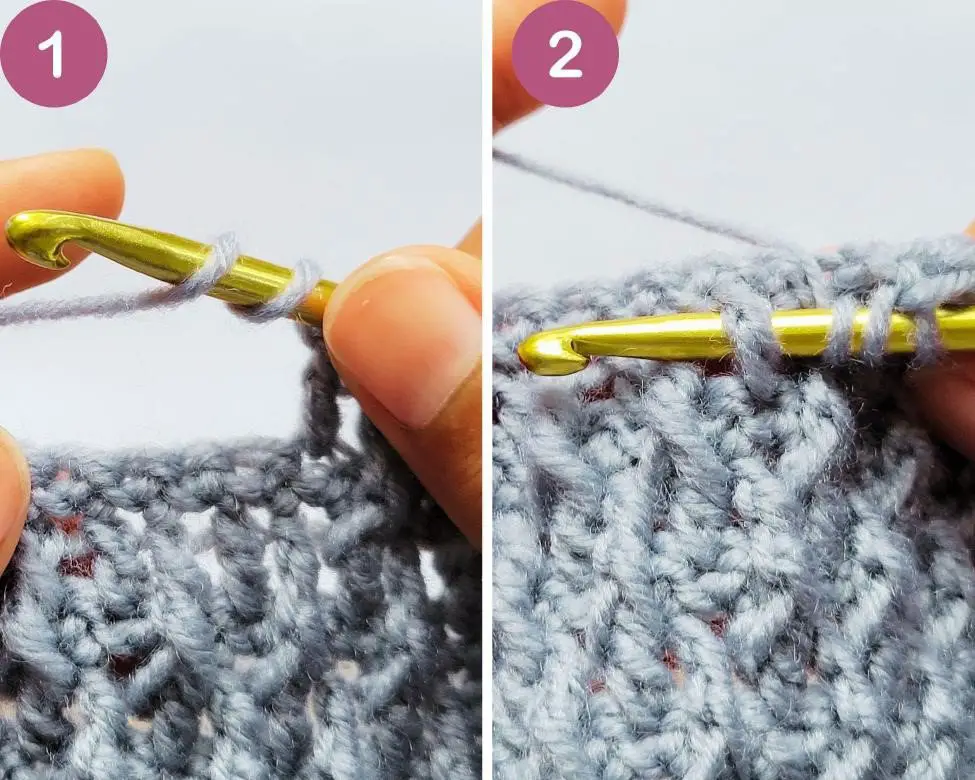
3. Yo and pull the yarn up to the current row.
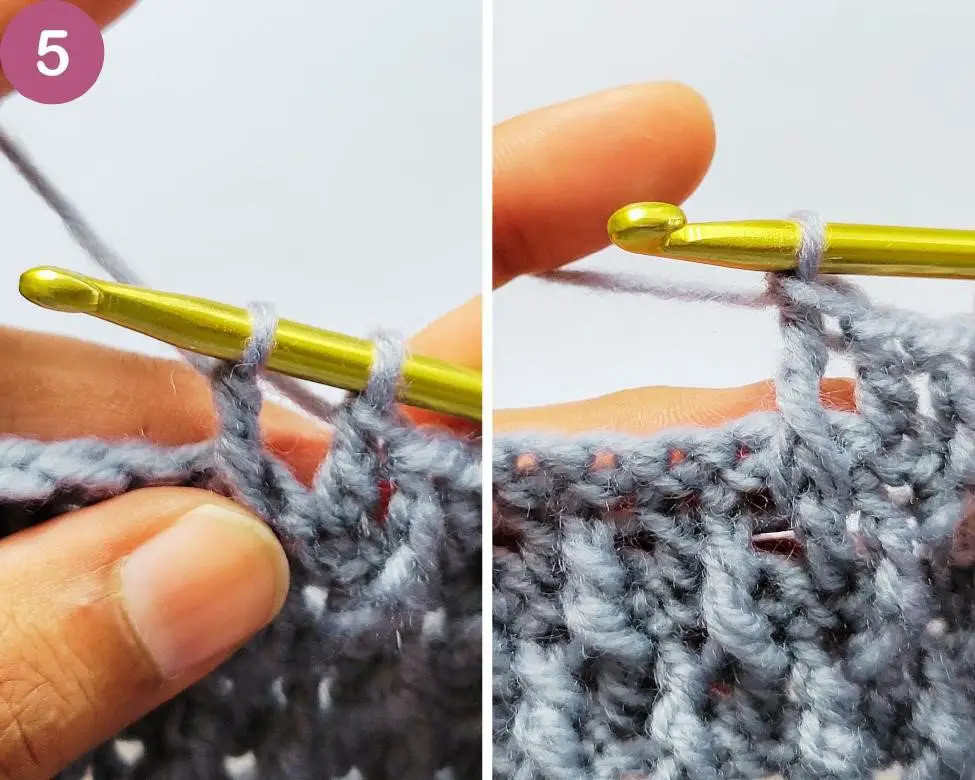
4. Yo and pull through the frst 2 loops.
5. Repeat 2 more times.
It sounds and even looks a little fancy, but it’s very simple. You’re simply working a treble crochet stitch, but instead of inserting the hook back into the next stitch, you’re inserting it behind a double crochet 2 rows below.
When alternated with double crochets throughout the pattern, it creates the alpine crochet stitch.
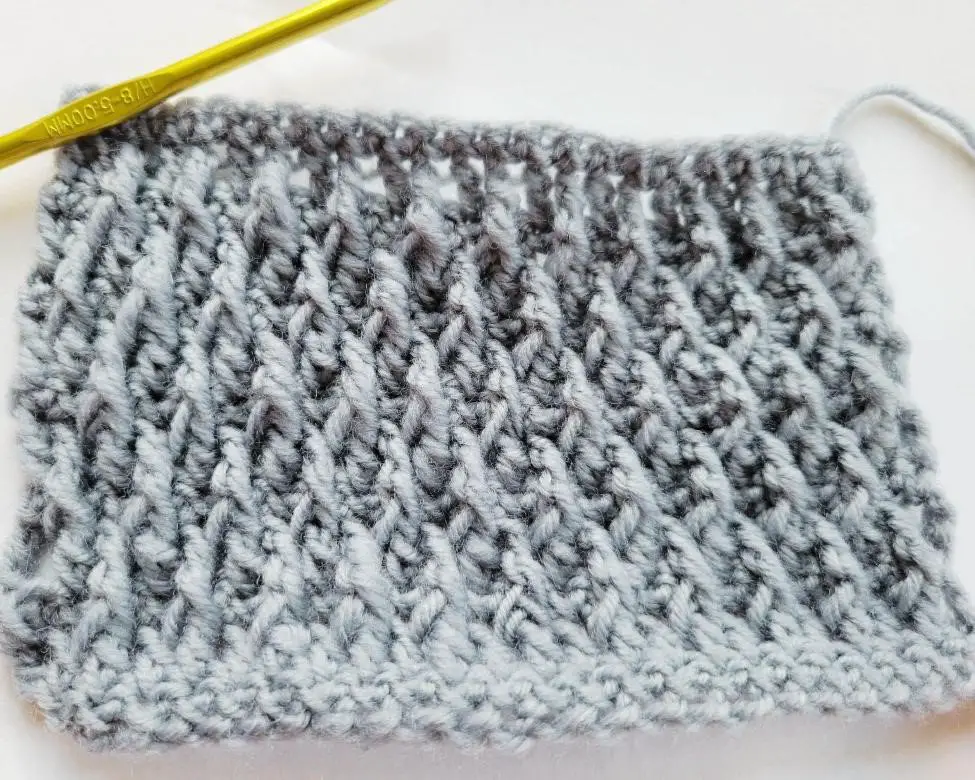
Alpine Crochet Stitch Picture Tutorial
Here is the full alpine crochet stitch pattern with pictures to help you follow along:
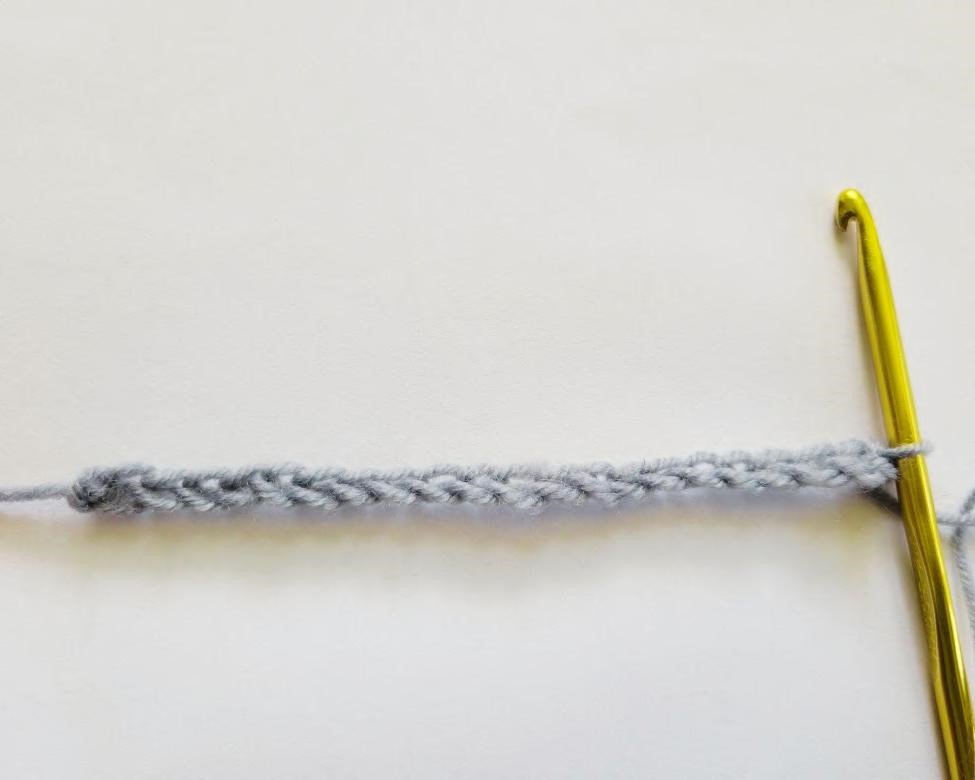
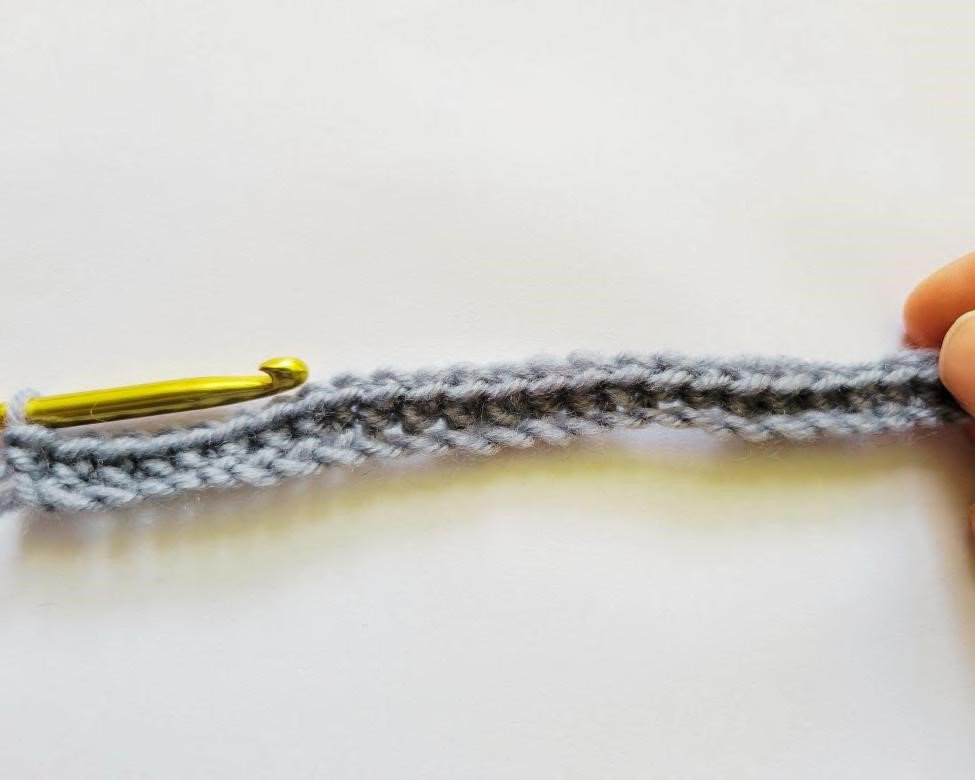
Row 1: ch an even number of stitches. For this tutorial, I started with 20 stitches.
Row 2: ch1, (this counts as your first stitch) skip the first stitch and sc to the end of the row.
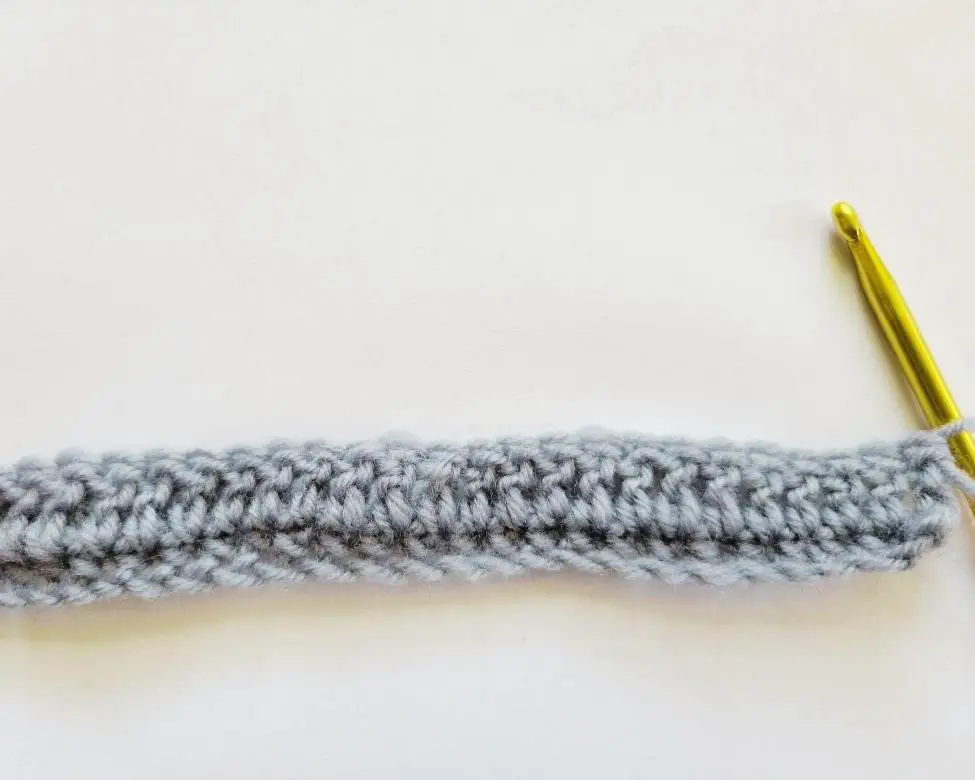
Row 3: ch2, (this counts as your first stitch) skip the first stitch and dc1 in each stitch to the end of the row.
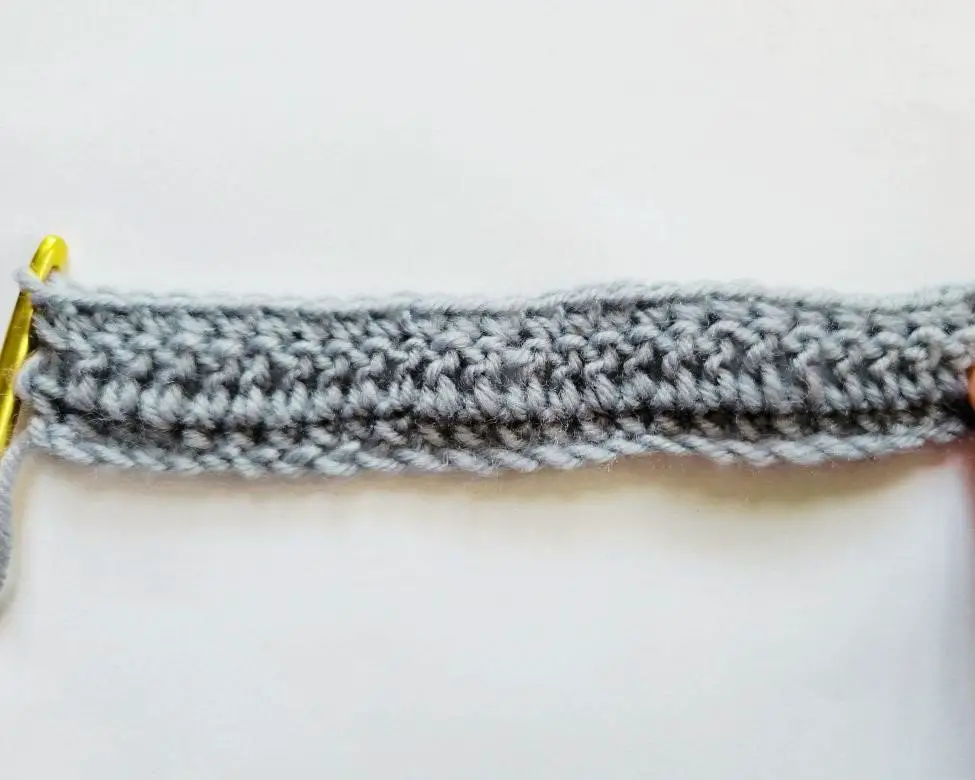
Row 4: ch1, (this does NOT count as your first stitch) skip the first stitch and sc to the end of the row.
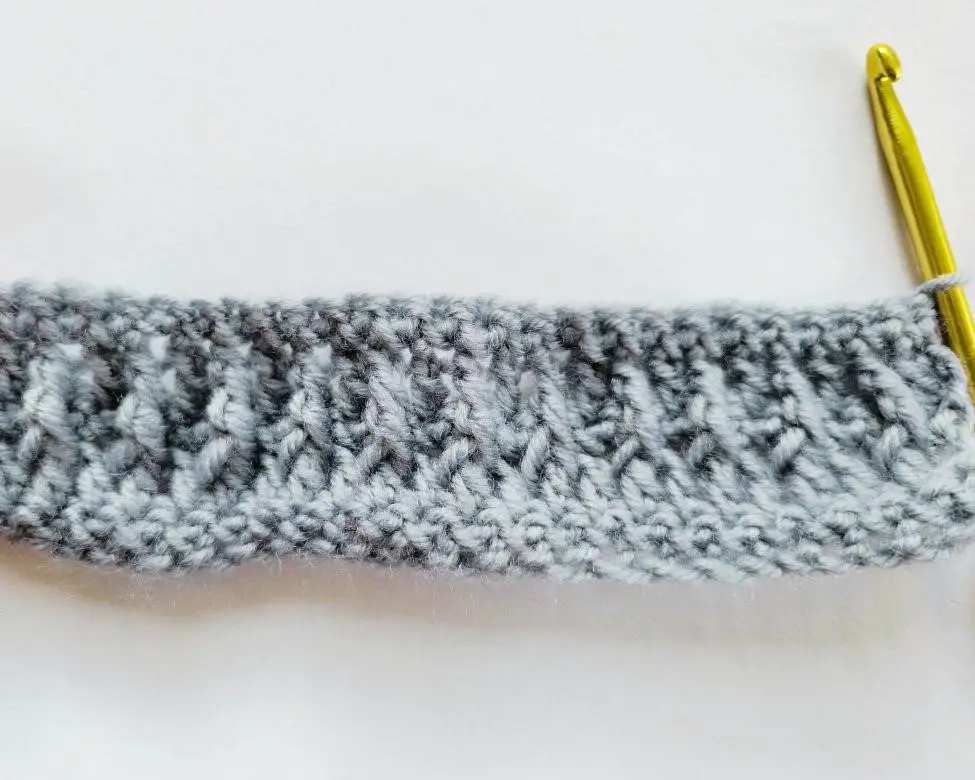
Row 5: ch2, (this counts as your first dc) skip the first stitch, FPtr1 into the next dc stitch 2 rows below. dc the next stitch. Repeat FPtr1 and dc1 until the last stitch in the row. dc1 in the last stitch.

Row 6: ch1, (this does NOT count as your first stitch) sc in the first stitch to the end of the row.
Row 7: ch2, (this counts as your first dc) skip the first stitch, dc1 in the next stitch. FPtr1 in the next dc stitch 2 rows below. Repeat dc1and FPtr1 until the end of the row.
Row 8: ch1, (this does NOT count as your first stitch) sc in the first stitch to the end of the row.
Row 9+: Continue alternating rows 5-8 until you reach your desired length. Be sure to end your project on a single crochet row for a nice final border.
Tips for Working the Alpine Crochet Stitch
Here are a couple of tips to make sure your alpine crochet stitch pattern turns out looking its best.
- Don’t pull too tight – keep your tension light while crocheting. If your stitches are too tight, the project will curl up more than usual.
- Stretch your front post treble crochet stitches – as you’re pulling the loop from behind your double crochet, try to stretch it up to the current row you’re stitching. This will also help to cut down on curling.
- Alternate your front post treble crochet stitches – as you are working through your rows, make sure to alternate which stitch you hook when working the FPtr. You should always be working into a double crochet stitch. The FPtr causes the stitch to be raised above the pattern, so you’ll be able to see which stitch you’re working in.
- Pay attention to what row you’re on – when you’re working on even number rows, your first ch does NOT count as your first stitch. When you’re working on odd rows (after row 1), your first ch2 DOES count as your first stitch.
FAQs About the Alpine Crochet Stitch
I still have a few questions about the Alpine crochet stitch. Here are some FAQs that others have had. If you don’t find an answer to your question, feel free to pop it in the comments down below!
Can I use a different stitch instead of the front post treble crochet?
Yes, you can! If you want to keep it simple, you can use a FPdc (front post double crochet). It’s similar to the FPtr, you just yarn over once before you insert the hook instead of twice.
How is the Alpine crochet stitch different from other stitches?
The alpine crochet stitch is unique because it’s made up of both front post and traditional stitches. This combination gives the fabric a nice texture and raise, making it stand out from other projects.
Do I need to use a specific yarn weight?
No, you can use any yarn weight you like! Just be sure to use a matching hook size.
Is the Alpine crochet stitch a yarn eater?
No, I wouldn’t consider it a yarn eater. Because it’s made up of both single crochet and double or treble crochet stitches, you don’t use as much yarn as you would if you were only using single crochet stitches.
It might use a little bit more yarn than taller stitches, but you get a much prettier pattern out of it.
How do you count Alpine Stitch rows?
You should count every row, even the single crochet rows. This stitch looks best when you alternate between double crochet and front post treble crochet stitches, so it’s important to keep track of where you are in the pattern.
I hope you enjoyed this tutorial on how to crochet the alpine stitch! If you have any questions, feel free to ask in the comments below. And don’t forget to share your finished projects with me on Instagram (@crochetgasm) – I can’t wait to see what you make!


