Learn how to crochet the Trinity stitch with these easy step-by-step instructions. This popular stitch is perfect for blankets, scarves, and more!
If you’re looking for a new stitch to try, you should definitely check out the trinity crochet stitch. It’s surprisingly simple to crochet but creates a beautiful pattern for the finished project.
All you need to know how to do are a few basic stitches and you can easily create this star-like design. It’s perfect for winter projects like blankets, scarves, and sweaters.
With this tutorial, I’ll walk you through how to crochet the trinity stitch with step-by-step instructions and pictures so you can follow along.
Let’s get started!
What is the Trinity Crochet Stitch?
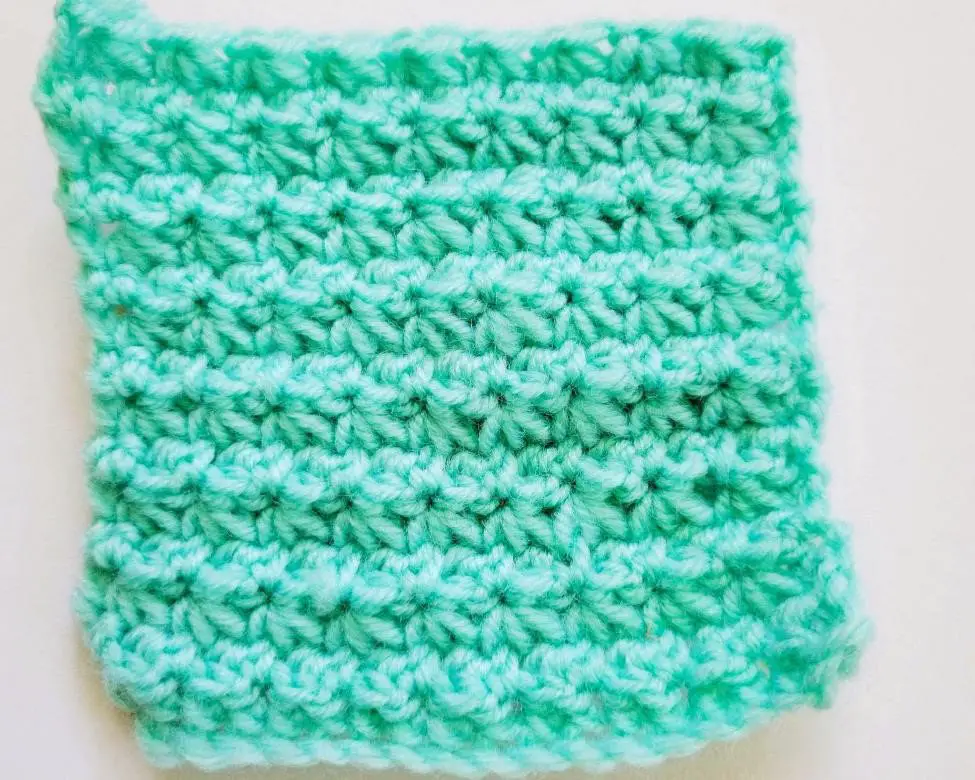
The trinity crochet stitch is a raised pattern created by alternating single crochet 3-together stitches with a single chain stitch.
This results in a three-dimensional stitch that looks like little stars. The trinity crochet stitch is worked in single rows, so it’s easy to crochet once you get the pattern down.
If you’ve mastered the single crochet stitch, you’ll have no trouble with it.
Project Ideas
The trinity crochet stitch creates a pattern with a pretty tight weave. This makes it great for cozy projects like blankets, hats, and scarves.
It also works well for dishcloths and other scrubby projects because the raised stitches can help catch dirt and grime.
Here are a few ideas for projects you could make with the trinity crochet stitch:
- Baby blankets
- Washcloths
- Beanies and hats
- Sweaters
- Scarves Cowls
- Cowls
- Dishcloths
- Coasters
Trinity Crochet Stitch Pattern Notes
Here is what you need to know before you get started:
Supplies Needed
- Yarn: you can use any yarn weight. For this tutorial, I used Craftiss Acrylic yarn in teal.
- Crochet hook: Be sure to match the size of your hook to the yarn. For this tutorial, I used 5.00 MM hook.
Abbreviations
For this pattern, I will be using the Craft Yarn Council U.S. abbreviations.
- yo: yarn over
- ch: chain stitch
- sc: single crochet
- sc3tog: single crochet 3 stitches together
Special Stitches
The trinity crochet stitch mainly uses beginner stitches like a chain stitch and single crochet, however, it does use a special stitch called the single crochet 3 together (sc3tog). If you don’t know how to crochet the sc3tog, here is a breakdown of how it’s done in the trinity crochet stitch.
1. Insert the hook into the last stitch you were just working in, yo, and pull up the loop. (You should have 2 loops on your hook.)
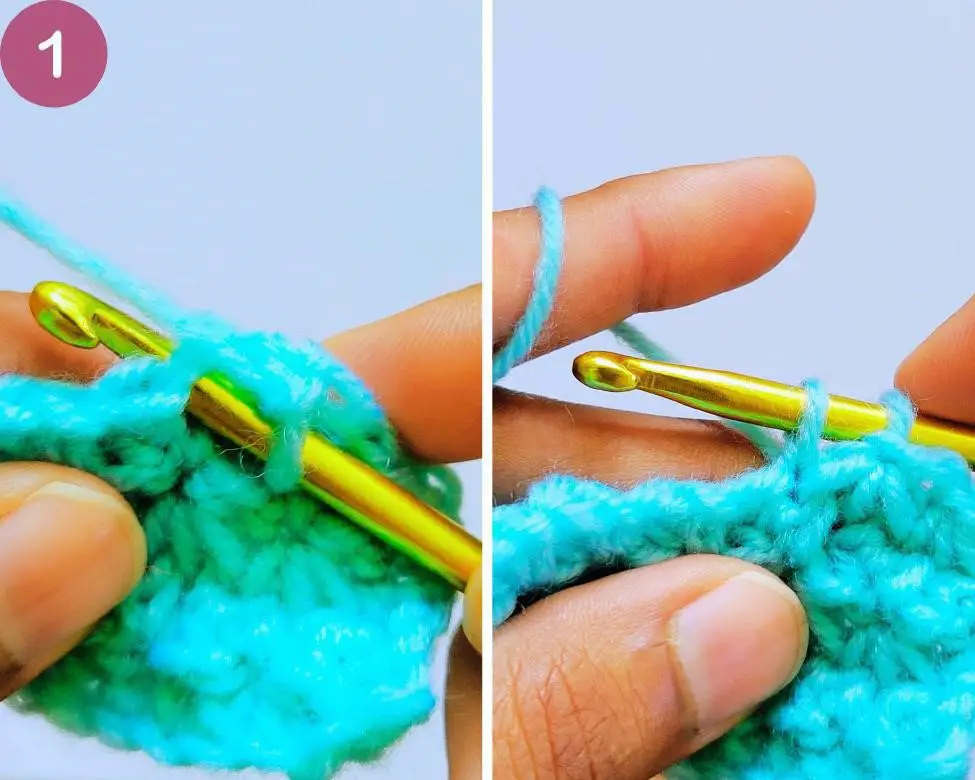
2. Insert the hook into the next stitch, yo, and pull up the loop. (You should have 3 loops on your hook.)

3. Repeat step 2 in the next stitch. (You should have 4 loops on your hook.)
4. Yo and loop the hook through all 4 loops.
That’s it! It’s basically just connecting 3 single crochets altogether at once.
Trinity Crochet Stitch Picture Tutorial
Here is the full trinity crochet stitch picture tutorial so you can follow along:
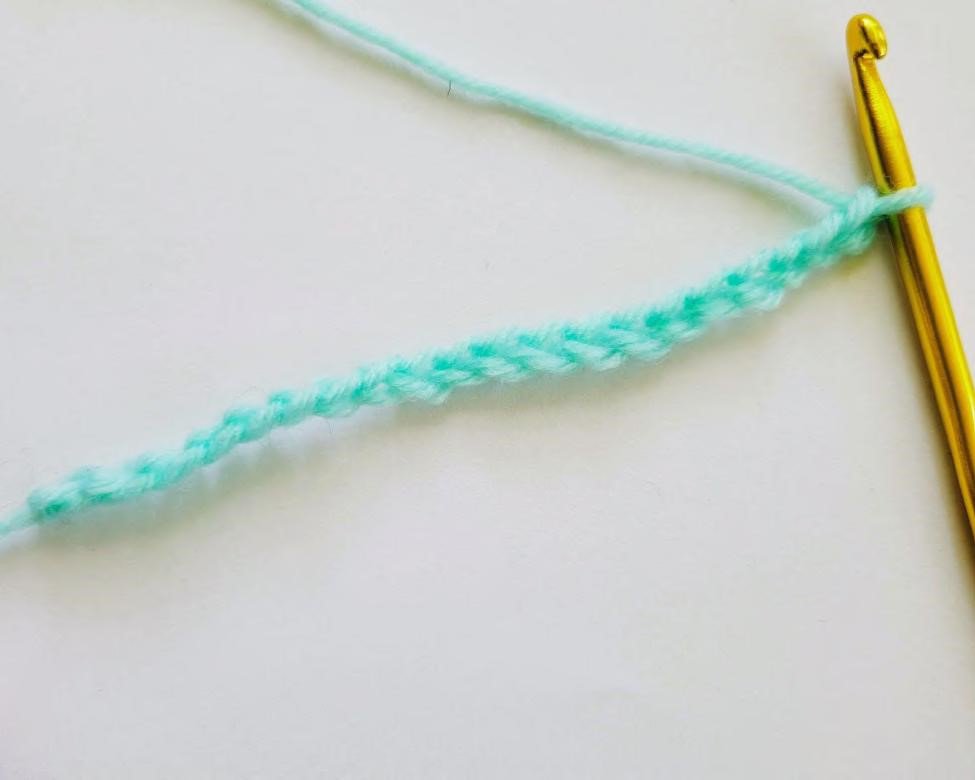
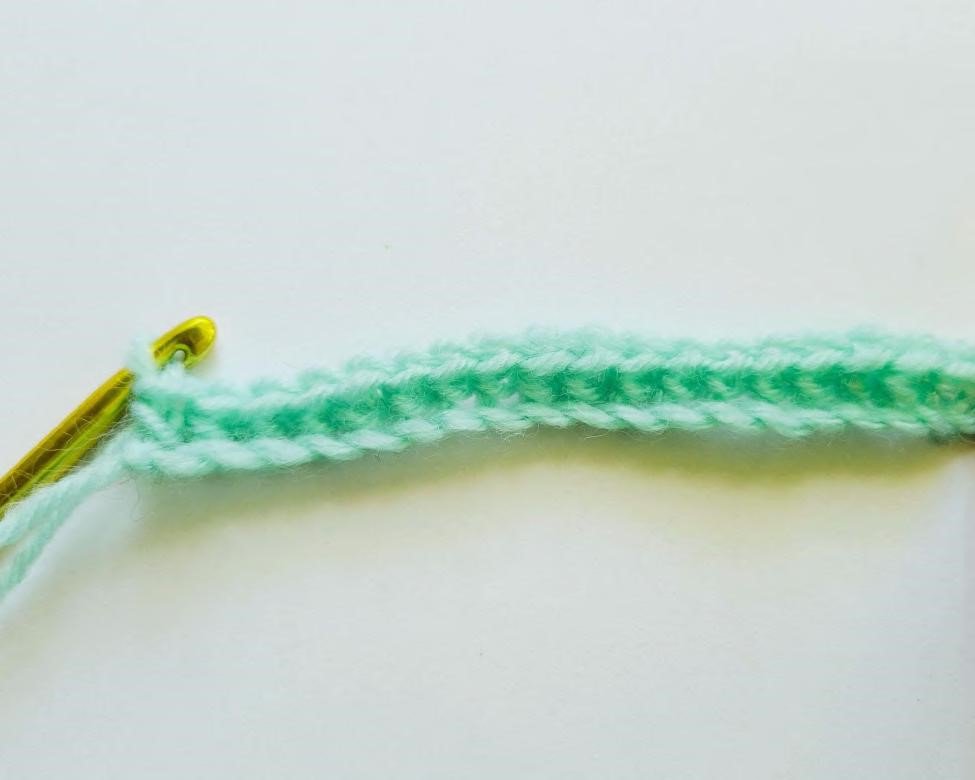
Row 1: ch an even number of stitches. I started with ch20 for this tutorial. Turn.
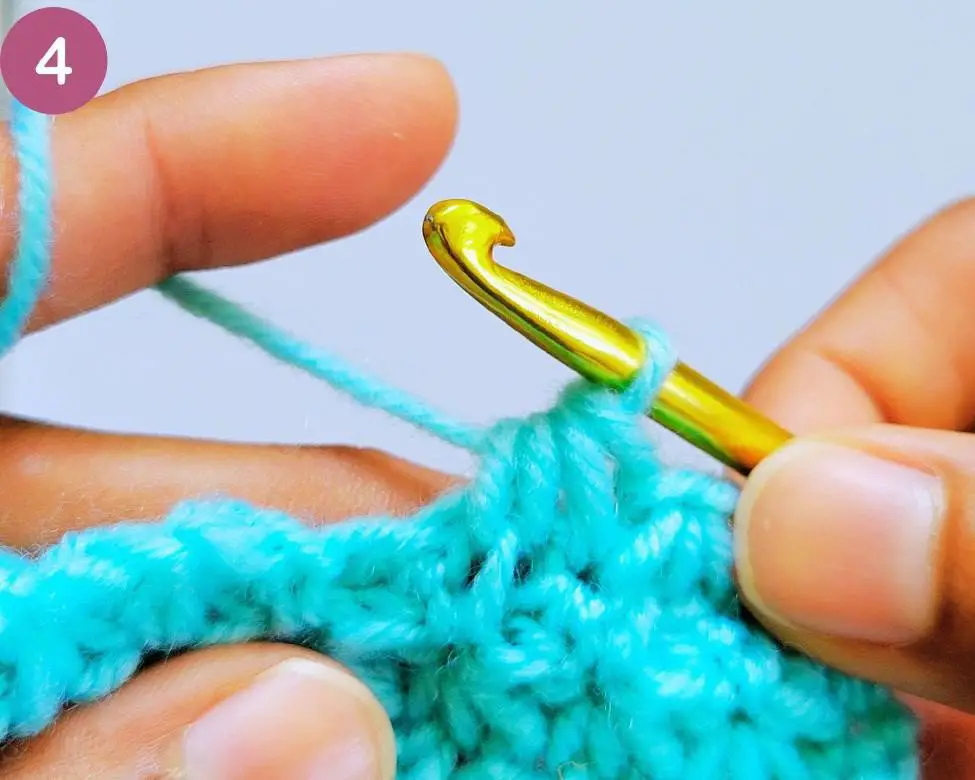
Row 2: ch 1 (this doesn’t count as your first stitch), sc to end of row. Turn.
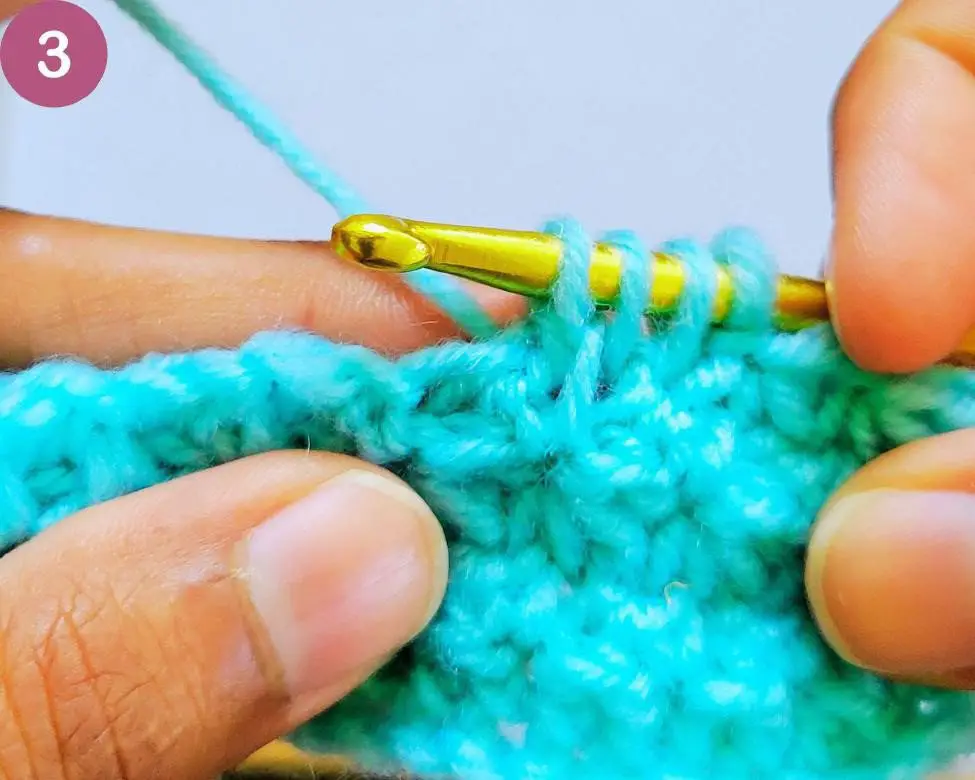
Row 3: ch1 (this doesn’t count as your first stitch), sc1, sc3tog starting in the same stitch as your first sc, ch1.
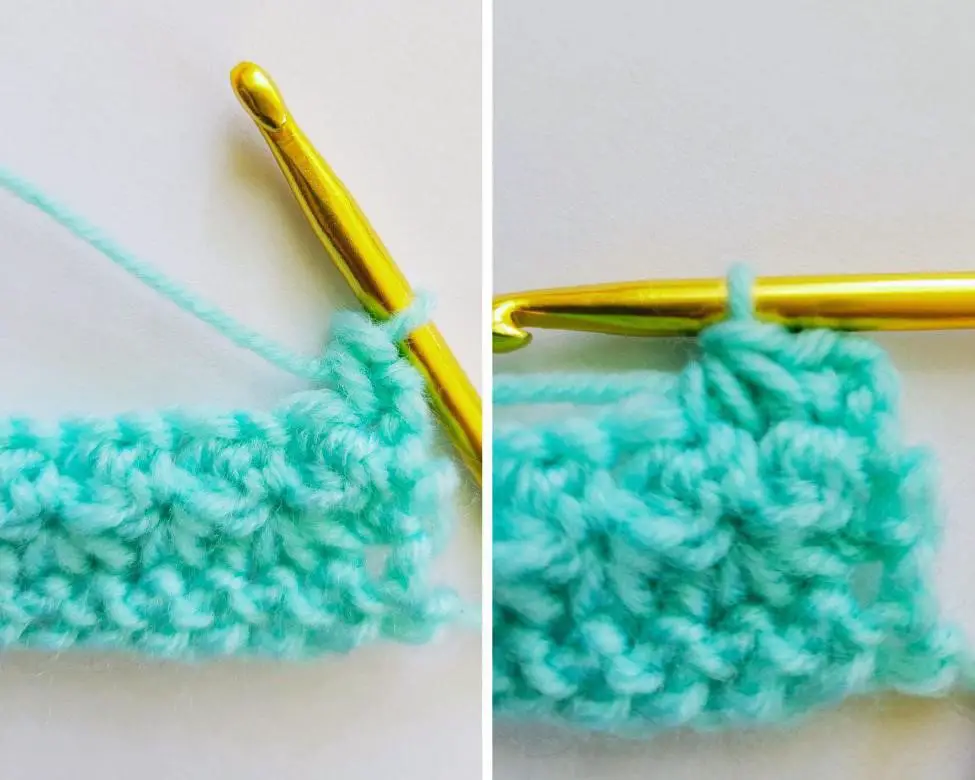
Repeat sc3tog and ch1 always starting your sc3tog in the last leg of the previous sc3tog until the end of the row. After the last sc3tog, work an sc1 into the same stitch as the last leg of the previous sc3tog. Turn.

Row 4+: Repeat row 3 until you reach the desired length of your project.
Tips for Working the Trinity Crochet Stitch
Here are a few tips to make sure your trinity crochet stitch comes out looking great:
- Start in the right spot – Always make sure to start your sc3tog in the SAME stitch as the previous one. Don’t skip to the next stitch.
- Don’t count the first ch1 – Don’t count the first ch1 at the beginning of the row as your first stitch. This is different from other patterns.
- Start and finish with an sc – Start and finish each row with sc.
FAQs About the Trinity Crochet Stitch
Here are a few common questions that come up when trying out the trinity crochet stitch for the first time. If you have a question that’s not on this list, feel free to drop it down in the comments down below!
Can I change colors with the trinity crochet stitch?
Yes! the trinity crochet stitch looks really nice with different color patterns. It’s important to note though, that it will create a wrong and right side of your project.
It also works best if you work in sets of even number rows for each color.
How do I adjust the size of my project with the trinity crochet stitch?
To adjust the size of your project, just change the number of chain stitches for your beginning row. The more stitches you put in the original chain, the wider the project.
Make sure to start your project with an even number of stitches. For the length of your project, you can stop whenever it reaches the desired length.
I hope you found this tutorial for the trinity crochet stitch helpful. If you have any questions, feel free to comment below. And don’t forget to share your finished projects with me on Instagram (@crochetgasm)!


