Welcome to the first crochet tutorial. I plan on publishing several tutorials covering the basics all the way up to more advanced techniques and stitches. I hope these tutorials help you learn and enjoy the art of crochet.
I learned how to crochet when I was about 9 years old. I watched my grandmother crochet intricate thread borders for her embroidery pieces for many years. Finally, I got the nerve up to ask her to teach me how to crochet and now almost 50 years later I still love to crochet.
Crochet has many health benefits. It has been shown to help lower blood pressure, alleviate depression, help prevent the symptoms of dementia, and teach children how to count and read.
Along with the health benefits, crochet is just plain fun. I really enjoy planning a project whether it is my own design or another designer’s creation. I also enjoy learning new stitches and techniques. Enough of my meanderings…are you ready to jump in and learn how to crochet? You are? Well let’s get to it!
Yarn 101
Before we learn how to crochet, I think it is important to go over some basics about yarn. Yarn is made from three main fibers; animal, synthetic, and plant. Animal fibers include wool, alpaca, Angora, silk, and cashmere.
Animal based fibers require more care than synthetic or plant fibers. Projects made with animal based fibers usually need hand washing and should also be blocked to open up the stitches and shape the fabric. Wool and other animal fibers create a soft lofty fabric perfect for garments and afghans.
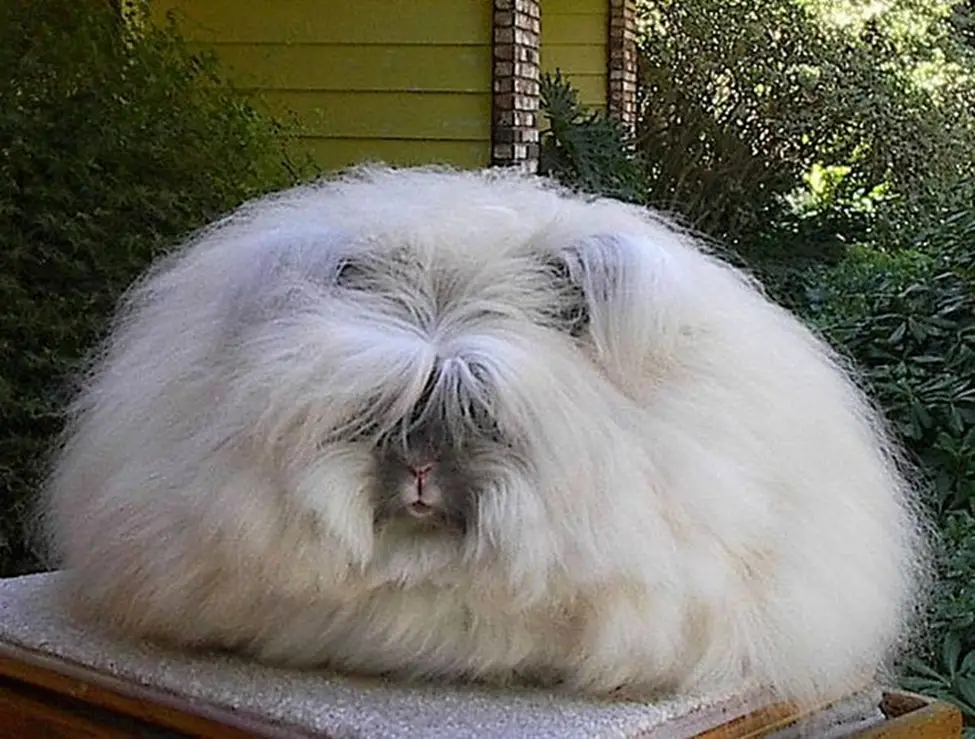
Angora Rabbit
Synthetic fibers include acrylic, polyester, nylon, and microfiber. Synthetic yarn is budget friendly and today’s synthetic yarns rival wool and other natural fibers. You can machine wash and dry projects made with synthetic yarn, so they are perfect for a wide variety of projects. Synthetic yarns come in almost any color imaginable as well as many variegated shades.
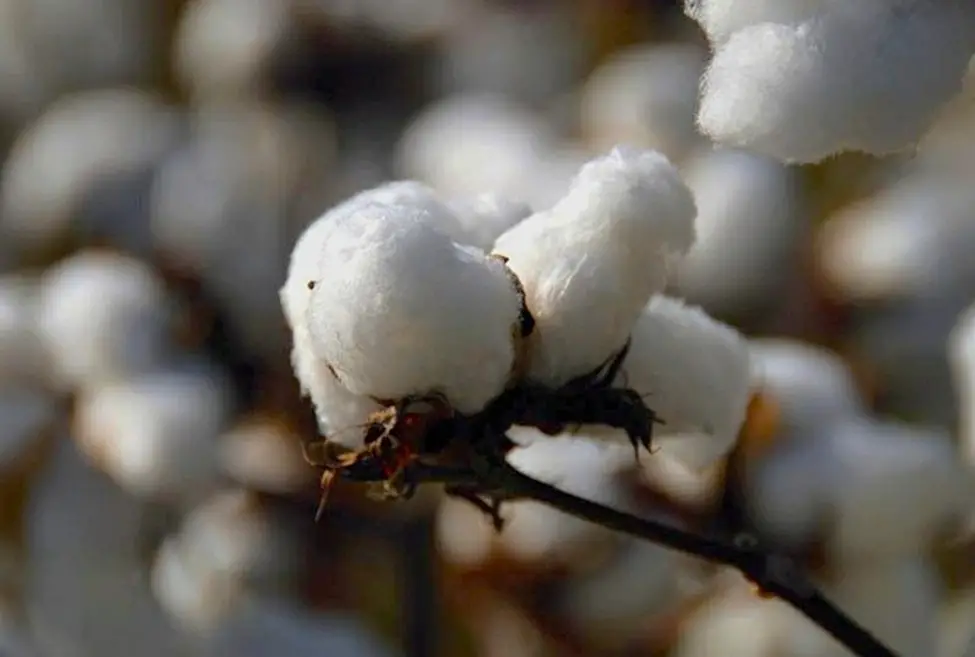
Plant fibers include cotton, hemp, linen, and bamboo. Cotton yarn is a popular choice for dishcloths and washcloths since it naturally absorbs water. Linen yarn is a good choice for summer garments as it wicks away moisture. Bamboo creates a detailed and intricate stitch definition. Most plant based yarns can be machine washed and dried. Depending on the pattern, they may or may not need blocked.
Fibers arrive at the yarn manufacturer in large bales. The fibers may or may not be dyed prior to arriving at the factory. They must be sorted and spun several times to create the yarn we find at our favorite store. Today most yarn does not have a dye lot. Check the label and if the yarn does have a dye lot, be sure to purchase more than you need so that the color of your project is uniform.
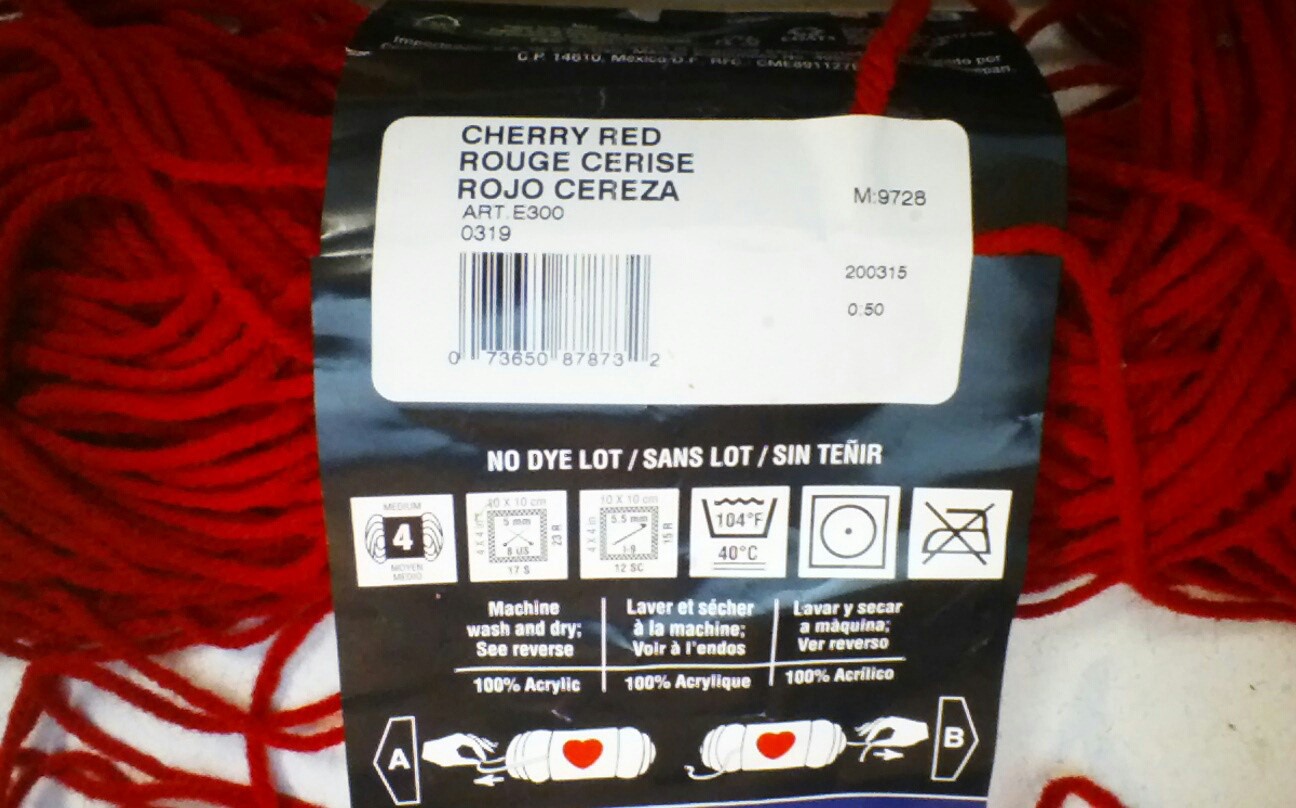
The yarn label shows the information you need to choose the correct yarn for your project. On it you will find the fiber, weight, gauge with the recommended hook size, and care instructions.
In the following image you can see this is a medium, weight class 4, acrylic yarn. The recommended hook size is I/9. This will give you a gauge of 5 stitches and 12 rows in a 4 by 4 swatch of fabric. Looking at the care symbols lets us know the yarn may be machine washed and dried, but not ironed or bleached. A complete list of laundry care symbols is available at the Lion Brand site.
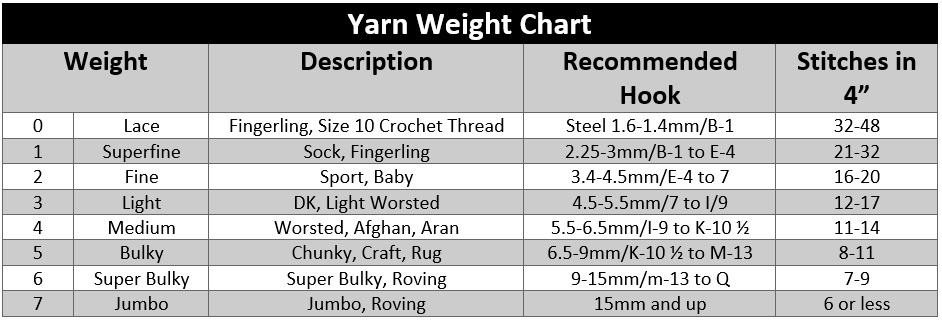
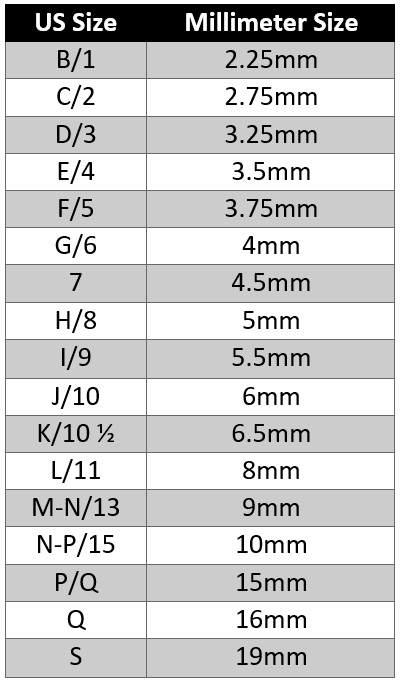
Yarn also comes in several weight classes from very fine to very bulky. Here is a handy table for you to refer to:
Crochet Hooks
Crochet hooks are pretty straight forward, but I wanted to go over some basic information you need to know.
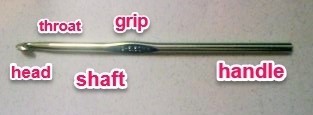
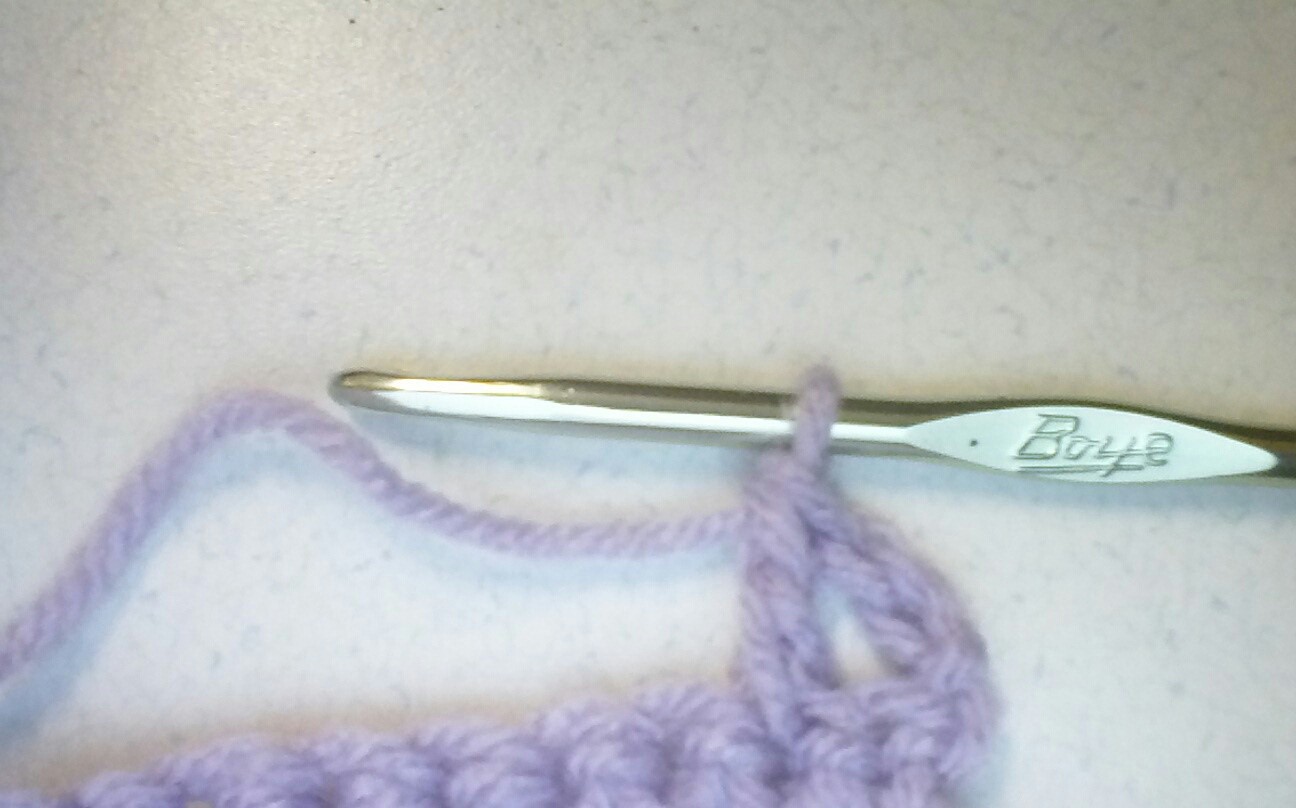
Hooks come in many different sizes from very small steel hooks used for crochet thread to very large hooks used with bulky yarn. Hooks in the US are sized with a letter and number. For example, the hook in the above image is an I/9 hook. It can also be sized using millimeters, 5.5 mm. Hooks in the UK and other countries are sized using millimeters.
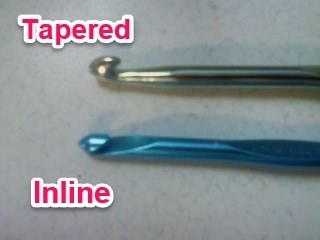
Hook heads are either tapered or inline. Tapered hooks have more of a curved head while inline heads have sharper edges. Both hook types create the same stitches, so it is a matter of personal preference on which one you use.
Getting Started
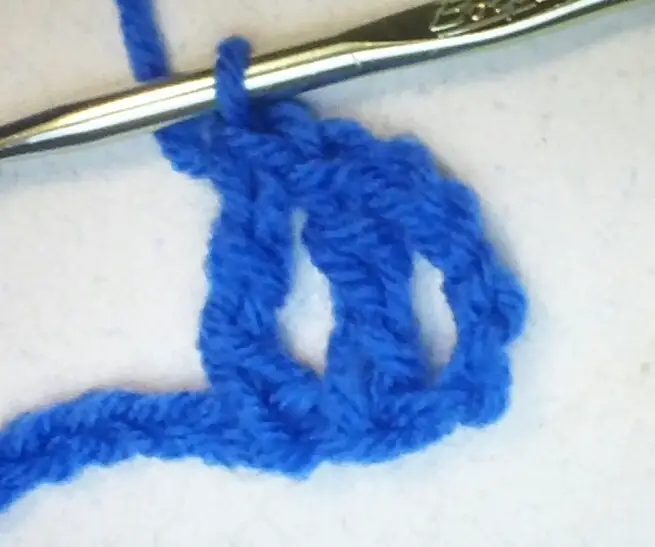
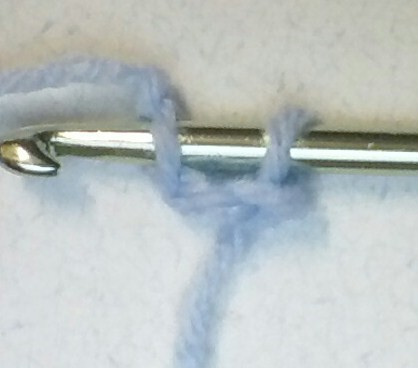
Before you can crochet, you need to have a foundation chain. Create a slip stitch and place it on the hook. Draw the yarn through the loop on your hook. This is a chain stitch. Continue to crochet chain stitches until you have the correct number for your project.
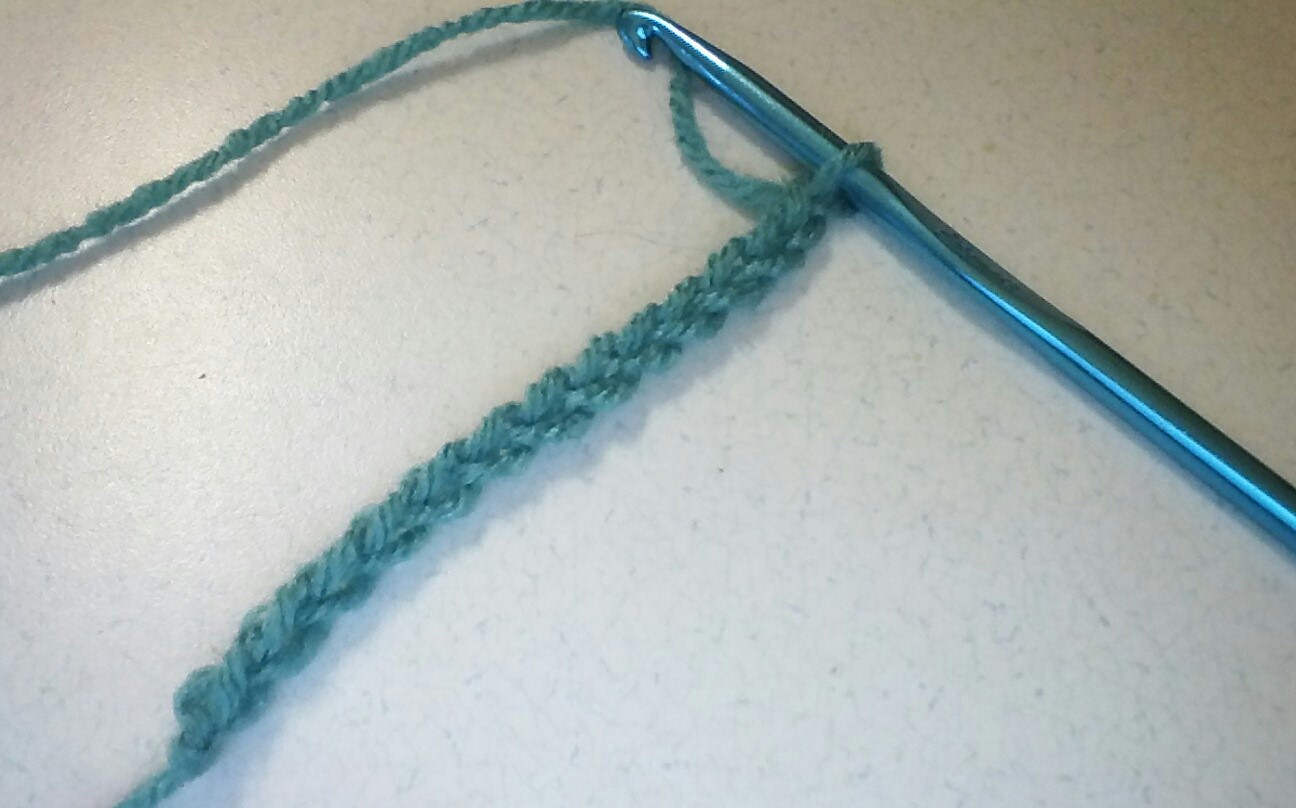
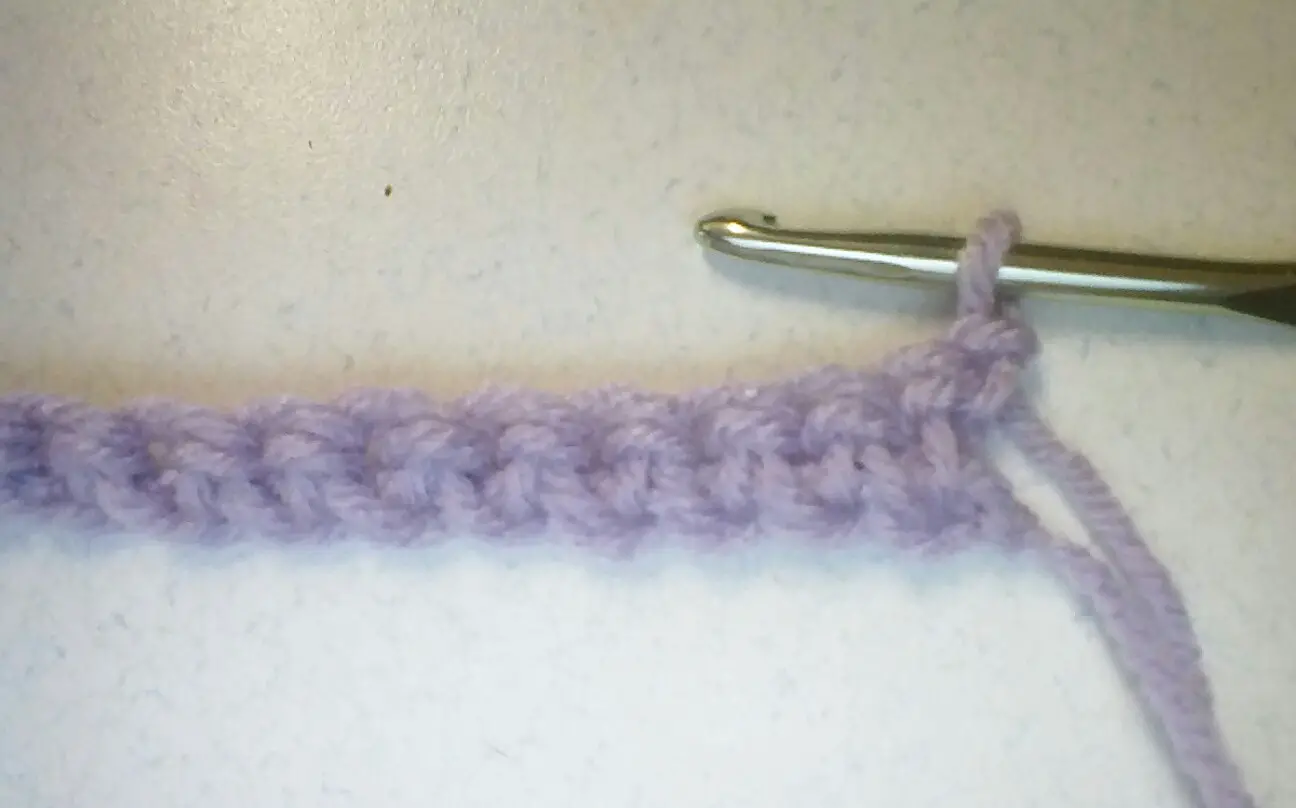
Concentrate on crocheting the stitches uniformly. Don’t worry about speed, it will come with practice. Your chain should look something like the image above.
Once you have the correct number of chain stitches, you are ready to begin the first row. At the beginning of each row you will chain a specific number of stitches and count these as the first stitch in the row.
Single crochet – 1 chain stitch
Half double crochet – 2 chain stitches
Double crochet – 3 chain stitches
Treble crochet – 5 chain stiches
Turn the chain and skip the appropriate number of stitches for the first stitch. For example, if you are using double crochet insert the hook into the 4th chain stitch. The first 3 stitches are skipped and considered the first stitch. If you are using single crochet, you will only need to skip 1 chain stitch and insert the hook into the 2nd chain stitch. You will do this at the beginning of each row.
Single Crochet
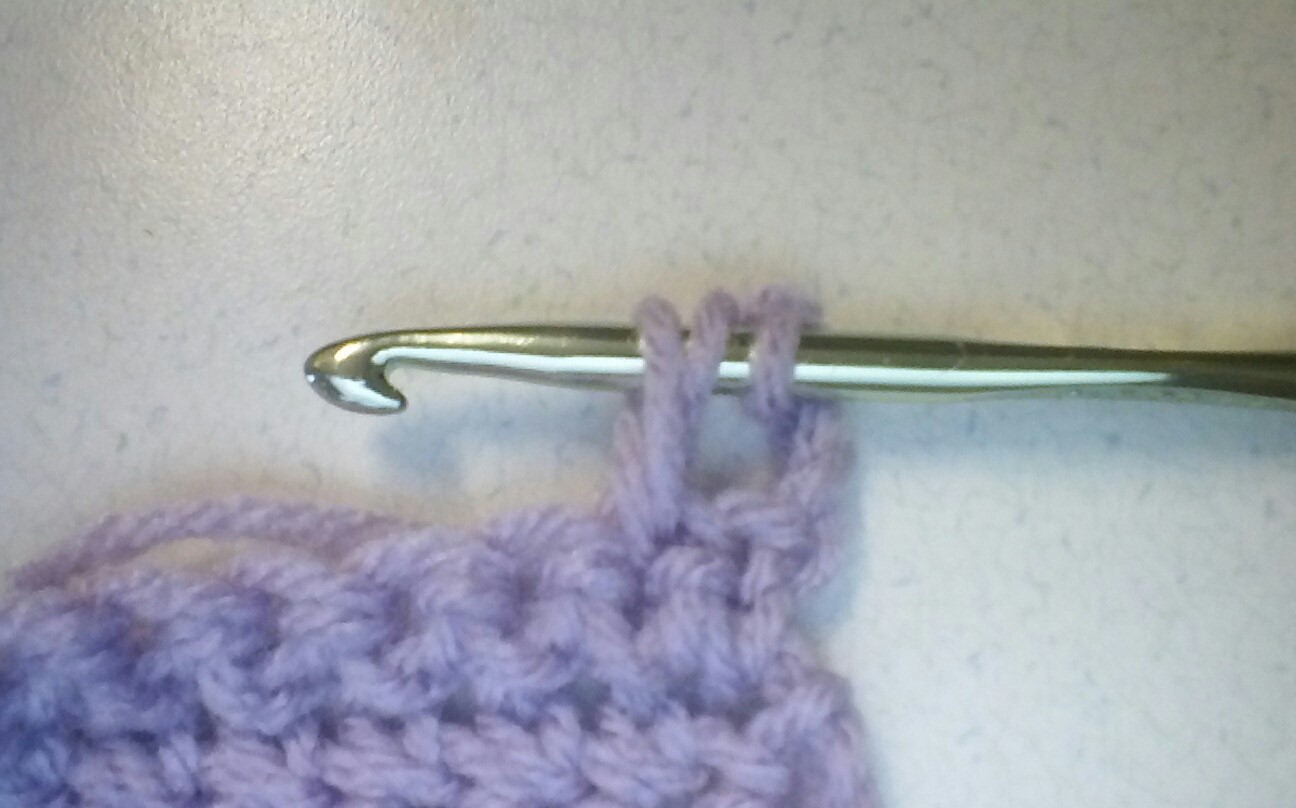
Begin a new row with chain 1. Insert the hook into the next stitch, not into the base of the chain 1. Draw the yarn through the stitch. You now have 2 loops on the hook. Draw the yarn through both loops to complete the stitch. Insert the hook into the next stitch and continue across the row. Work the last stitch into the chain 1 of the previous row. Turn your work and chain 1 to begin a new row.
Single crochet row
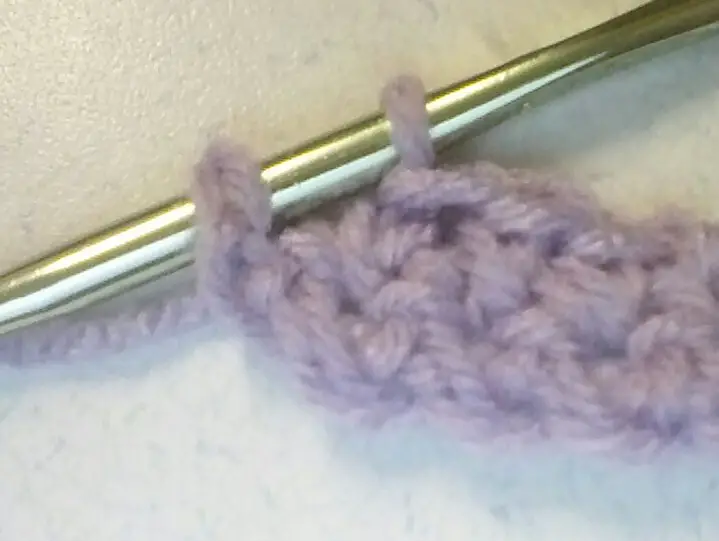
Work the last stitch in the chain 1 of the previous row.
Double Crochet
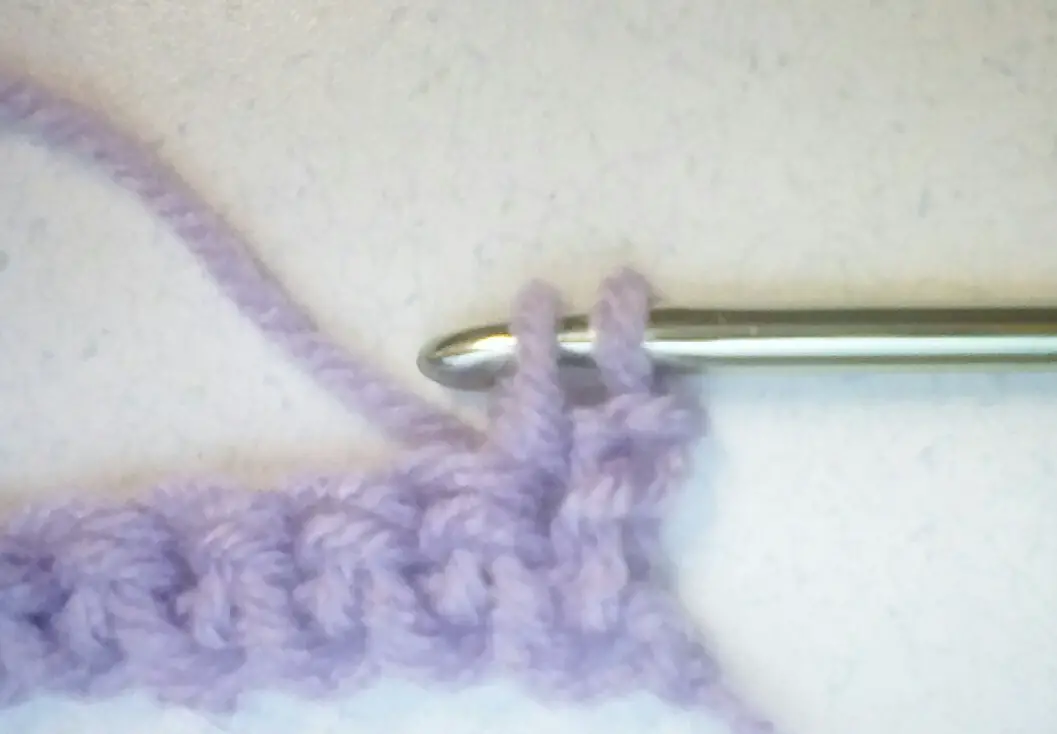
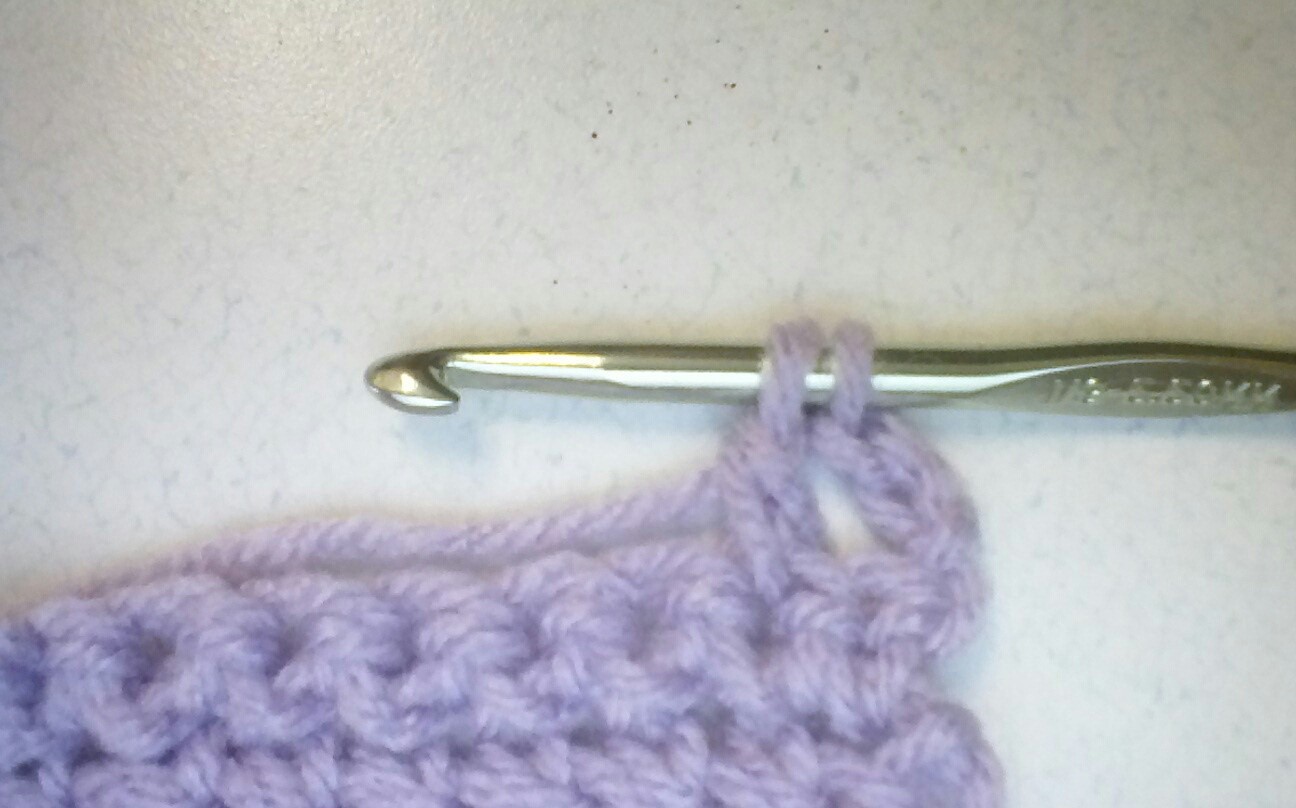
To begin a double crochet row chain 3. This counts as the first stitch. Yarn over the hook and insert the hook into the first stitch. Yarn over and pull the yarn through the stitch. You will have 3 loops on the hook. Yarn over and pull through the first 2 loops. Yarn over and pull through the last 2 loops to complete the stitch. Work across the row and work the last stitch into the 3rd chain stitch of the previous row. Turn your work and chain 3 to begin a new row.
Half Double Crochet
Begin a row of half double crochet by chaining 2. Yarn over and insert the hook into the first stitch. Yarn over and pull the yarn through the stitch. You will now have 3 loops on the hook. Yarn over and pull the yarn through all 3 loops at once to complete the stitch. Work across the row working the last stitch into the 2nd chain stitch of the previous row. Turn your work and chain 2 to begin the next row.
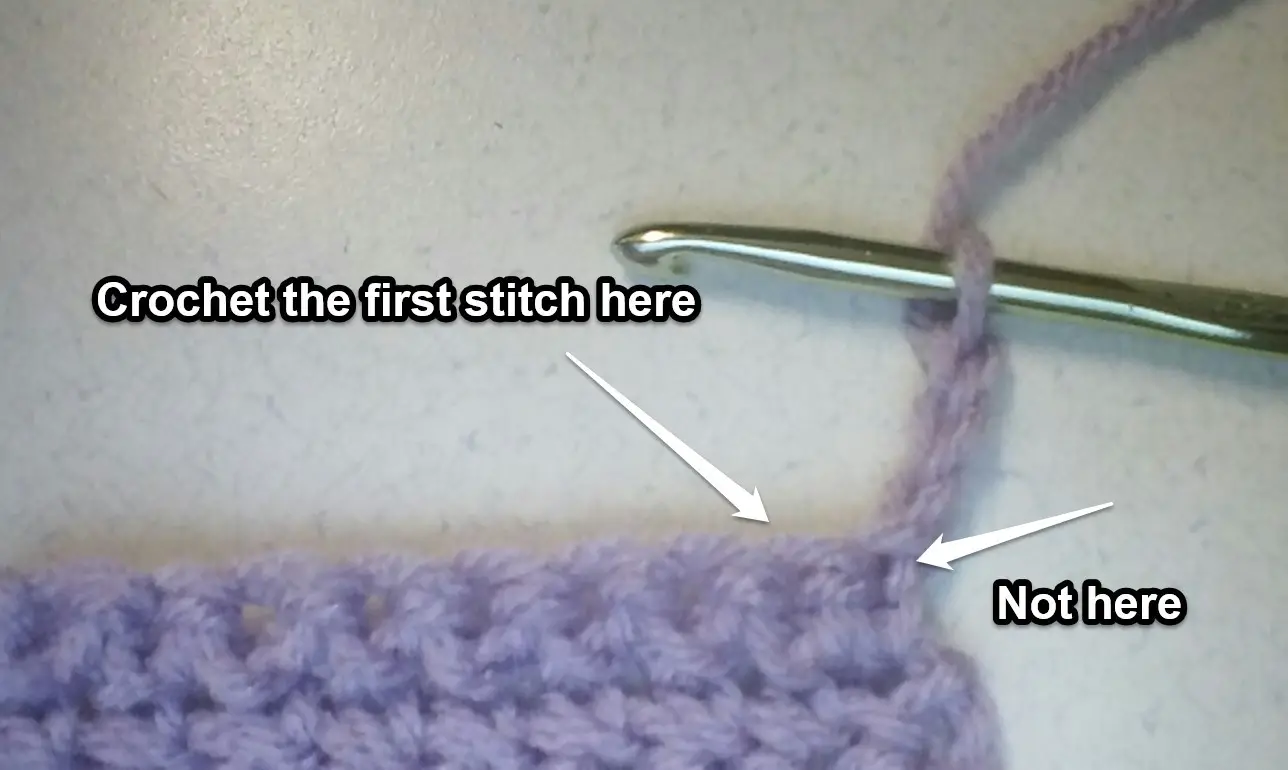
Be careful to insert the hook into the first stitch, not the base of the chain stitches. This will keep your sides nice and straight and give you the correct number of stitches per row.
Treble Crochet
To begin a treble crochet row, chain 5. Yarn over twice and insert the hook into the first stitch. Yarn over and pull through the stitch. You will now have 4 loops on the hook. Yarn over and pull through the first 2 loops, yarn over and pull through the next 2 loops, and finally yarn over and pull through the last 2 loops to complete the stitch. Work across the row and crochet the last stitch into the 5th chain of the previous row. Turn your work and chain 5 to begin a new row.

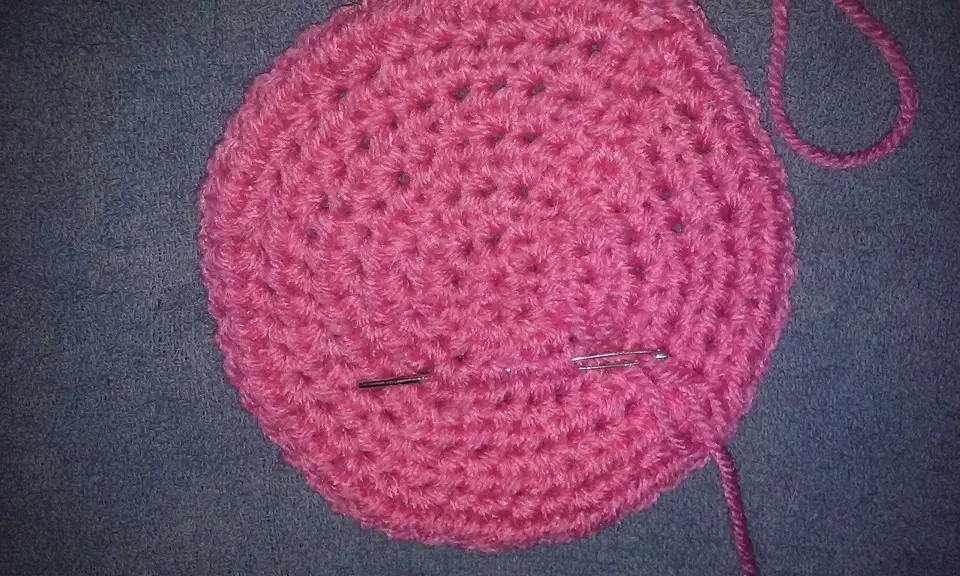
Crochet in the Round
Projects like hats and Granny squares are crocheted in the round. Instead of crocheting in rows and turning your work, you crochet around and around joining the yarn in the first chain stitch of the round.
Begin by chaining the appropriate number of stitches called for in the pattern. For example, chain 4 and slip stitch (insert the hook into the stitch and draw the yarn through the stitch and through the loop on the hook) into the first chain stitch to join the circle.
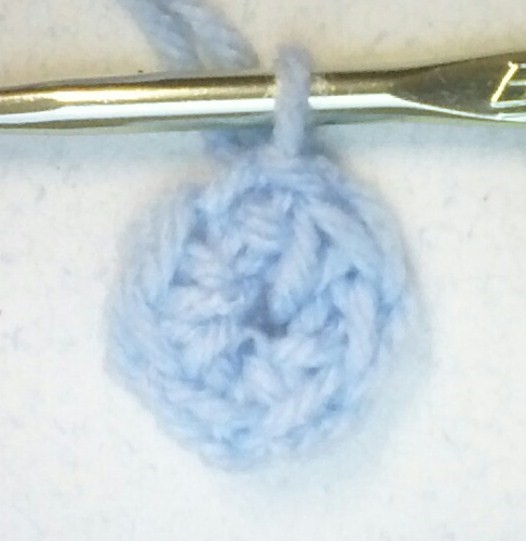
Work the first round of stitches into the circle, not the chain stitches. Slip stitch into the chain stitch of the round to complete the round. Work each round according to the pattern and slip stitch into the chain stitch of the beginning chain to complete each round.
Weaving in the Tails
When you need to cut the yarn, leave at least 6 inches so you can weave the tails in securely. Thread a tapestry needle with the tail and weave it in and out of the stitches on the wrong side of the fabric for a few inches. Turn your work and weave the tail in and out of the stitches for another few inches. Turn your work one more time and weave the tail in and out. You may now cut the tail without worrying about it becoming loose and unraveling your work.
Crochet Abbreviations and Crochet Terms
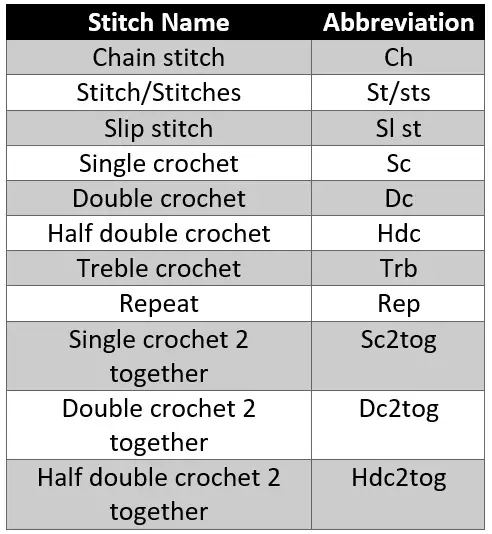
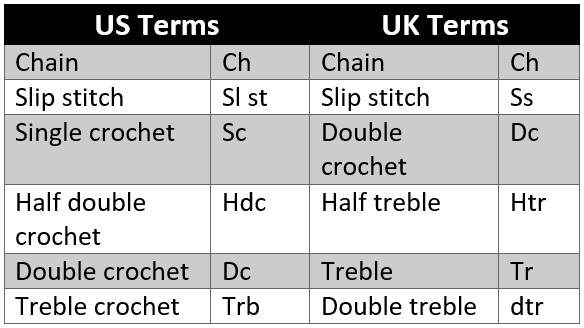
Designers use a standardized set of abbreviations when writing patterns. These make patterns easier to read and shorter than if every stitch and term were written out. Here is a table of the most commonly used abbreviations.
With the popularity of free and paid patterns online, you may find patterns written in UK terms. A US single crochet is a UK double crochet. This makes a world of difference when working a pattern written with UK terms.
Repeats in patterns are denoted by asterisks, parentheses, or brackets. Work the stitches between these as many times as stated in the pattern. For example, ch3, dc into the next 3 sts *sk 1 st, 3dc into the next st* rep to last st, dc.
This example is worked by chaining 3, work a double crochet into each of the next 3 stitches. This begins the stitch repeat. Skip 1 stitch and work 3 double crochet into the next stitch. Crochet skip 1 stitch and work 3 double crochet into the next stitch until you come to the last stitch. Double crochet into the last stitch to complete the row.
End Notes
Thank you for stopping by today. I hope this tutorial helps you learn the basic crochet stitches you need to begin your adventure in crochet. Please feel free to ask any questions you may have in the comments. I will do my best to answer them.
Until next time, take care and keep on hooking!
Check back for our second installment coming soon!
If You Enjoyed this Article Please Share and Pin. It is Greatly Appreciated. 🙂


