Hello and welcome back to our crochet tutorial series. In the first installment, we learned basic crochet stitches, crochet hooks, and their sizes, basic crochet terms and abbreviations, and how to weave in the tails of your project so they won’t come unraveled. If you need to catch up, check out my last post Crochet Tutorial #1 – Basic Crochet Stitches.
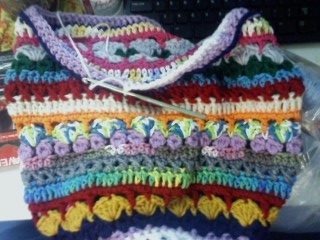
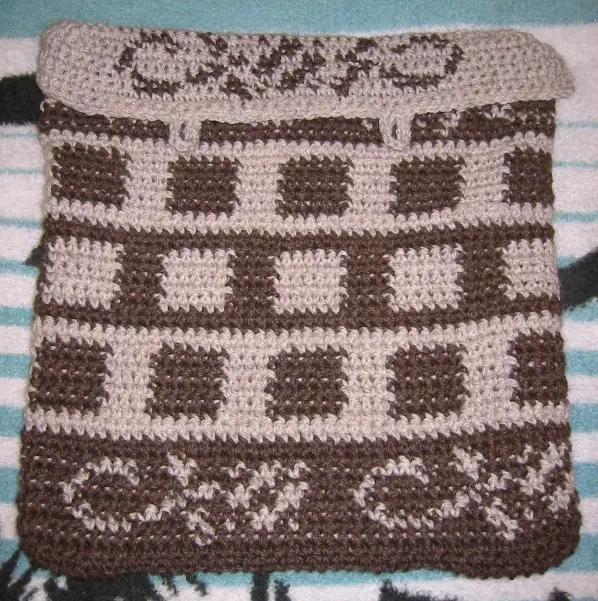
Today we’re going to learn about working with color in your crochet projects. I love color! One of my favorite projects I made is a bag made with leftover yarn. I took the bits and pieces of leftover yarn and just went with it. I used different stitches so not only is it very colorful, but it has lots of texture.
You may think working with color in crochet is hard. It really isn’t. Changing colors is pretty straightforward. We’ll not only learn how to change colors and carry them up the side of your projects, but we’ll go over some of the most popular types of crochet colorwork. Intarsia, Fair Isle, and Tapestry all use color but with different techniques. My hope is that this post will give you the knowledge and confidence to have fun with color and crochet. Ready? Let’s get started!
Basic Color Theory
Artists and designers use the basic color theory as a guide when choosing colors for their projects. Colors are divided into three main categories.
Primary colors – blue, red, yellow
Secondary colors – orange, green, violet
Tertiary colors – yellow-orange, yellow-green, red-orange, blue-green, red violet, blue violet
All colors have several shades and tints ranging from deep saturated color to pale pastel color.
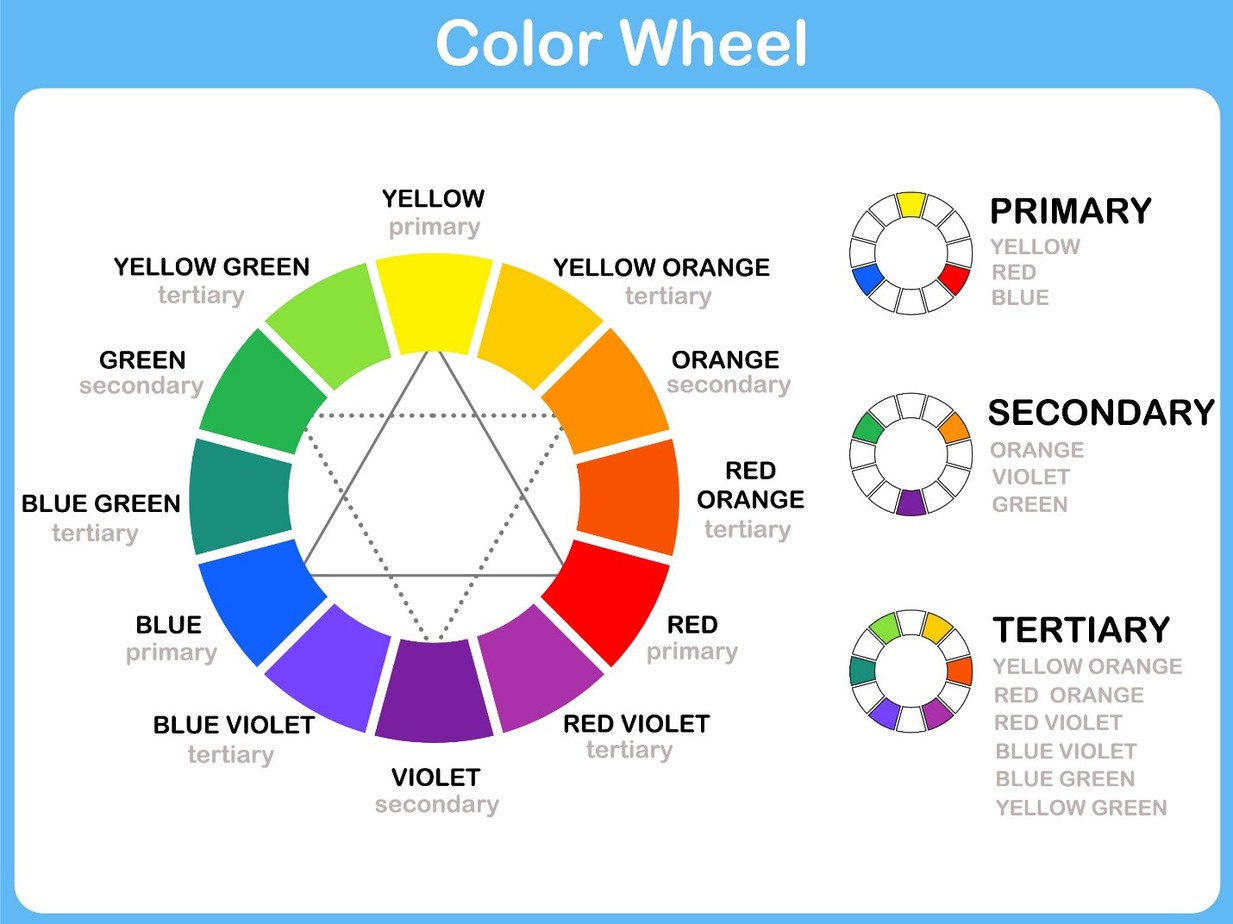
When choosing a color palette use the color wheel as a guide. Colors that are opposite on the color wheel are known as complimentary colors. Examples include red/green, orange/blue, and violet/yellow. If you choose to use a complimentary color scheme add a neutral color to balance it out. Neutral colors include white, black, and gray.
If you want to create a serene color palette you may want to use an analogous color scheme. Analogous colors are next to each other on the color wheel. Choose one color to be dominant and the other two colors as complements.
A triadic color scheme uses colors that form a triangle on the color wheel. They are evenly spaced out on the wheel. An example of this type of color scheme is green, orange, and blue.
Green, red-violet, and red-orange is an example of a split-complementary color palette. This color scheme uses a base color and two colors adjacent to its complementary color.
A rectangle, or tetradic, color palette uses two pairs of complementary colors that form a rectangle on the color wheel. This is a very vibrant color scheme and an example is red, green, blue, and orange. Choose one to be dominant for balance.
A square color palette uses four colors evenly spaced on the color wheel to form a square. Red, yellow, green, and blue is an example of a square color palette.
Don’t feel like you are locked into these color palettes. I find inspiration everywhere for color in my crochet projects. If you like certain colors together, use them. You’re the artist, let your creativity be your guide.
Changing Colors in Crochet
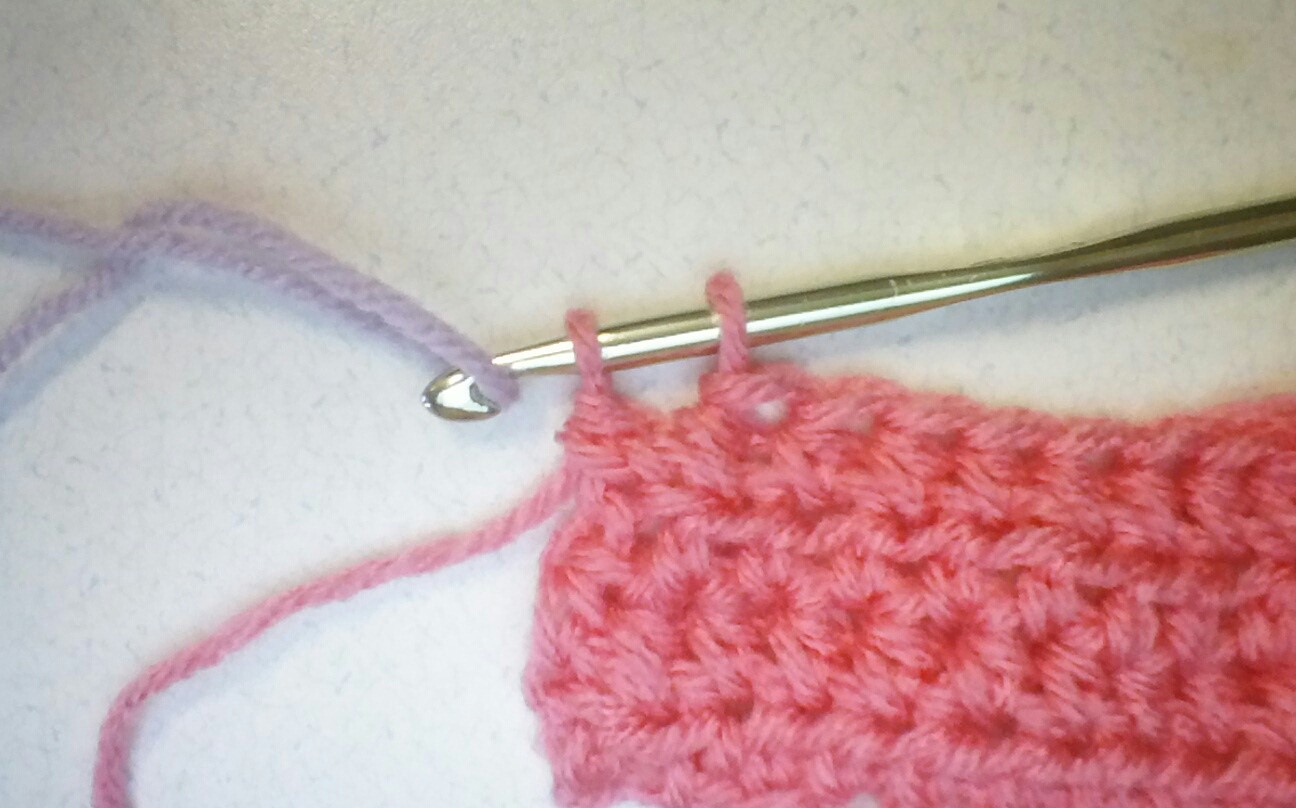
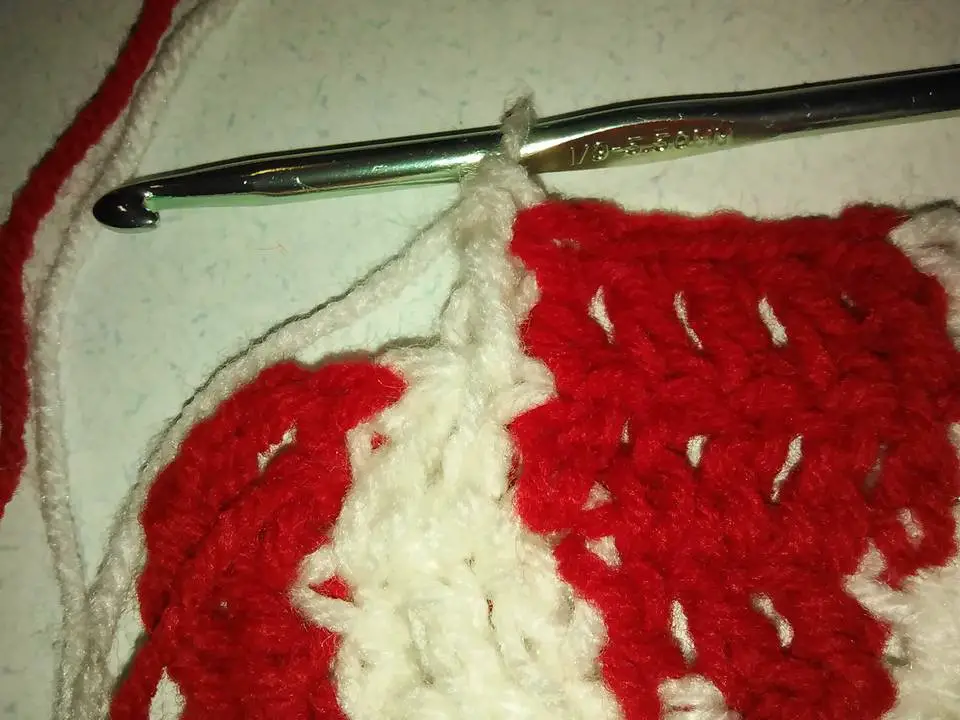
Changing colors in crochet is very easy. When you are ready to change colors work the last stitch of the old color until you have 2 loops on your hook. Pull the new color through these 2 loops and then crochet with the new color. If you need to cut the old color, leave at least a 6-inch tail so you can weave it in securely. Use this technique in a row or round and at the end of a row.

Work the old color until you have 2 loops on the hook.
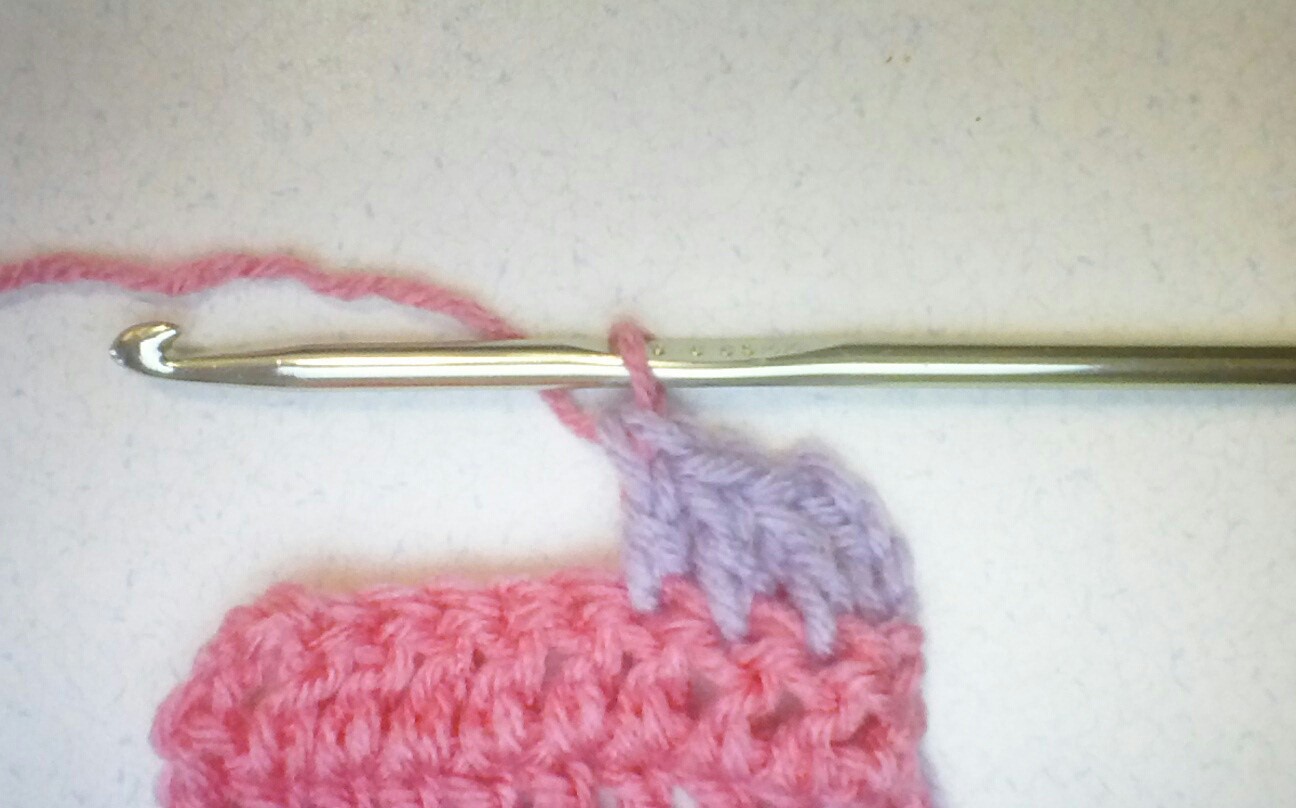
Pull the new color through the 2 loops.

Continue with the new color.
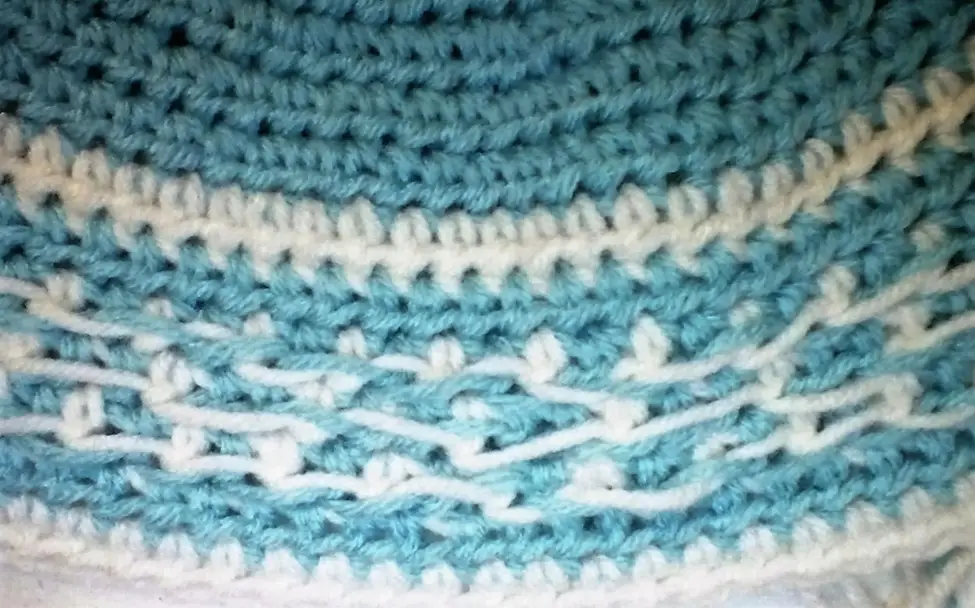
For projects where you will be changing the colors every other row, or every few rows, you can avoid a mess of tails by carrying the colors up the side of the project. Work the last stitch of the row until you have 2 loops on the hook. Pull the new color through these loops, turn your work, capture the old color under the chain stitches for the new row. This carries the color up the side of the project so that it is ready when you need it again. Don’t pull the yarn too tightly as this will cause the sides of your fabric to pucker. But on the other hand, don’t let the yarn sag or your work will look messy.
Work the last stitch until you have 2 loops on the hook.
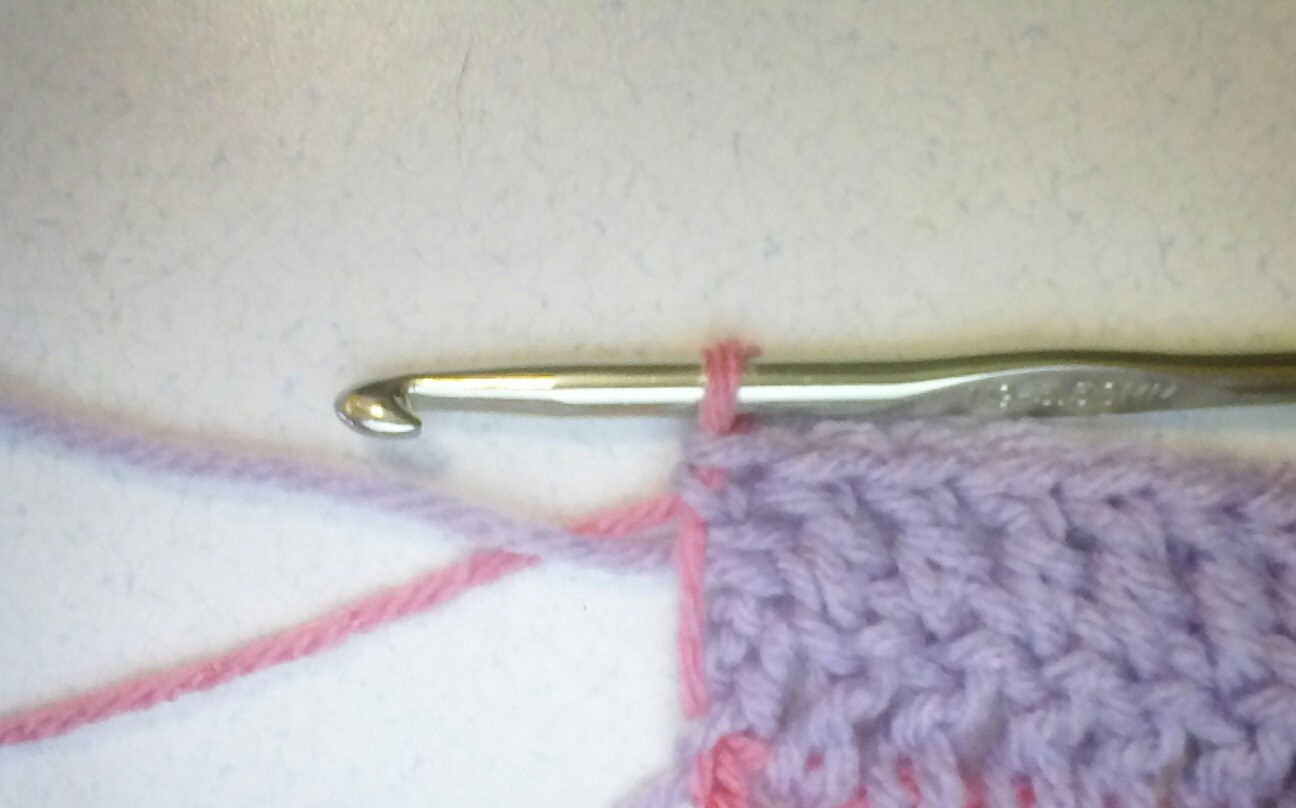
Pull the new color through the 2 loops.

Capture the old color in the first chain stitch of the next row.
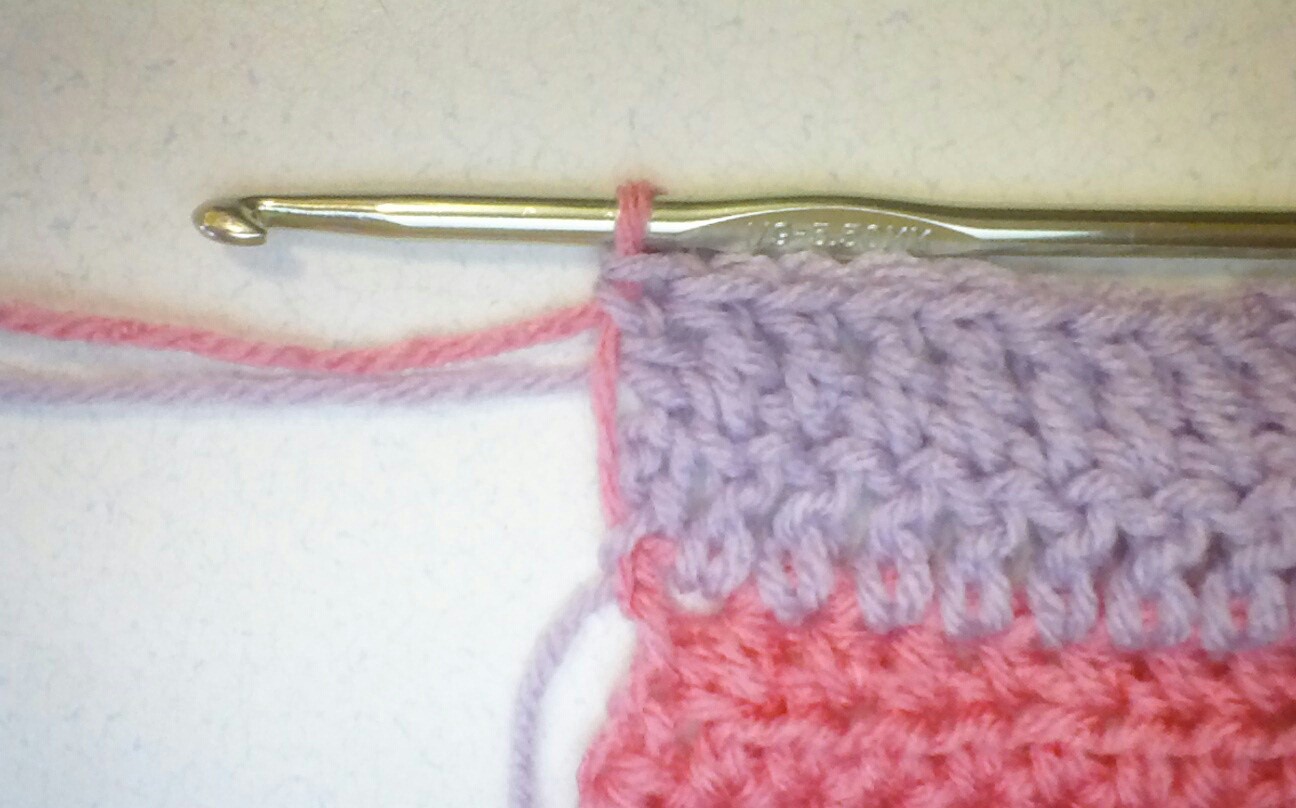
Carry the colors up the side of your fabric.
Use the same technique if you are crocheting in the round. Carry the colors up the wrong side of the fabric as you work.
When working on motifs, such as Granny squares, change colors at the beginning of a new round. Create a slip knot and place it on the hook. Insert the hook into a corner and pull the yarn through the slip knot. This anchors the new color onto your project. You may now chain the appropriate number of stitches to begin a new round. When you reach the end of the round, slip stitch into the top chain stitch of the beginning chain. Pull up at least 6 inches before you snip the yarn to give yourself a nice long tail to weave in.
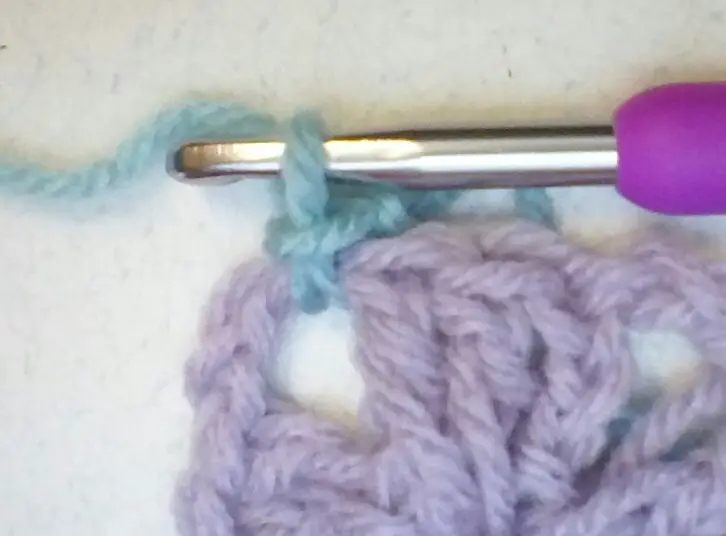
Attach a new color with a slip knot and a slip stitch.
When working with Granny squares you may notice the center of the square is crooked. This is a natural occurrence because of the way the tension of the yarn works. If you want perfectly square Grannys, turn the Granny each time you begin a new round. This will help keep the Granny square. I like the wonky centers, but it is up to you which look you prefer.
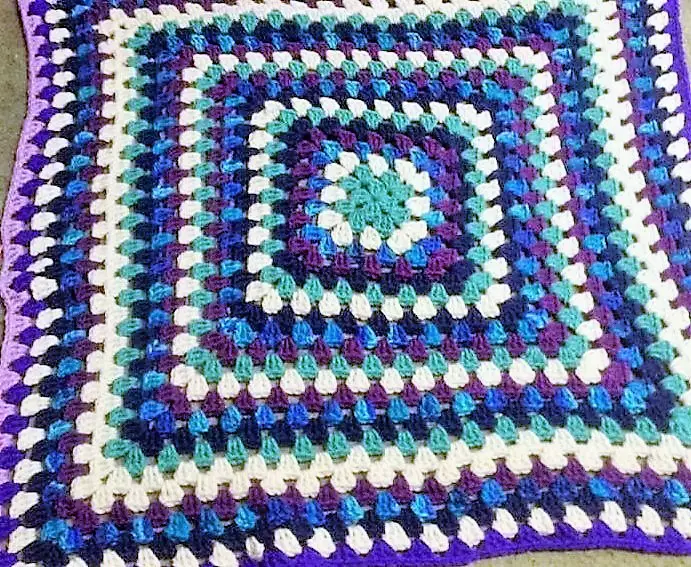
My wonky-centered big Granny lapghan I made a while back.
Intarsia Crochet
Intarsia crochet is a technique used to create pictures in crochet fabric. It is used to create simple or very detailed images and it is a lot of fun. Intarsia uses crochet charts as patterns. For each color change you will need a bobbin of color. Wind up enough yarn to create a small bobbin of color for each color change in the pattern. As you work you will pick up the new color and let the old color rest until you come back across the row and need it again.
For example, if you are working across a row and need to change colors, work until you have the last 2 loops of the old color on your hook. Drop the old color and pull it to the front of the fabric and leave it there. Do not cut the yarn. Work with the new color until you come to the next color change. Change colors and bring the old color to the front of the fabric. When you come back across the row the colors will be on the wrong side of the fabric ready for you to use. The hardest thing about Intarsia crochet is keeping your bobbins and yarn for getting tangled. Take the time at each row to untangle and fix the yarn bobbins to avoid a huge mess. Images produced with Intarsia crochet will look a bit pixelated. This is natural because of the nature of crochet stitches. Keep the edges of your images clean by capturing the old color under the stitch of the new color. This also anchors the yarn and makes for a neater project.
Fair Isle Crochet
You’ve probably heard of Fair Isle knitting. Did you know you can also use this technique in crochet? Well, you can. Colors are carried across the row anchored under the old color as you go.
For example, if you are using 2 colors work the first color until you have 2 loops on the hook. Pull the new color through the 2 loops, place the old color over the new color, and anchor it in the next stitch. Carry the old color along the back of the fabric until you need it again and change colors. The unused color is always anchored in the first stitch of the new color to carry it across the row. Do not pull the yarn up tightly as this will pucker and pull your work. Let the yarn have some slack, but not too much. Avoid carrying the yarn more than 3 stitches.
The unused yarn is carried along the wrong side of the crochet fabric.
Fair Isle patterns normally use up to three colors at once. Any more colors and the fabric would be bulky and hard to work with. Fair Isle patterns use graphs as patterns and can be very basic, or very complicated. I find Fair Isle a fun and interesting color technique. One other perk is you can take a knitting Fair Isle pattern or a cross stitch pattern and use it for Fair Isle crochet.

Here is a pretty example of Fair Isle hand warmers.
Tapestry Crochet
Tapestry crochet is a fun color technique used to create pictures and patterns in crochet. Most projects use a very vibrant color scheme since the technique creates clean color changes. Instead of using bobbins or carrying the colors along the wrong side of the fabric, Tapestry crochet carries the colors within the row under the stitches of the active color.
Change color as usual, working the new color into the last 2 loops of the old color, and capture the unused color under the stitches of the active color. Each time you need to change colors, simply pick up the new color and begin working with it carrying the unused color within the stitches of the active color. It is natural to see some of the unused color peeking through the stitches.

Tapestry crochet projects are reversible. The pattern creates a design on the right and wrong side of the fabric since the yarn is carried within the stitches, there are no loose tails where the colors are changed. Completely change a color by swapping it out at the end of a row.
Color Charts
Crochet colorwork normally uses crochet charts. Charts are very easy to use once you understand how they work. The foundation chain is not included in a crochet color chart. The first row is worked from the right to the left and the next row is worked from the left to the right. All odd rows are then worked from the right to the left, and all even rows are worked from the left to the right from the bottom to the top of the chart.
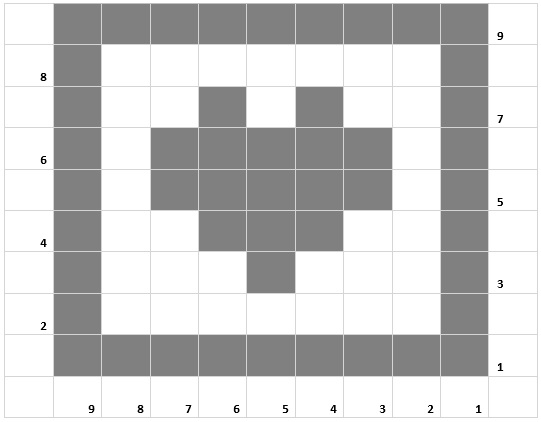
In this example of a simple heart pattern, you will notice the designer numbered the rows on both sides of the chart. This is to make it easier for you to keep track of which row you are working on and remind you which direction to work in each row. I find it useful to use a ruler or highlight to mark which row I’m working on.
You’ll also note the foundation is 9 stitches. This means if you’re using single crochet you’ll need to chain 10 to compensate for the first stitch (9 sts plus 1 for the first stitch). If you’re using double crochet, you’ll need to chain 12 stitches and begin crocheting into the 4th chain stitch to create the first double crochet stitch. Since the foundation stitches are not included you’ll need to take into consideration which stitch you’re using and how many extra chain stitches you’ll need to have the correct number of foundation stitches.
End Notes
I hope this quick tutorial on crochet colorwork has helped you learn the basics and given you the skills you need to have fun with color. Later I plan on posting actual projects using these color techniques, so be sure to check back often. Please post any questions you may have in the comments. I will do my best to answer them, plus I’d love to hear any feedback you have. Tell me how to make this blog better, and if you have anything specific you’d like me to cover.
Thanks for stopping by and be on the lookout for our next tutorial. Take care and until then, keep on hooking!
If You Enjoyed this Article Please Share and Pin. It is Greatly Appreciated. 🙂


