
Hello and welcome! Thanks for stopping by today. Crochet Entrelac has always been a challenge for me to master. I’ve watched several videos showing how to crochet the Entrelac technique and practiced several times in an effort to get the hang of it. I could do it, but my projects just didn’t look neat or finished. Finally, it clicked!
Today I want to share with you how to crochet the Entrelac technique. We’ll learn how to get started and I’ll share some tips I’ve learned to make crocheting the Entrelac technique easier and make your projects look more polished and finished.
Crochet Entrelac Construction
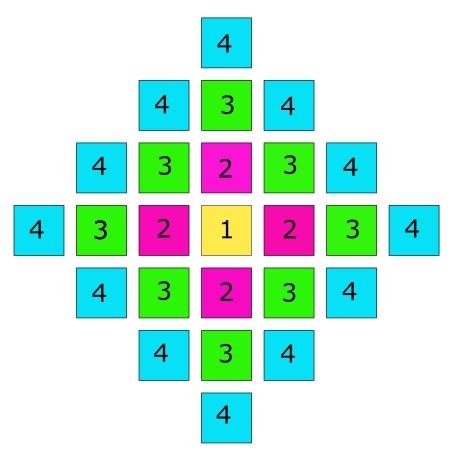
Entrelac projects are crocheted around a center square. Each tier works upon the edges of the last one. You add tiers until you have the size you want and then work in the corners to even out the shape. I know this sounds weird, but as you begin to work, and your project takes shape it will make more sense.
Take a look at the illustration below. The pattern begins with a center square. The next tier is then crocheted on the four sides of this square. Tier 3 is crocheted onto each side of tier 2. The tiers keep going around and around until you reach the desired size. The corners are worked separately to create a square.
By crocheting one at the beginning of each row in a square, a neat border is created. You can then add a border, or leave it as is. Personally, I think a border pulls the project together and helps give it shape.
There is an Entrelac crochet technique for crocheting in rows, but this tutorial is for the traditional technique. I may cover the Entrelac in rows pattern in a later blog.
For this tutorial, I have used squares that have 7 rows. There isn’t a set number of rows, you can make them as large or small as you want. I wouldn’t make them smaller than 5 rows, or they would be hard to work with.
Body of project
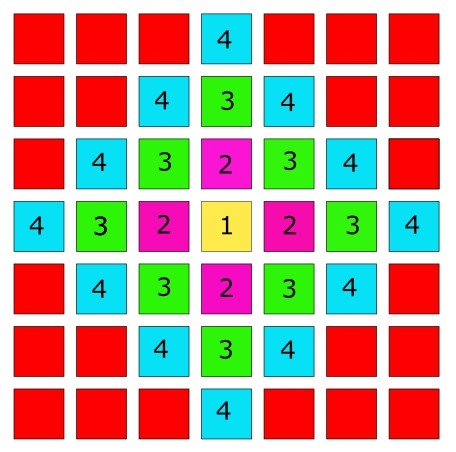
Corner sections are worked separately, not in tiers
Entrelac Crochet Pattern
Let’s jump in and begin. I used Premier Home cotton/poly blend yarn and a J/10 6mm hook. You can use any yarn and hook size you are comfortable with, but for your first project, I would recommend a medium weight yarn and a slightly larger hook than the gauge for the yarn calls for.
Square 1: Chain 7
Turn the chain on the side and look for the bumps on the spine of the chain. This is where we will be inserting the hook. The rows in the squares are worked in two steps. The forward row and the return row. A row is not complete until the return row is completed.
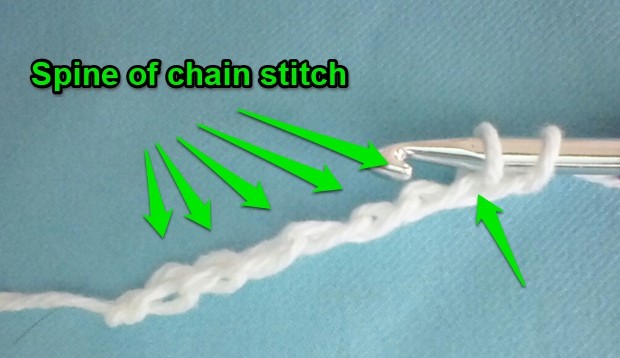
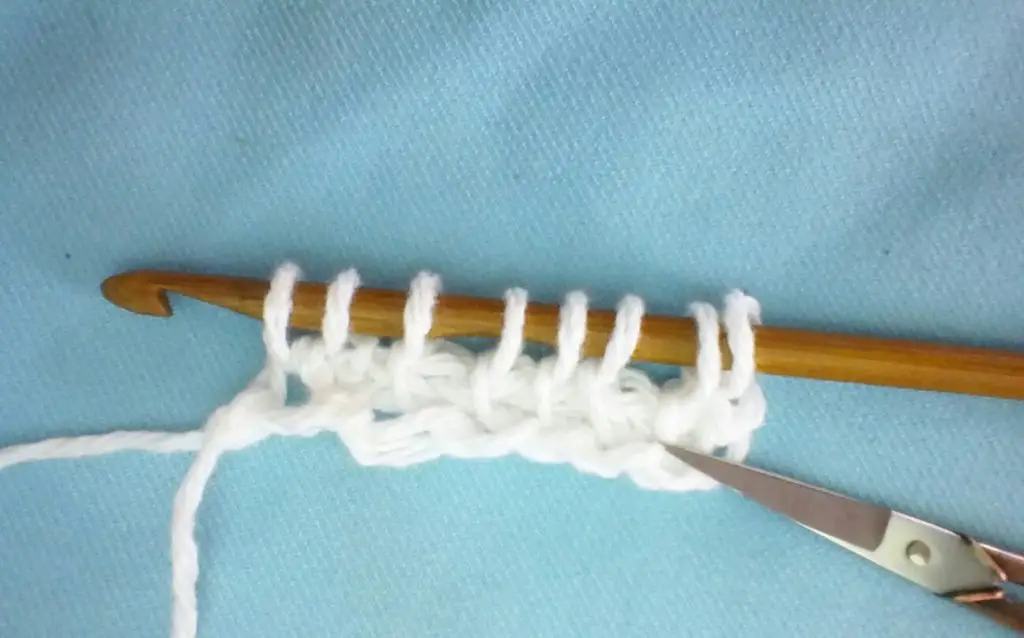
Row 1: Forward Row (FR): Insert the hook into the first bump of the spine and draw the yarn through it. Insert the hook into the second bump of the spine and draw the yarn through, keep both loops on the hook. Continue until you have 7 loops on the hook and you are at the end of the chain.
Return Row (RR): Draw the yarn through the first 2 loops on the hook. Draw the yarn through the next 2 loops on the hook. Continue to draw the yarn through 2 loops on the hook until you reach the end of the return row and have only 1 loop on the hook.
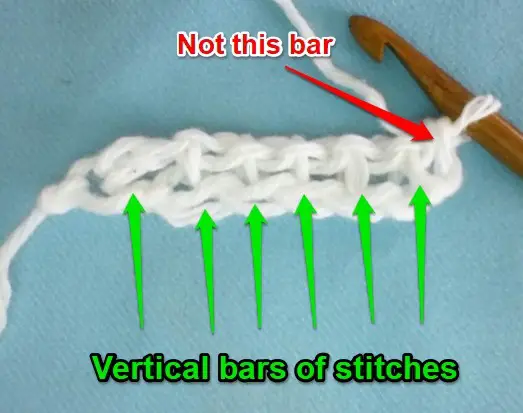
Row 2: FR – Chain 1, insert the hook under the first vertical bar, yarn over and draw yarn through, leave the loop on hook. Insert the hook under the next bar, yarn over and draw the yarn through, leave the loop on hook. Continue to the end of the row, insert the hook under the last stitch, draw yarn through. You should now 8 loops on the hook.
The loops on each end create the side borders, and the 6 loops between the create the bulk of the fabric. You should always have 6 bars in each row lined up on each other. If you don’t, you’ve missed a stitch.
Forward row
RR: Chain 1. Yarn over and draw the yarn through the first loop on the hook. Draw the yarn through the next 2 loops on the hook. Continue across the row drawing the yarn through 2 loops at a time until you have only 1 loop on the hook.
Return row
Rows 3-6: Repeat forward and return rows
Row 7: Repeat forward row
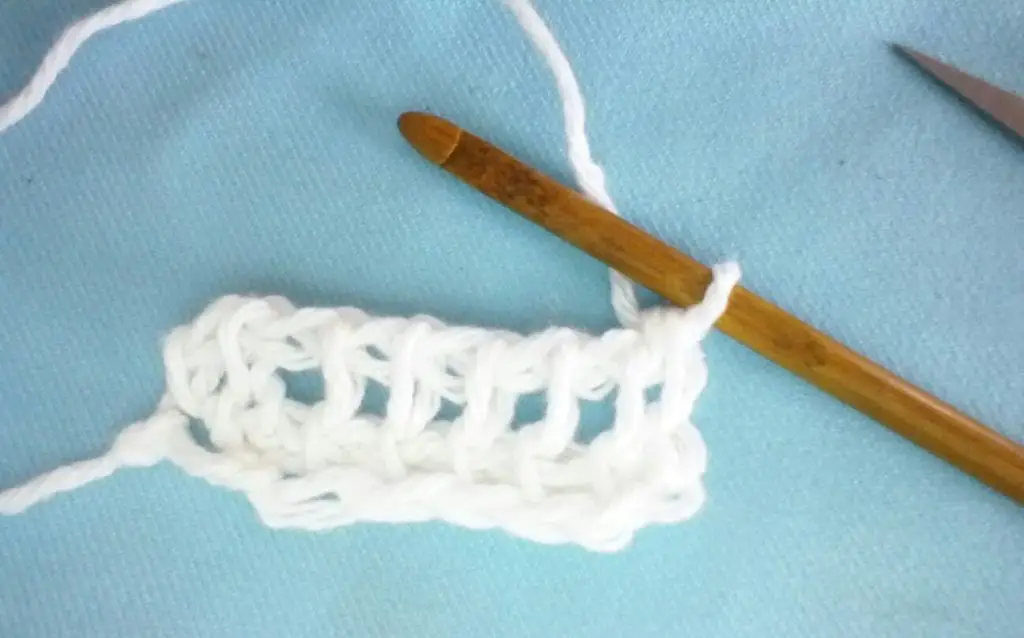
RR – This row is also known as casting off since you are removing the stitches from the hook for the last time for this square. Chain 1. Insert the hook under the first bar, yarn over and pull through both loops on the hook. Insert the hook under the next bar, yarn over, and pull through both loops on the hook. Continue across the row. At the last stitch, cut the yarn and pull through the stitch.

Square 1 complete
Tier 2
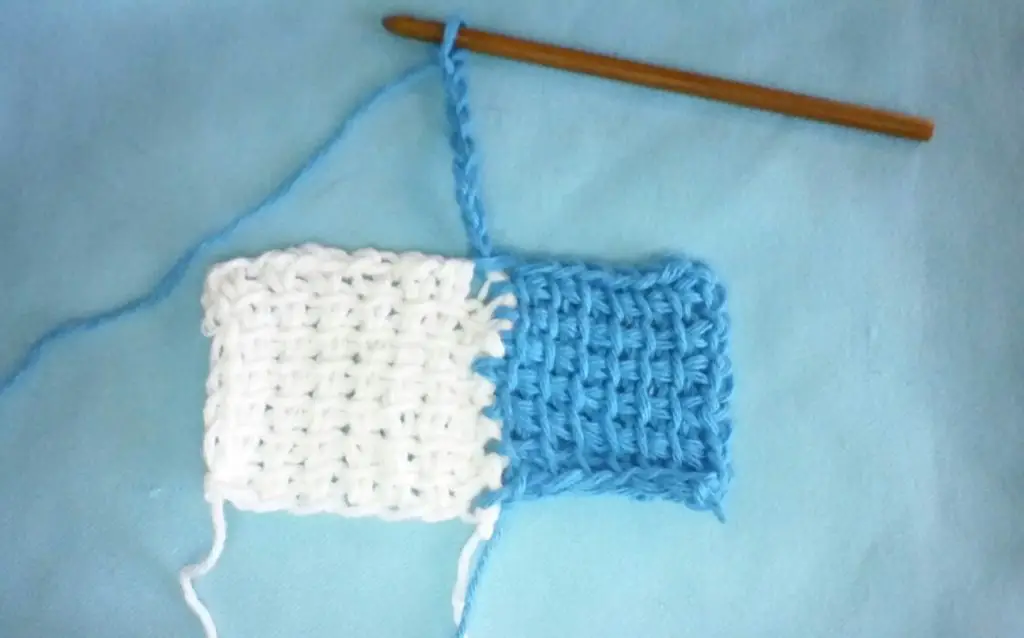
FR: Attach a new color into a corner space. Chain 7. Insert the hook into each bump on the spine of the chain and draw up a loop on the hook. Insert the hook into space between the first and second row of Square 1 and draw a loop onto the hook.
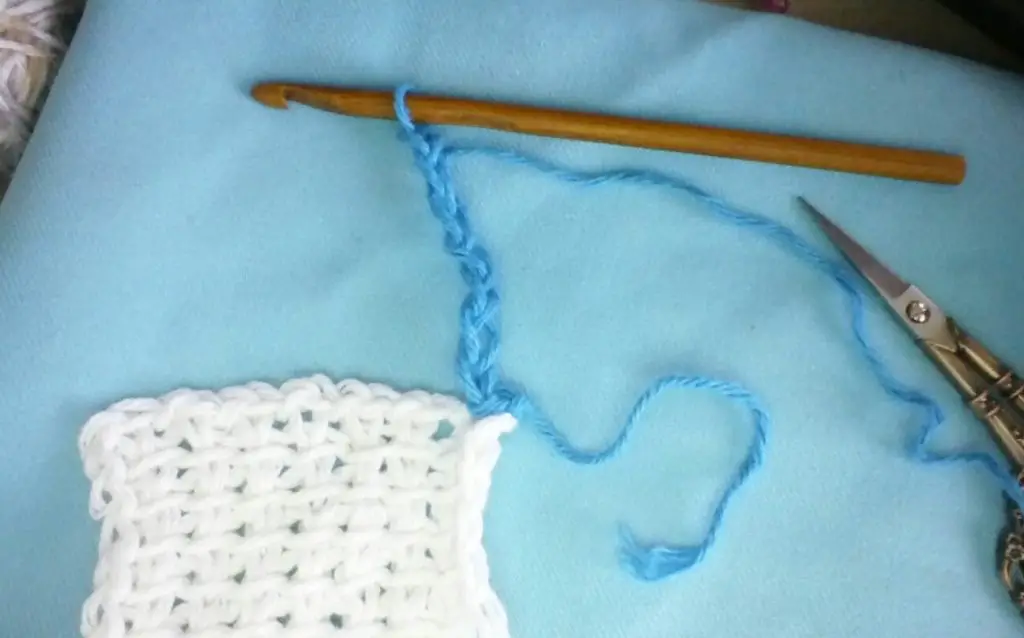
Attach new color and chain 7
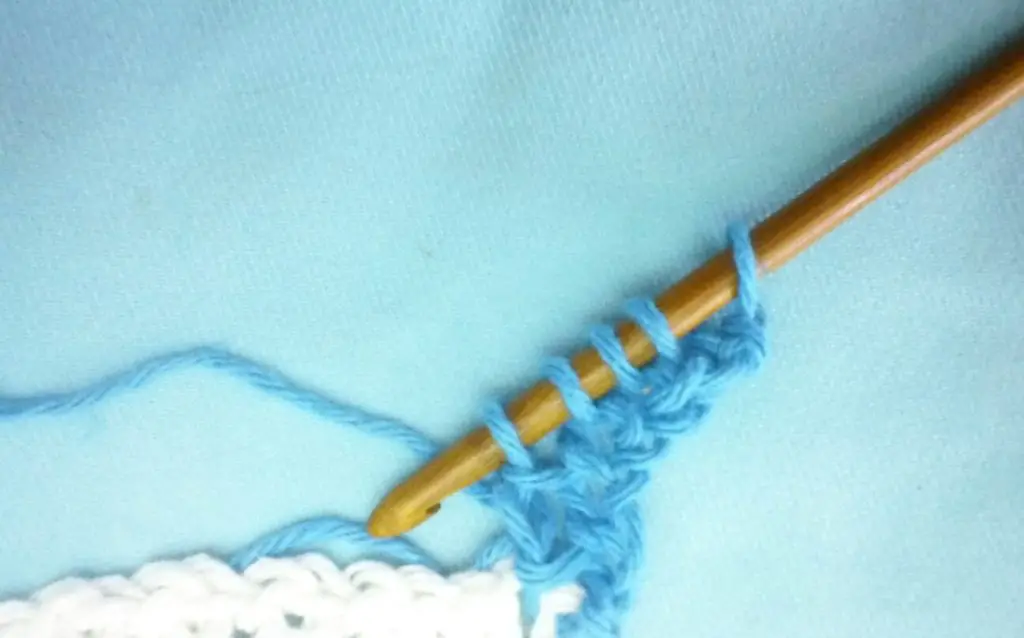
Insert the hook into the space between Row 1 and Row 2.
RR: Yarn over and pull through the first 2 loops on the hook. Continue to yarn over and pull through the first 2 loops on the hook until you have 1 loop left on the hook.
Rows 2-6: Repeat forward and return rows inserting the hook into the spaces between the rows on Square 1
Row 7: Work forward row as usual
RR: Chain 1, insert hook under first vertical bar, yarn over and pull through both loops on the hook. Continue across the row and insert the hook into the next corner of the square. Chain 7 to begin next square.
Repeat on the remaining 3 sides of Square 1.
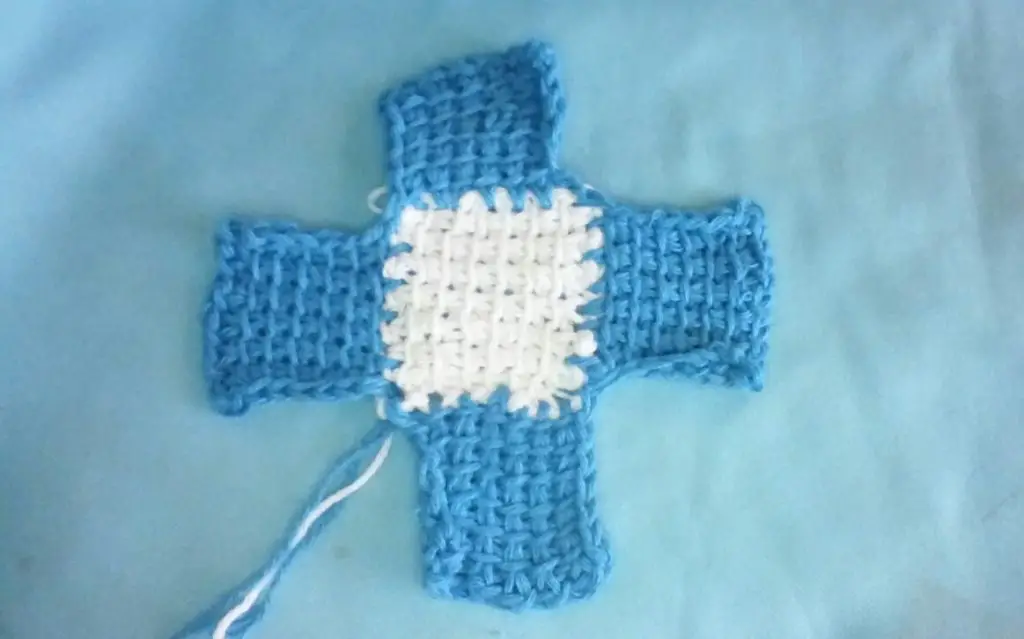
Tier 2 completed
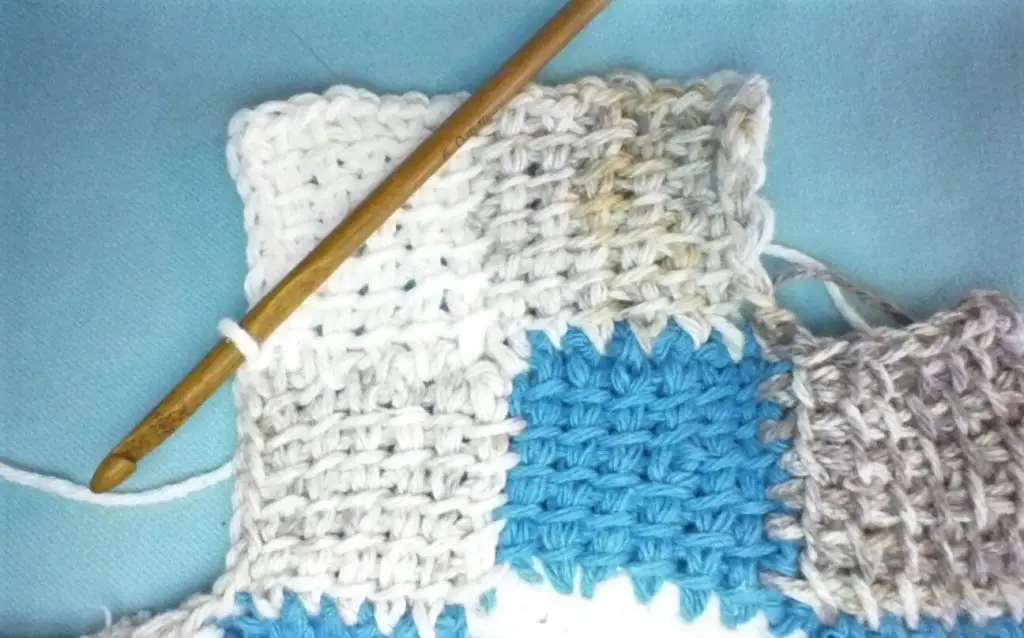
Tier 3 is worked on the edges of Tier 2. Place your project down so that it looks like a cross. On the ends of the squares, you will chain 7 to begin.
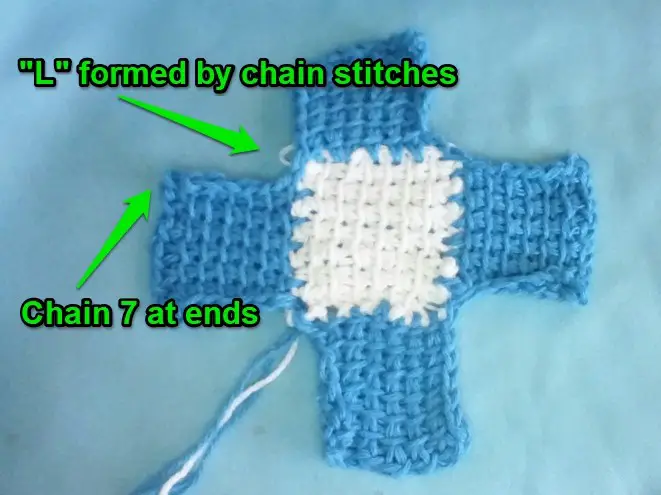
Look at the way the chain stitches form an “L” in the corners where the squares meet. To crochet the square in this space chain 1, insert the hook in between the first two chain stitches and draw a loop of yarn up onto the hook. Insert the hook between the next two chain stitches and draw a loop of yarn onto the hook. Continue to do this until you have 6 loops on the hook. Insert the hook into the first chain stitch on the side of the adjoining square.

Begin the return row by a yarn over and pull through the first 2 loops on the hook. Continue to yarn over and pull through the first 2 loops on the hook until you reach the end and have only 1 loop on the hook.
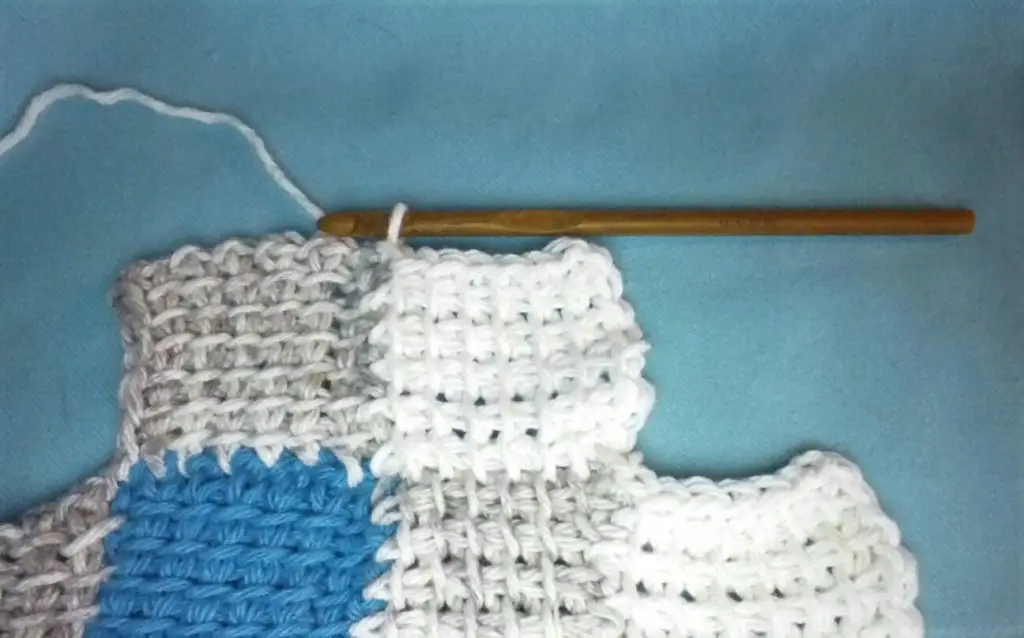
For the next forward row chain 1, insert the hook under each vertical bar and draw up a loop onto the hook. Insert the hook between the next set of chain stitches and draw up a loop onto the hook. Continue until you have 7 rows and have reached the corner of the square. On the last return row, cast off the stitches and end by inserting the hook between the first and second chain stitches on the edge of the end square. Chain 7 to begin next square.
Continue around the project chaining 7 at the end squares and picking up loops in the “L” of the side squares. This is the technique from now on until your Entrelac crochet fabric is as large as you desire.
How to Crochet the Corner Sections
Once you have gotten your project as large as you want it, you will notice it is not square. While you can leave it like this, I think it looks much nicer with straight sides. Each corner is crocheted separately. You can change colors for each diagonal row or make the corners all one color. It is up to you.
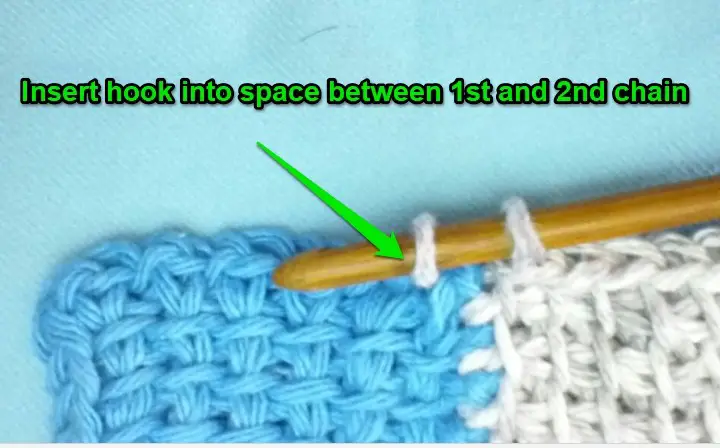
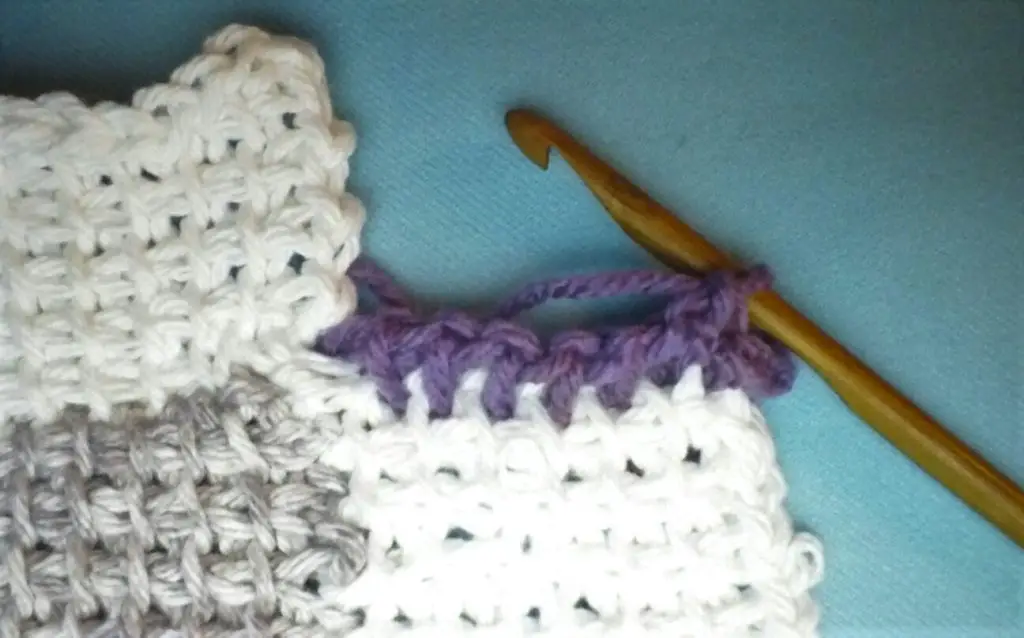
Attach yarn onto the outside of an “L”. Chain 1, insert the hook between the chain stitches, one at a time, and draw up a loop onto the hook. Insert the hook between the 1st and 2nd chain stitches of the adjoining square. Crochet a return row as normal. Work the square just like you did the other squares in an “L” space. At the end of the cast-off forward row insert the hook into the corner space of the adjoining square.
Begin the next square just like the last one you crocheted. Insert the hook into space between the 1st and 2nd chain stitch and pull up a loop. Continue to do this until you have reached the end of the row. Insert the hook into space between the 1st and 2nd chain stitch and draw a loop up onto the hook. Yarn over and pull through 2 loops at a time until you only have 1 loop. Work forward and return rows until you have 6 rows completed. Work a cast off-row.
Slip stitch across the top of the middle square. Work the rest of the tier one corner squares just like you did in the first corner. Slip stitch across the middle square and work the first tier of each corner. Once you have worked around all four sides, break the yarn.

For the last corners, attach the yarn in the corner of a square. Insert the hook into the spaces between the chain stitches and draw up a loop. You should have 7 loops on the hook. Insert the hook into space between the 1st and 2nd chain stitch of the side of the adjoining square. Yarn over and draw the yarn through the first 2 loops on the hook.
Continue until you have 1 loop on the hook. Work forward and return rows until you have 6 rows. Cast off the last row and break the yarn. Repeat this on the remaining 3 corners.
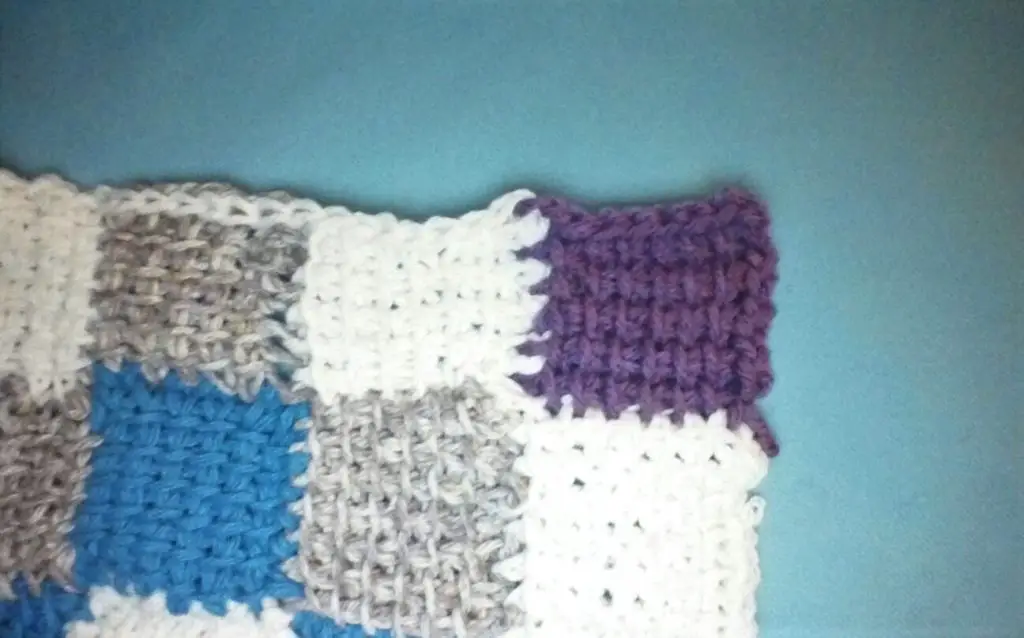
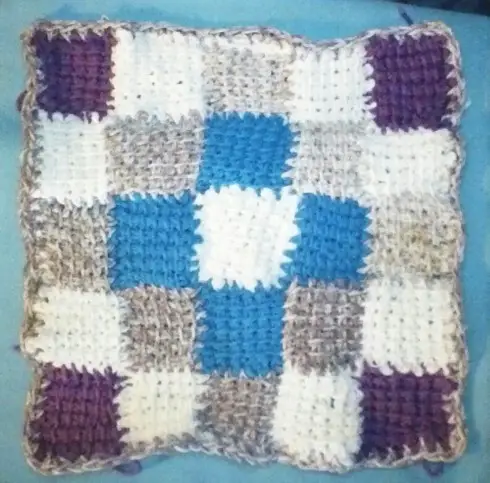
Once you have the corners crocheted, work a border of single crochet around the entire Entrelac fabric. Join the border yarn at any corner and chain 1. Evenly single crochet around the fabric working 3 single crochet stitches into each corner. Join in the chain 1. You can crochet more than one round of single crochet stitches or crochet any border stitch you like. Your project will look better if you block it. I haven’t blocked the sample, but if you do the blocks should straighten up.
And there you have it, the crochet Entrelac tutorial. You can use this technique to make lots of projects like afghans, blankets, garments, and home décor items.
Recommended Reading. Free on Kindle with Kindle Unlimited.
The Almanac of Crocheting is the complete comprehensive A to Z guide on crochet available on Kindle and Free if you have Kindle Unlimited. It will take you from a Beginners’s level all the way up to advance. And countless projects for the novice to all the way up to Expert. This Box set takes you from step one novice all the way to expert with detailed instructions and pictures. Click Here to take a look at it on Amazon.
End Notes
Thanks again for stopping by. I hope this tutorial has helped you learn the crochet Entrelac technique. I tried to make the instructions clear and include lots of images to make learning this technique easy. If you have any questions, please ask them in the comments. I will get back to you as soon as I can. Until next time, take care and keep on hooking!


