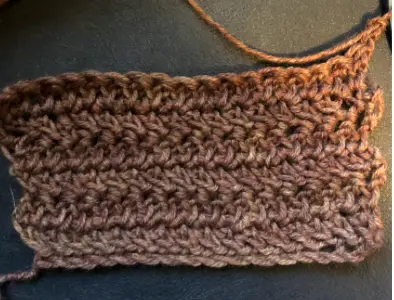
The herringbone double crochet stitch is such a cute stitch! It is an easy textured stitch that creates a neat arrow shape when it is finished. It can also be done as a single crochet or a half double crochet. However, I think the double crochet looks the best so that is the one that will be explained below. This pattern is great and can be used for any crochet craft your heart desires! My personal favorite is using this stitch for blankets but it can be used for so much more!
For this stitch, all you will need to know is how to do a chain, and a double crochet! We will be learning how to do a herringbone double crochet stitch but it is just a variation off of a double crochet stitch. This means if you can do a double crochet you can do this variation with relative ease!
What I will be using for this stitch
- Size G hook (4.25 mm)
- Medium weight yarn
Stitches that you need to know for this pattern are
Ch – Chain
Dc – double crochet
hbdc – herringbone double crochet
The pattern below is a simple test swatch for a stitch. The test swatch allows you to get practice with a stitch before committing the stitch to a larger project. If you fall in love with the stitch and want to manipulate the pattern into a size for a larger project that can be done! This stitch in any number of stitches you want +3. Meaning that to make the pattern larger all you need to do is chain any number to get your desired length and then add 3 more stitches.
How the pattern can be manipulated
Any number+ 3
Pattern
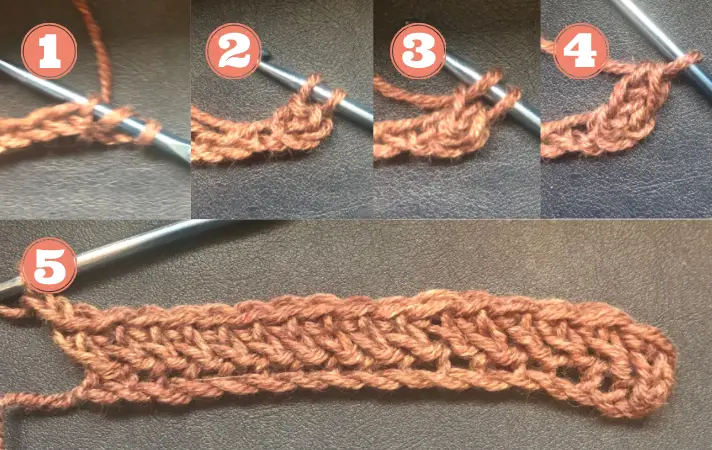
There is a visual representation of each part of the pattern below the instructions for each row.
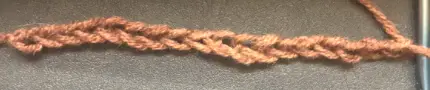
Start by chaining 15
Row 1
We Will start by making hbdc in the 3rd chain from the hook. To do the hbdc *yarn over and insert hook into stitch. Yarn over and pull through the stitch and then through the first loop on the hook. Yarn over and pull through one loop on hook. Yarn over and pull through the last two loops on hook. * Continue to make hbdc in the remaining stitches. Ch 2. Turn.
Row 2
Make one hbdc in the first stitch. Continue to work hbdc stitch all the way down the row until you reach the last stitch. Ch 2. Turn. You can start to see the arrow shape forming.

Continue to repeat row 2 until the desired length has been reached. For the sake of this pattern and for practice repeat this row 6 more times.