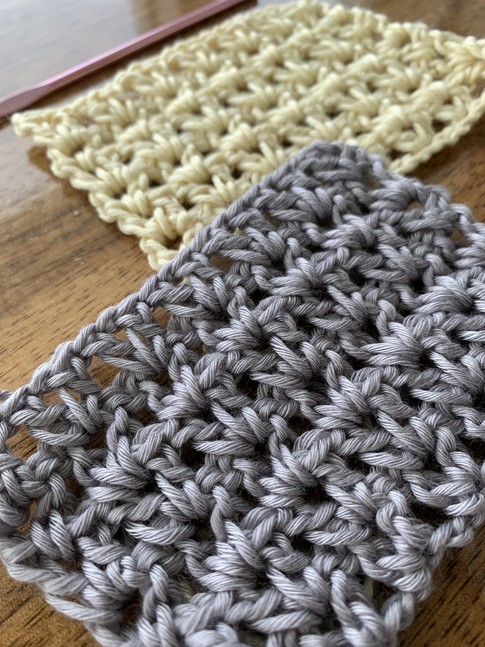
In this step-by-step photo tutorial, we are going to learn how to make the beautiful “V” stitch. I simply love using this classic and beginner-friendly stitch because it is very quick and easy to do, yet very pretty and eye-catching. Its versatility makes it essential since it can be used in many projects. To be able to do it you only need to know how to make chains and double crochet! Simple, right? You will see that once you start making the first rows, you will be totally hooked, and then it is just a matter of going with the flow and entering that incredible meditative state that crochet brings us!
Another thing I like about the V stitch is that Its open texture makes it ideal for mid-season projects if we use cotton, but also for winter if we use a thicker yarn. We can get very different results by changing our materials! One last thing is that it looks great if you do everything in the same color but also if you choose to go crazy and play with the color scheme in some or all of the rows!
Let’s get started!
What will you need to do it?
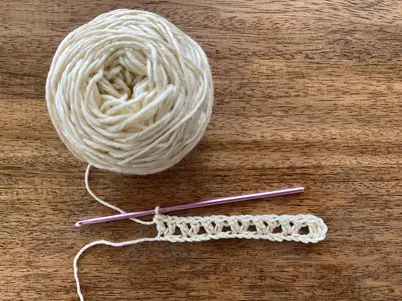
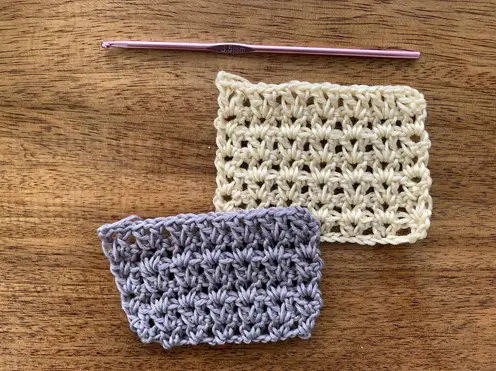
You can use any yarn you have and its corresponding crochet hook. Here i am using cotton and a 3.5 mm crochet hook
Scissors
Abbreviations:
I will be using US terminology.
ch: chain
dc: double crochet
sk: skip
Some considerations:
- Here we are gonna learn how to make a sample of the stitch, but you can use it for any project of the size you want. To be able to adjust it to your desired size, you just need to start with a chain that is a multiple of 3 + 1.
- The V stitch is worked all in the same stitch and it goes *dc, ch 1, dc* .
- When we start making the second row and the following ones, we are always going to be working inside the ch 1 space of the “V” of the previous row and not in the gap between each “V”. Which can be a very common mistake.
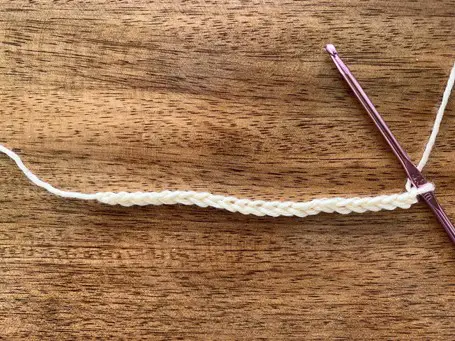
Start making a chain that is multiple of 3 + 1. Here I did 22.
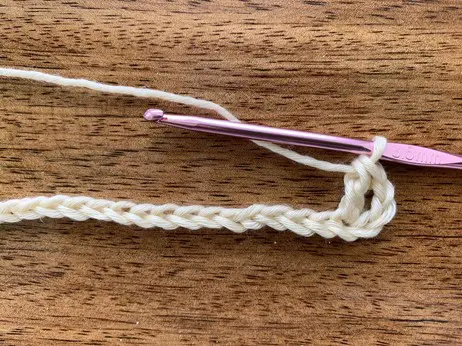
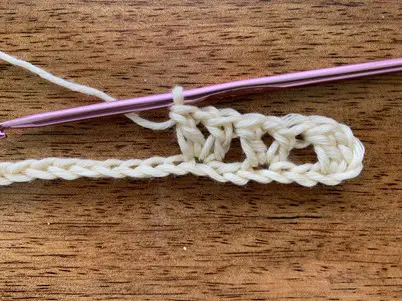
Row 1: Make a double crochet (dc) in the 4th chain (ch) from the hook. (This 3 ch + dc counts as your first “V” stitch of the row) , *Skip two chains, then ( dc, chain 1, dc ) in the next stitch* Repeat from * to * until the end of your row. The last “V” has to be in the last chain of the row.
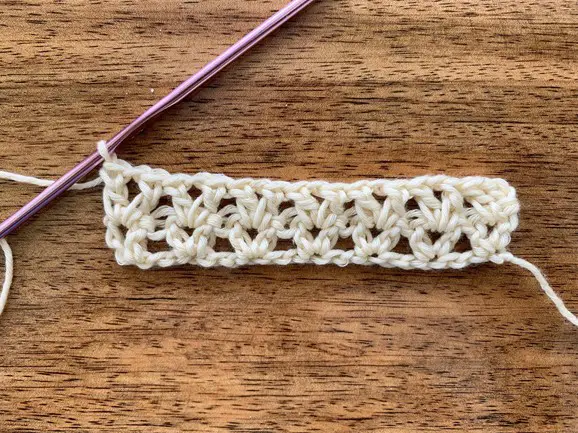
Row 2: Turn. Ch 3. Dc in the first ch 1 space of the row below. (Counts as your first V stitch) As you can see we are placing the V´s in the ch1 space from the row below. *(dc , ch 1, dc) in the next ch 1 space* Repeat from * to * until the end of the row.
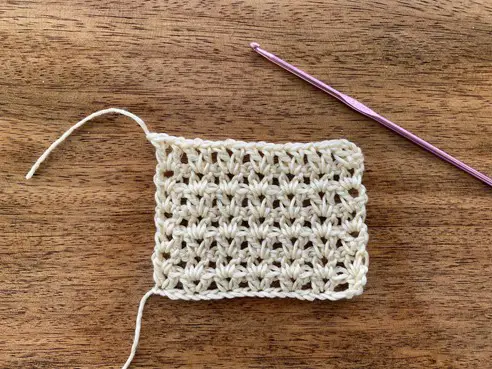
Now repeat row 2 until the work is your desired size and Voilá!
Thank you! Hope you enjoy this stitch and help you do wonderful things! Happy crocheting and see you in the next post!
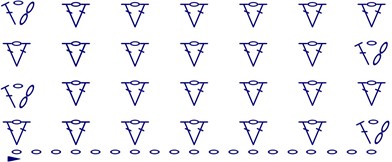
Diagram:
Know how to read crochet? Here is the diagram of the written pattern. If you don’t know how to read it, don’t be afraid, it looks scary at the beginning but it’s an amazing tool and a superpower to add to your crochet skills! Check out this article that explains everything!