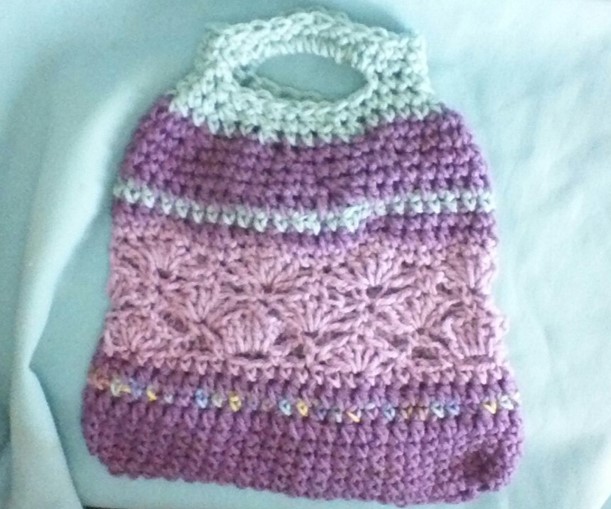
Spring is right around the corner which means summer is not far behind. With summer comes time at the beach, pool, and enjoying outdoor activities. This means you need a tote to carry what you need such as bathing suits, towels, toys for the kids, snacks, bottles of water, and games.

Totes and bags are some of my favorite projects. I have a bunch of them and somehow, I seem to fill them up as soon as I make them. Today I’d like to share a cute summer beach crochet tote.
The summer beach crochet tote can be made larger by crocheting more chain stitches in the starting chain. This pattern I would consider advanced beginner. You only need to know basic stitches and techniques to work this pattern.
You will need a couple of skeins of yarn depending on how many colors you choose to make your crochet tote. I used some yarn out of my stash so none of the colors are full skeins. Red Heart Super Saver yarn is the yarn I used, but you can use any medium weight yarn. You’ll also need a size Jj/10 8mm crochet hook and a tapestry needle.
Yarn Colors
Color A – Orchid (main color)
Color B – Light Orchid
Color C – Light Aqua
Color D – Watercolor
Stitches used:
Chain – ch
Slip Stitch – sl st
Single crochet – sc
Half Double crochet – hdc
Single crochet 2 together – sc2tog (Insert the hook into the next stitch, yarn over an pull through, insert the hook into the next stitch, yarn over and pull through, yarn over and pull through all 3 loops on the hook at once.)
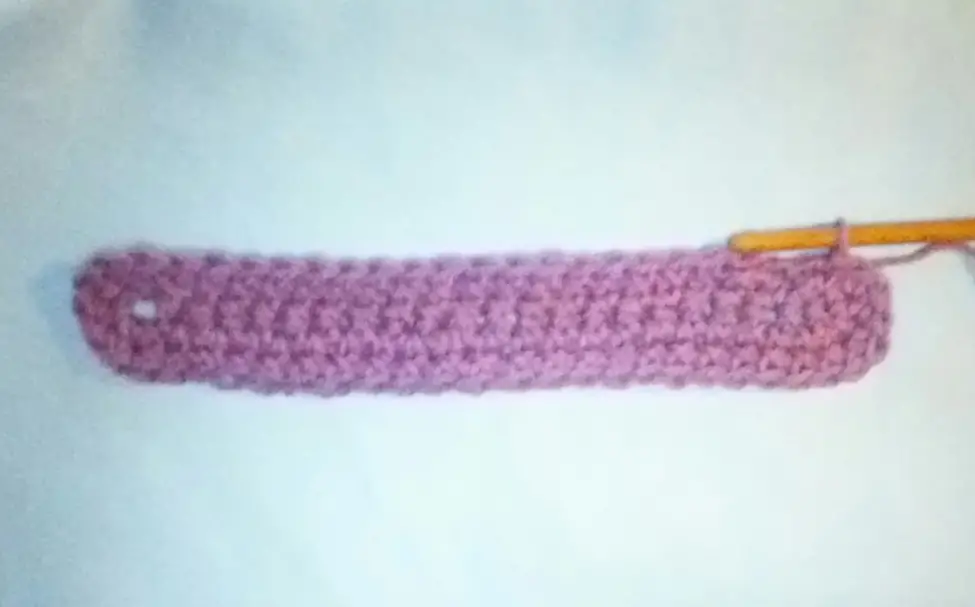
Notes: To begin the tote I crocheted a foundation chain and crocheted around the ends and on both sides of the chain. This creates an oval and is a handy way to shape the tote. Begin a foundation chain by chaining two. Insert the hook into the first chain and pull the yarn through. Yarn over and pull through the first loop on the hook. This creates the chain stitch you will need to start the next foundation chain stitch. Yarn over and pull through the two loops on the hook to complete the single crochet foundation chain.
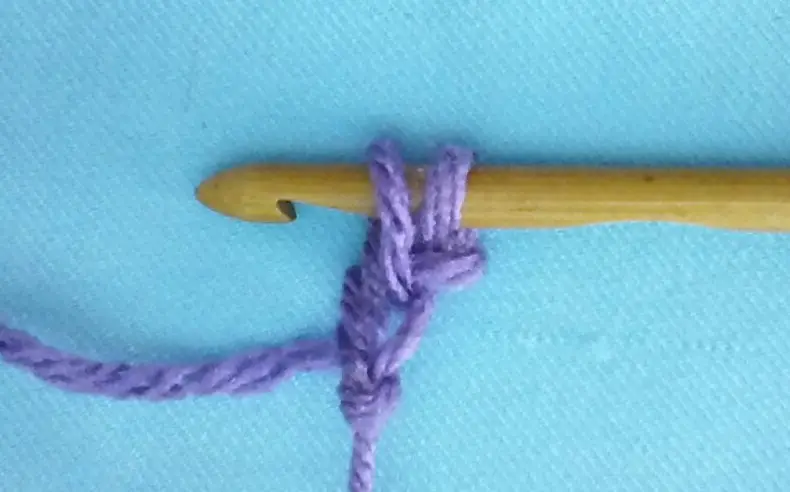
Chain 2 and insert the hook into the 1st chain.
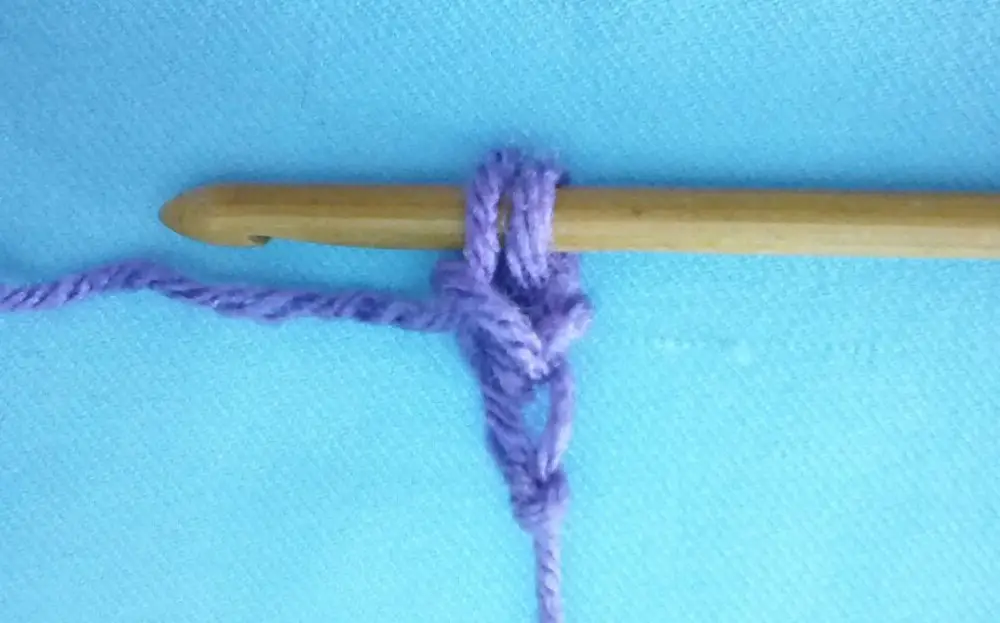
Pull through and pull the yarn through the first loop, yarn over and pull through the last 2 loops on the hook.
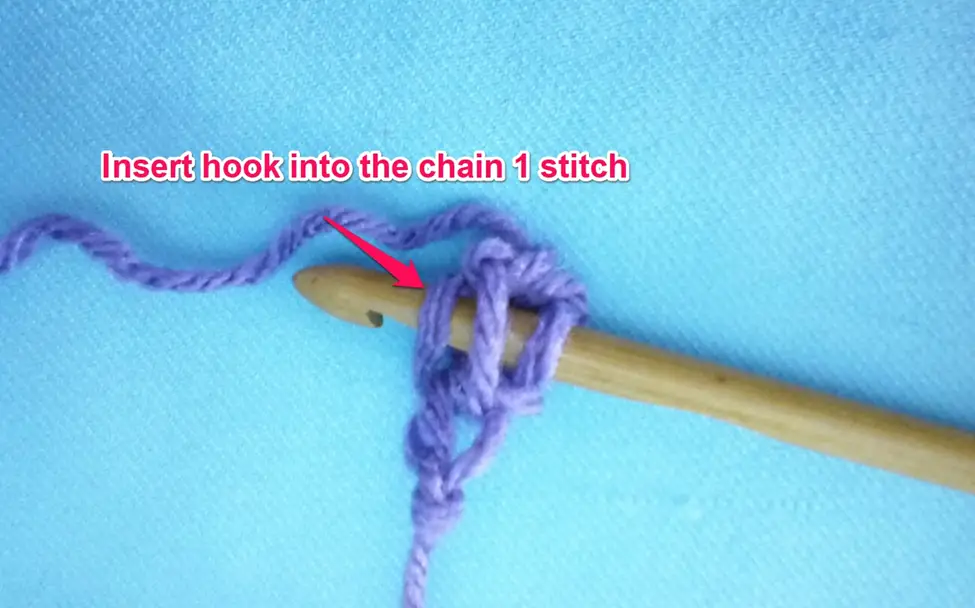
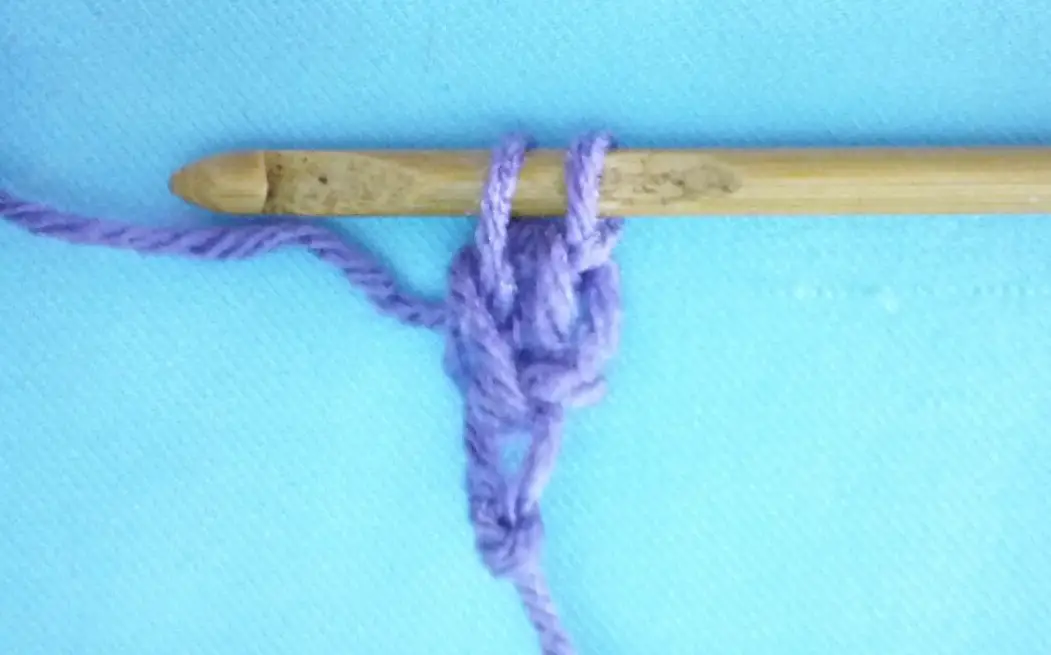
Begin the next stitch by inserting the hook into the chain stitch, yarn over and pull the yarn through. Yarn over and pull through the first loop, yarn over and pull through the two loops on the hook. Repeat this until you have the correct number of foundation stitches.
I used the seamless join. Work around and when you come to the last stitch, work one more stitch into the base of the starting chain. Join into the first full stitch after the starting chain. This hides the starting chain and creates an almost invisible seam. Since you work an extra stitch into the base of the starting chain, your stitch count comes out correctly.
Work one more stitch into the base of the starting chain.
Look ma! No seam!
Summer Beach Crochet Tote Pattern
Row 1: Crochet 15 sc foundation chains
Row 2: ch1, sc across foundation chain, 5sc into last st, turn chain and sc across the foundation chain, 5sc into last st, join in ch1
Your work should look something like this. Tote is crocheted in the round from this point.
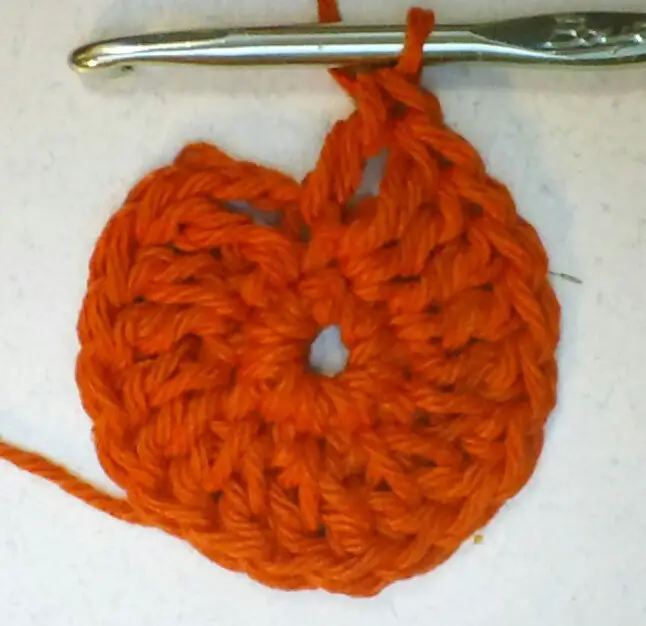
Round 1: ch1, sc to the 3 sts around end, work 2sc into next st, 1sc into next st, 2sc into next st, sc to end, 2sc into next st, 1sc into next st, 2 sc into next st, join in ch1
Your work should look like this after Round 1.
Rounds 2-8: ch1, sc around, join
Round 9: ch2, hdc around, join
Round 10: With Color D ch1, sc around join
Round 11: With Color A ch2, hdc around, join
Round 12: With Color B ch1, sc around
Round 13: (*ch3, sk 2 sts, sc* rep twice, sk 2 sts, 5dc into next st, sk 2 sts) rep around (I had to cheat at the end since I ran out of stitches. I only skipped 1 stitch between the ch3 sections at the end and joined the round into the first chain.)
Round 14 sl st into ch3 sp *ch3, 5dc into next ch3 sp, ch3, sc into next ch3 sp, ch3 sc into 3rd dc of next shell, ch3 into next ch3 sp* rep around, join in sl st
Round 15: sl st to 3rd dc of first shell *ch3, 5dc into next ch3 sp, ch3, sc into next ch3 sp, ch3, sc into 3rd dc of next shell* rep around, join in sl st
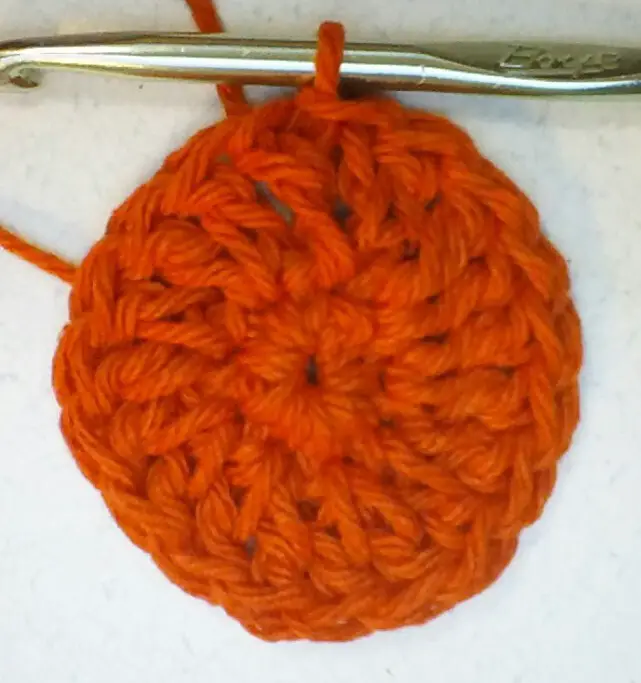
Round 16: ch3, 4dc into same st, *sc into 3rd dc of next shell, 5dc into next sc st, sc into next sc, 5dc into next sc* rep around, join in 3rd ch
Round 17: sl st to 3rd dc in 1st shell *ch3, sc into sc, ch3, sc into 3rd dc of next shell, ch3, sc into 3rd dc of next shell* rep around, join in sl st
Round 18: *5dc into next sc st, sc into next sc st* rep around, join in 1st dc
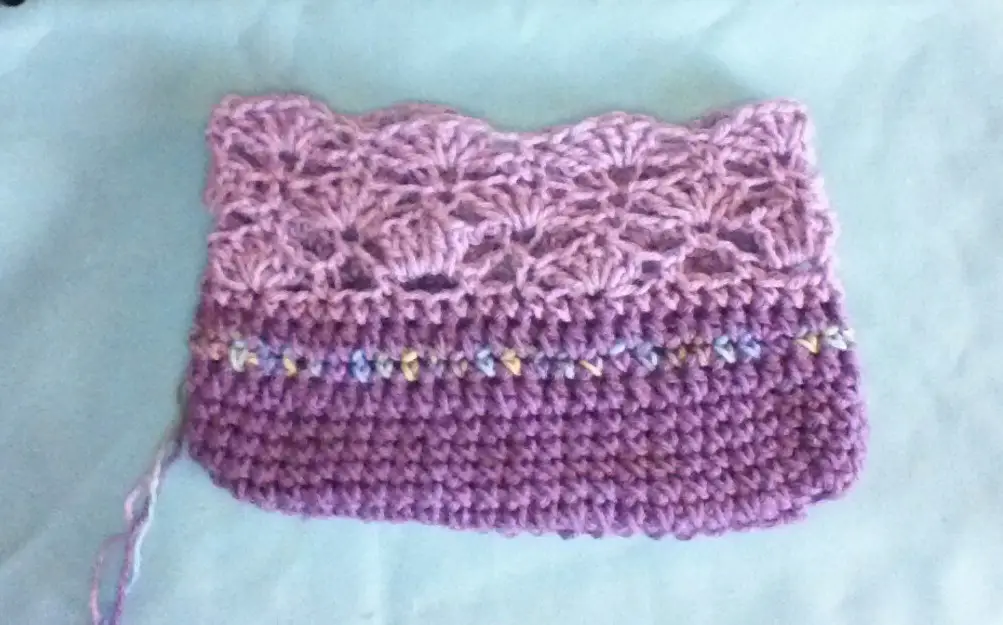
This is what your tote should look like after Round 18.
Round 19: ch1, sc around, join
Round 20: With Color A ch1, *sc into each of the next 2 sts, hdc into each of the next 4 sts rep around, join in ch1
Round 21: ch1, sc around, join
Round 22: With Color C ch1, sc around, join
Round 23: With Color A ch2, hdc around, join
Rounds 24 & 25: ch1, sc around, join
Rounds 26 & 27: ch1, *sc into each of the next 4 sts, sc2tog* rep around, join
Round 28: With Color D ch1, *sc into each of the next 4 sts, sc2tog* rep around, join
Rounds 29 & 30: ch1, sc around, join
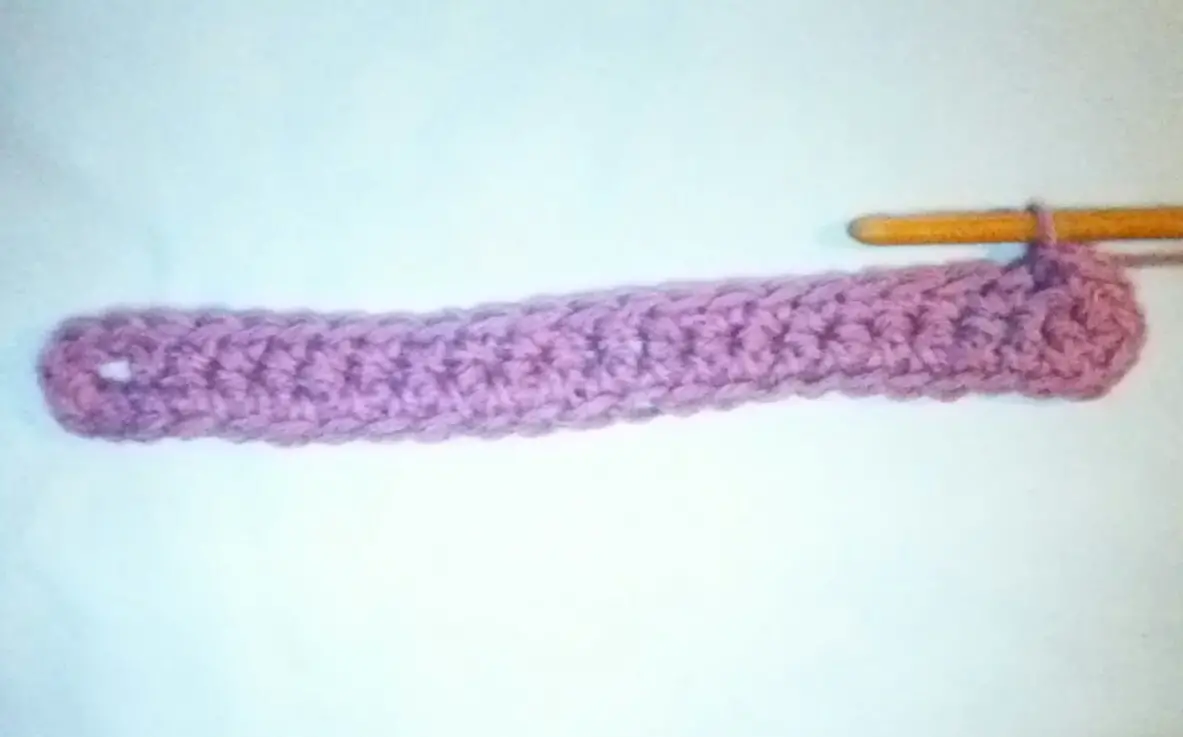
At this point you will need to determine where your handle will be. Count the stitches around the top of the tote and divide them in half. Find the side center and place a marker. Place a marker at the other side of the tote to mark the center of this side. I single crocheted 3 stitches before and after each marker and skipped 7 stitches, crocheted 6 stitches around the center side, and skipped 7 stitches on the other side of the tote to form the handle.
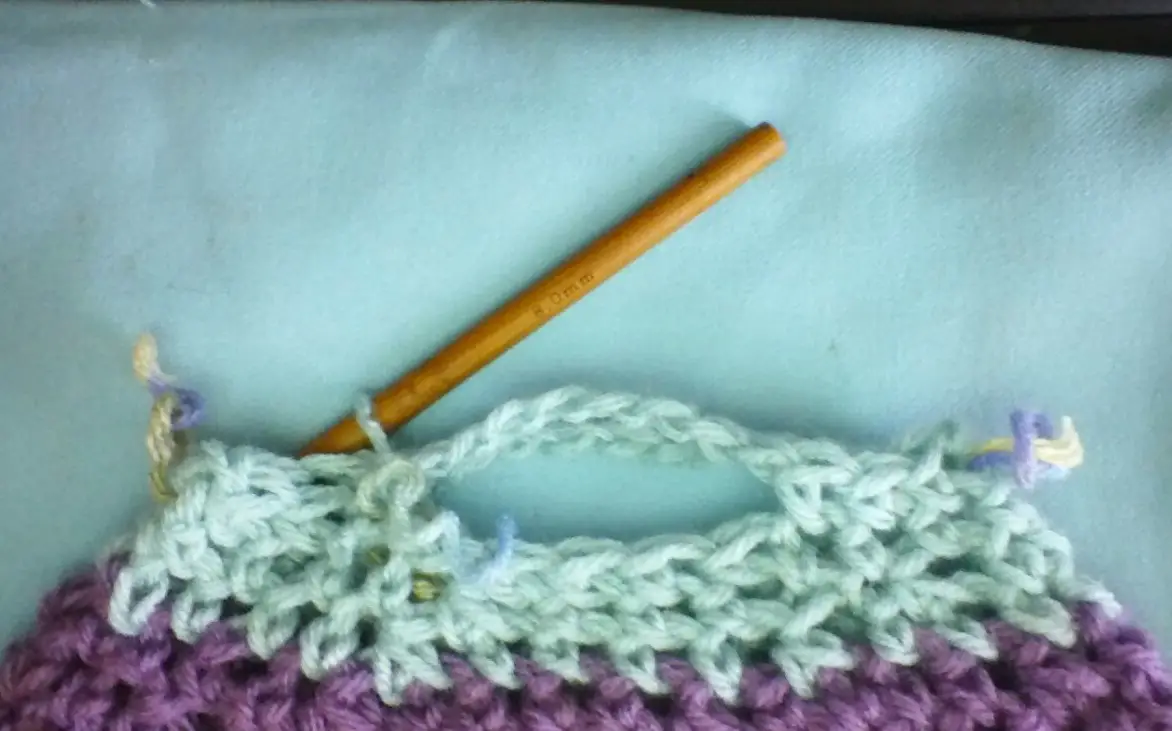
I couldn’t find my stitch markers, so I used some scrap yarn to mark the center sides and beginning of the handle.
Round 31: ch1, sl st until you are 3 stitches away from the center side marker, sc into each of the next 6 sts, ch8, sk 7 sts, sc into each of the next 6 sts, ch8, sk 7 sts, join in ch1
Round 32: ch1, sc into each st, work 16 sc around ch8, sc into each st, work 16 sc around ch8, work 1 more sc, join
Round 33: ch1, *sc into each st on body of tote (sc, sk 1 st) across handle* rep around, join, break yarn and weave in tails
All done! Feel free to use any colors you like. You can use any medium weight yarn such as cotton, cotton/poly, or acrylic. I just used some acrylic yarn from my stash that I thought would look nice together. As with all my patterns, feel free to sell any items you make with them. But if you want to share the pattern, please share the link to this blog instead of copying and pasting.
End Notes
I have made every effort to make this free crochet pattern error free, but if you find an error or have a question please let me know in the comments I hope you enjoy crocheting this cute tote. I have enjoyed designing it for you.
Thanks for coming by, and until next time take care and keep on hooking!
Find more totes and bags in the book Crochet Bags: 5 Bags for You to Crochet for Everyday, by Cynthia Welsh.


