
I have an addiction. I love to Crochet. Ever since I was a small girl at my mother and grama’s knee I have loved to watch them take a simple hook and yarn and create wonderful projects. My grama’s hands would fly using tiny needle-like hooks and cotton threads as she created intricate borders for her embroidery pieces. I remember my mom made my Barbie’s two beautiful dresses with variegated crochet thread. Even as a child I appreciated the talent needed to create such projects. And of course, we had plenty of handmade afghans around the house ranging from traditional Granny squares to more intricate patterns.
It is my goal to pique your interest in crochet and perhaps start you on your own lifelong journey of crochet. In this blog, we’ll go over a brief history of crochet, the equipment you need, the various terminology used, and a bit about patterns.
Don’t worry if you’ve never attempted crochet, it’s not hard. It just takes practice. I plan on publishing tutorials teaching you the basics and the way up to fun more advanced techniques. I hope you enjoy the tutorial series and please if you have any questions ask them in the comments section. I’d be happy to help you out any way I can. If I don’t know the answer I will find it for you and do my best to answer your questions.
A Brief History of Crochet
There is some controversy about the origins of crochet. In her article on the Crochet Guild of America’s website, History of Crochet, Ruthie Marks relates that many historians believe crochet had its beginnings in 16th century Europe and was called chain lace or crochet lace. Crochet may have also been around as early as the 15th century and known as nun’s lace or nun’s work. Today’s thread doilies are very similar to nun’s lace but not as intricate.
Examples of crochet have also been found among the descendants of the Guiana Indians. Lis Paludan puts forth the theory that crochet began in Asia and the craft worked its way westward to Spain and then followed the Arab trade routes, and eastward to Tibet. She also theorizes crochet may have had its beginnings in South America and was used to craft adornments for the rites of puberty. Early examples of crochet have also been found in China as three-dimensional dolls.
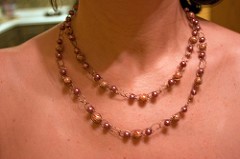
While there is no definitive answer to where crochet came from, today it is one of the most popular yarn arts with devotees from across the globe. Crochet is used to creating garments, accessories, home décor, toys, and even jewelry and fiber art. Your imagination is truly the limit with the wide range of fibers and yarns you can find in today’s stores and online. Here is an example of using crochet thread and beads to fashion a stylish necklace.
Tools of the Trade
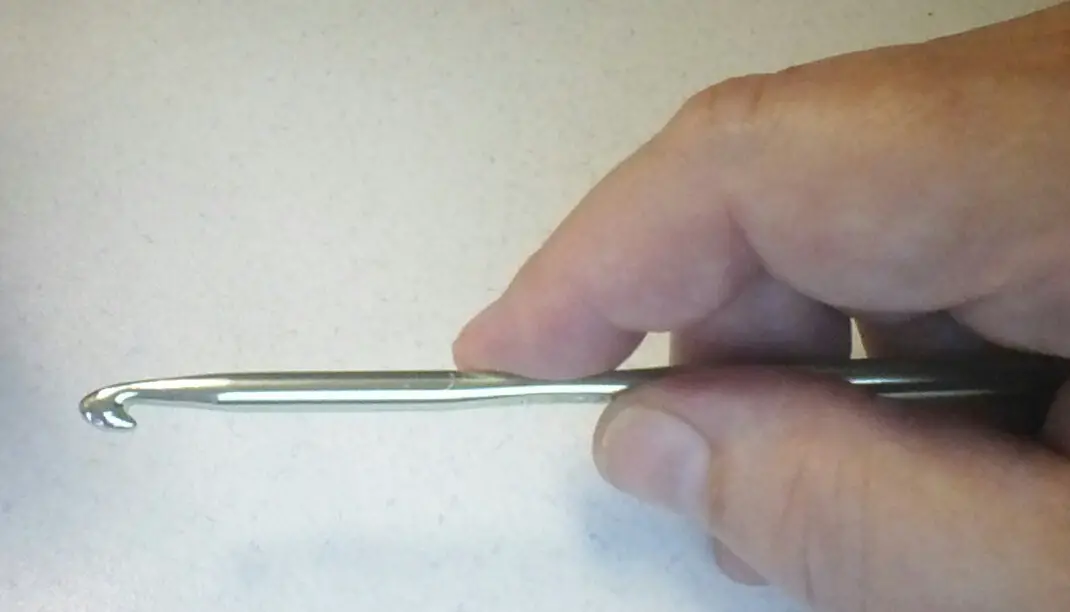
You don’t need a lot of things to crochet. Hooks and yarn are about it. A good pair of scissors, a tape measure, and some clip-on stitch markers are good tools to have on hand. Hooks range in size from very delicate steel hooks used for thread and floss to large thick hooks used to crochet rugs and home décor. The anatomy of a crochet hook is pretty straightforward. Designs may vary a bit, but the basic structure is the same.

In the US hooks use a letter and number designation. For example, my favorite hooks are a J/10 hook. It is also known as a 6mm hook. The most popular sizes range from C/2 to J/10, or 2.75mm to 6mm. Hooks from the UK and Europe generally use millimeters for their sizes.
The most common materials used today are aluminum and bamboo. Plastic is also used and is a good choice for children since it is easy on the hands and easy to handle. Steel is used for the tiny hooks used in fine work such as thread.
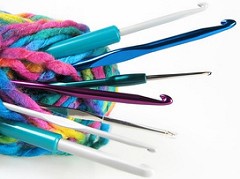 Hook handles vary from straight handles to ergonomic handles designed for people who have trouble holding a straight hook. I have a set of steel hooks with bamboo handles which save my hands from fatigue when I use them.
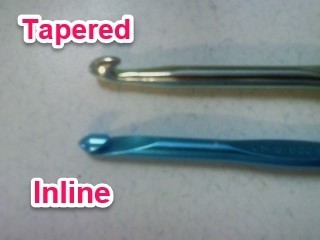
Crochet hooks come with two main styles of heads. Tapered hooks are curved while inline hooks have a sharper more distinct hook. Both types of heads create the same stitches. It is a matter of preference when it comes to taper or inline. I prefer tapered, but some of my friends swear by their inline hooks. The main thing to look for when choosing a hook is the balance and how it feels in your hand. It should fit easily in your hand and be easy to manipulate. You will probably end up owning several sets of hooks and have your favorites.
I started out many years ago with a simple set of aluminum hooks and now I have bamboo, plastic, steel, hooks without added handles, hooks with decorative baked-on handles, and pretty pastel bendy spoon handles.
Holding Your Hook
How you hold the hook is a matter of personal preference. The pencil hold and the knife hold create the same stitches and either one is an acceptable way to hold your hook. Use whichever feels the best. I use both holds depending on the project. While I mainly use the pencil hold, if I’m working on a project using a very thick yarn I may use the knife hold for more control over the hook and yarn.
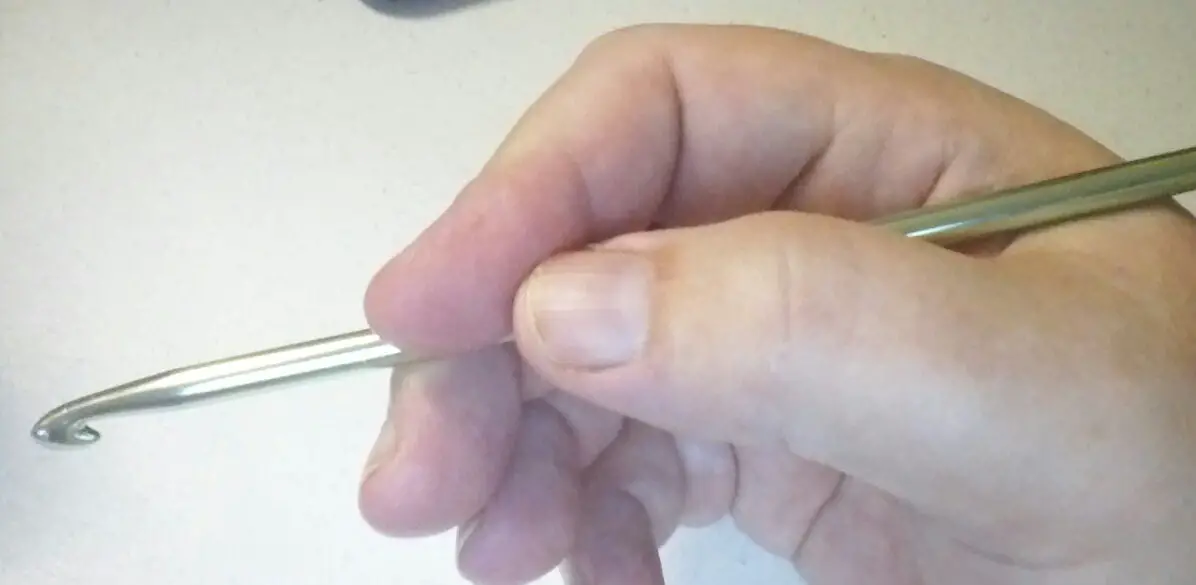
Pencil Hold
Knife Hold
Here is a handy table for you that lists the most common hook sizes in US terms and millimeters.
| US Hook Sizes | ||||
| US Size | Millimeter Size | US Size | Millimeter Size | |
| B/1 | 2.25mm | J/10 | 6mm | |
| C/2 | 2.75mm | K/10 ½ | 6.5mm | |
| D/3 | 3.25mm | L/11 | 8mm | |
| E/4 | 3.5mm | M-N/13 | 9mm | |
| F/5 | 3.75mm | N-P/15 | 10mm | |
| G/6 | 4mm | P/Q | 15mm | |
| 7 | 4.5mm | Q | 16mm | |
| H/8 | 5mm | S | 19mm | |
| I/9 | 5.5mm | |||
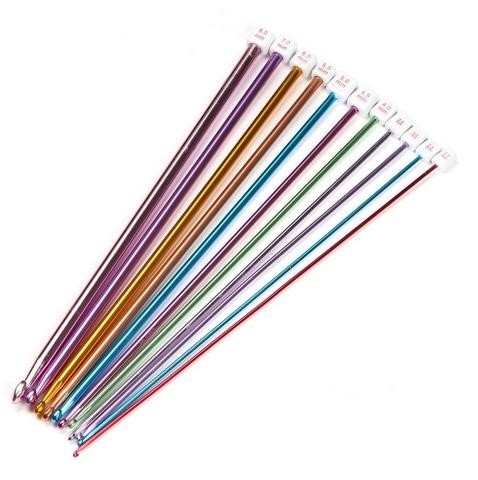
Another type of hook is the Tunisian crochet hook. This type of hook is either a very long straight hook or a hook attached to a long plastic cable with a knot or bead at the end of it. In Tunisian crochet, stitches are held on the hook or cable, depending on the size of your project, for the forward pass and then worked off the hook in the return pass. (We’ll cover Tunisian crochet in a future tutorial.) Tunisian crochet hooks are sized just like traditional hooks. For example, a size H/8 Tunisian hook is the same size as a traditional H/8 hook.
Other Tools
Besides a good set of hooks, you will need a few other things to begin. Purchase a nice set of snips or shears. Hide them…yes, I’m serious. Your crochet scissors should only be used for yarn and fabric. No paper, no hair, nothing. Let your family know they are off-limits. The reason is that when they are used for other things besides yarn, thread, and fabric they get dull. You need to be able to snip the tails of the yarn cleanly. So, get a nice set and squirrel them away.
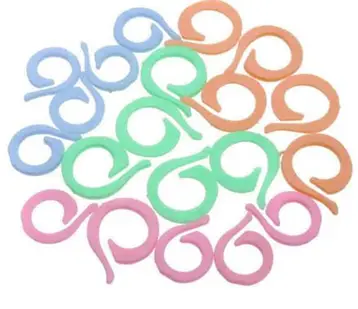 Clip-on or locking stitch markers are used to mark the beginning of a round of crochet, repeating patterns, and any other place you need to keep track of. They come in many assorted styles from a very simple circle to fancy ceramic and bead creations. You can also make your own with earring loops and beads and jewels. I’ve even used a bobby pin when I couldn’t find my stitch markers.
Crochet Terminology
Now that we’ve covered what you need to get started, let’s review the terminology used in patterns. Most designers use a standard set of abbreviations and terms when writing patterns. Sometimes a designer will use a unique abbreviation, but they should explain the term in the key of the pattern. Terms aren’t hard to understand, and yes, I know there are lots of them. But for now, let’s concentrate on the basic ones.
The basic stitches all crochet is based upon are the chain stitch, slip stitch, single crochet, half double crochet, double crochet, and treble crochet. We will learn how to create all these stitches in a later tutorial, but for now, I wanted to familiarize you with the basic terms.
| Stitch Name | Abbreviation |
| Chain stitch | Ch |
| Stitch/Stitches | St/sts |
| Slip stitch | Sl st |
| Single crochet | Sc |
| Double crochet | Dc |
| Half double crochet | Hdc |
| Treble crochet | Trb |
US and UK terms are different. Be sure you know which terms are used in a pattern. This will make a huge difference in your project. Use this table to translate patterns from one term to the other.
| US Terms | UK Terms | ||
| Chain | Ch | Chain | Ch |
| Slip stitch | Sl st | Slip stitch | Ss |
| Single crochet | Sc | Double crochet | Dc |
| Half double crochet | Hdc | Half treble | Htr |
| Double crochet | Dc | Treble | Tr |
| Treble crochet | Trb | Double treble | dtr |
Pattern Basics
As I mentioned earlier, designers use a standardized set of abbreviations and terms when writing patterns. Designers also use a similar format when writing patterns. This includes the key which explains the terms and abbreviations in the pattern. The materials needed to tell you which yarn the designer recommends, the size of the hooks, and any other materials you will need to complete the project. Special stitches and pattern repeats should also be included for clarification.
I know at first patterns may seem intimidating but take a deep breath and let’s take a look at one section by section.
Grit Stitch Crochet Dishcloth Pattern
You will need a small amount of cotton or cotton-blend yarn. I used Premier Home cotton./polyester yarn in Purple (Color A) and Grape Splash (Color B). You’ll also need a size J/10 (6.00mm) crochet hook and a tapestry needle.
This section tells you the type of yarn needed and what hook size to use.
Stitches Used
Chain – ch
Single crochet – sc
Double crochet – dc
This section lists the stitches and abbreviations used in this pattern. Next is the pattern itself. Take it one row at a time and relax.
Notes
On all rows, you will be working a single crochet into a double crochet and a double crochet into a single crochet.
The notes are special instructions and tips provided by the designer.
Pattern
With Color A crochet 20 single crochet foundation stitches
Row 1: ch3 *sc into next st, dc into next st* rep across ending with a sc into the last st, turn
Row 2: ch3 *sc into the next st, dc into the next st* rep across ending with a sc into the 3rd turning chain, turn
Repeat Row 2 until the desired length, fasten off Color A and weave in the tails.
Notice pattern repeats are denoted between asterisks. Work from the first * to the next * and repeat the instructions between the asterisks as many times as called for.
Edging
Round 1: Join Color B in any corner and ch1. Single crochet evenly around the washcloth working 3 single crochet into each corner. Work 2 single crochet into the last corner and join into the chain 1
Round 2: ch1, sc into each st around working 3 single crochet into each corner, join into the chain 1
For the loop chain 8 and slip stitch into the base of the beginning of the chain 8, turn your work and work 8 single crochet around the loop, slip stitch into the stitch to the left of the base of the chain, fasten off and weave in tails.
You’re all done!
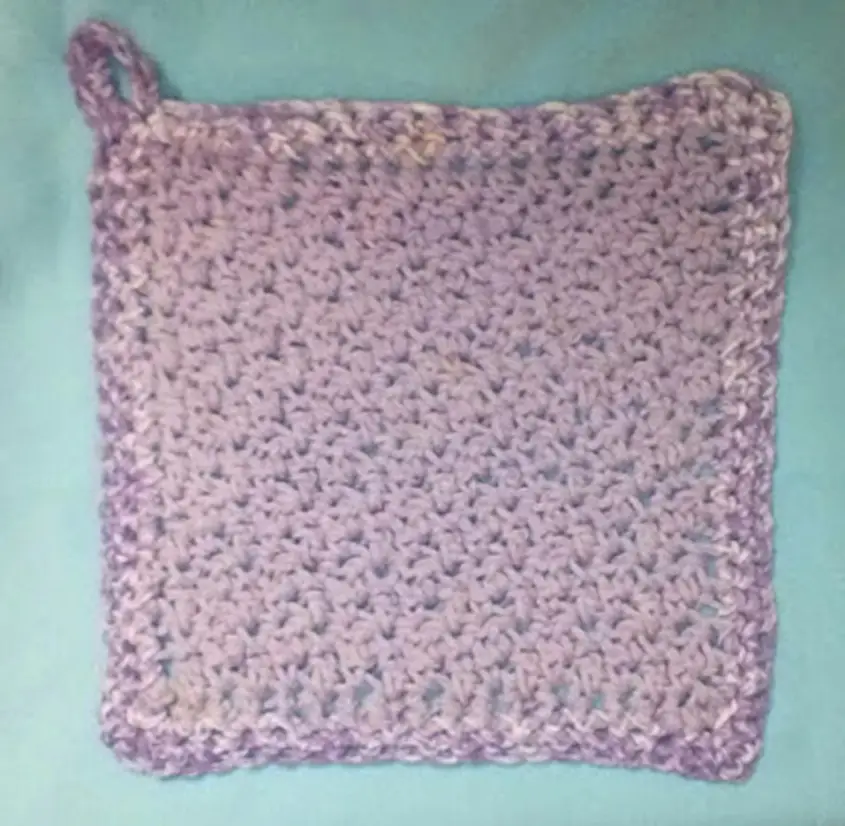
Grit Stitch Washcloth
I didn’t include the gauge in this pattern. Gauge refers to how many stitches and rows it takes to create a 4 by 4-inch swatch of a pattern. Always take the time to crochet up a gauge swatch. If your swatch is larger than the gauge, tighten up your tension or try a smaller hook. If your swatch is smaller than the gauge, loosen your tension or try a larger hook.
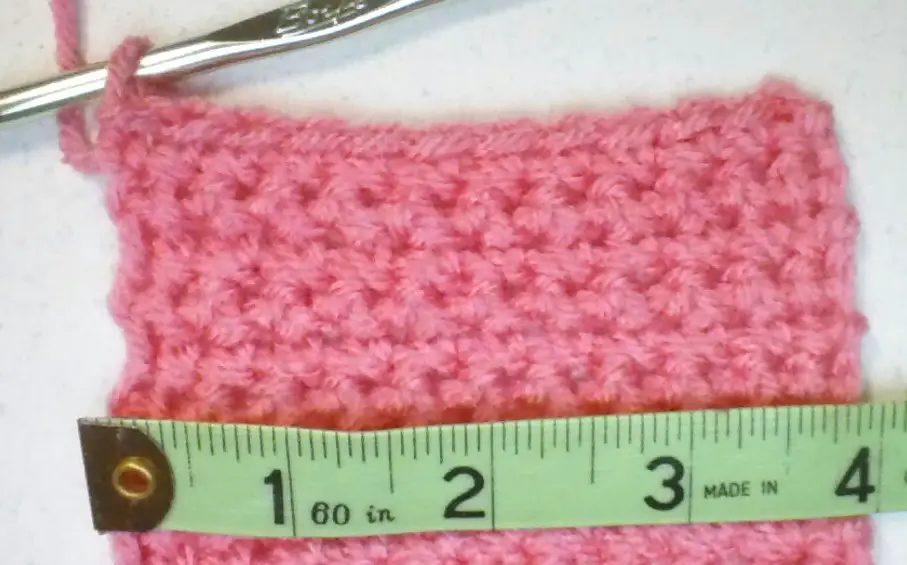
This is a medium-weight yarn and I used a size I/9 hook. There are approximately 20 single crochet stitches per 4 inches of fabric. There are also approximately 5 rows of single crochet per 4 inches of fabric. Compare your swatch to the pattern and adjust your hook size or tension accordingly.
End Notes
I hope this introduction has helped you understand the basic concept of crochet and given you some interesting backstories of the craft. Be sure to ask any questions you may have in the comments section. I’ll be checking back often and would love to hear from you.
Be sure to sign up for updates as I plan on posting lots of tutorials and patterns. I will also be on the lookout for any interesting news or stories to share with you. Please let me know if you have any ideas for a future blog or if you have a crochet related story.
Take care my dear readers and keep on hooking!


