
Let’s face it, we all make mistakes. No matter how long we’ve been crocheting mistakes happen. Sometimes we ignore our mistakes and just call them “personalization”. Other times the mistake is obvious, and we have no choice but to frog (rip out) the mistake and begin again. Today I thought it would be a good idea to go over the top 10 mistakes made in crochet and how to avoid them.
- It is crochet, not knitting. I’ve even heard crocheters refer to their work as knitting. Knitting is done with two needles and crochet is done with one hook. Crochet hooks are sometimes called needles, but you still only use one when crocheting. The best thing to do when someone calls your crochet knitting is to smile and say, no this is crochet.
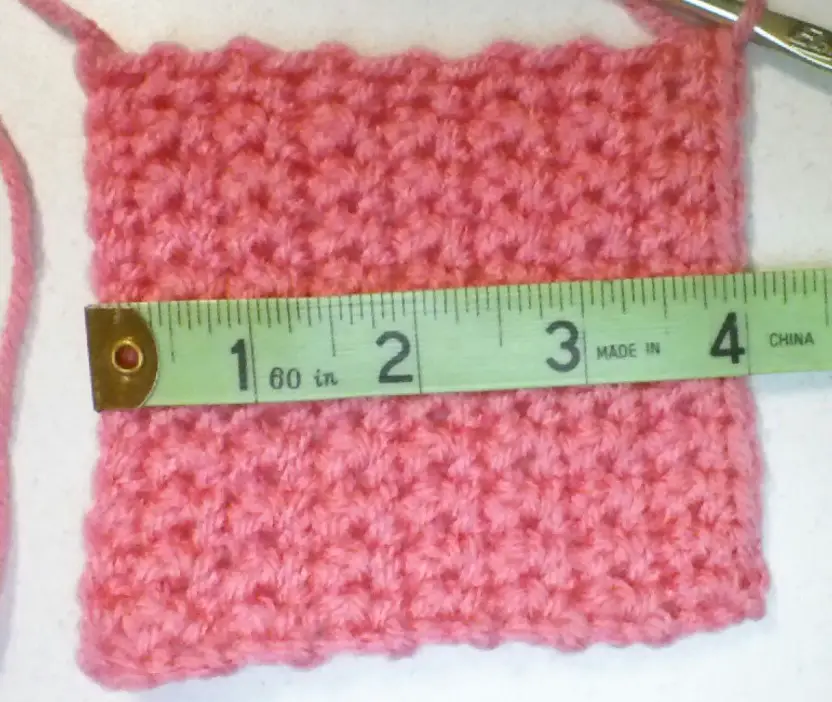
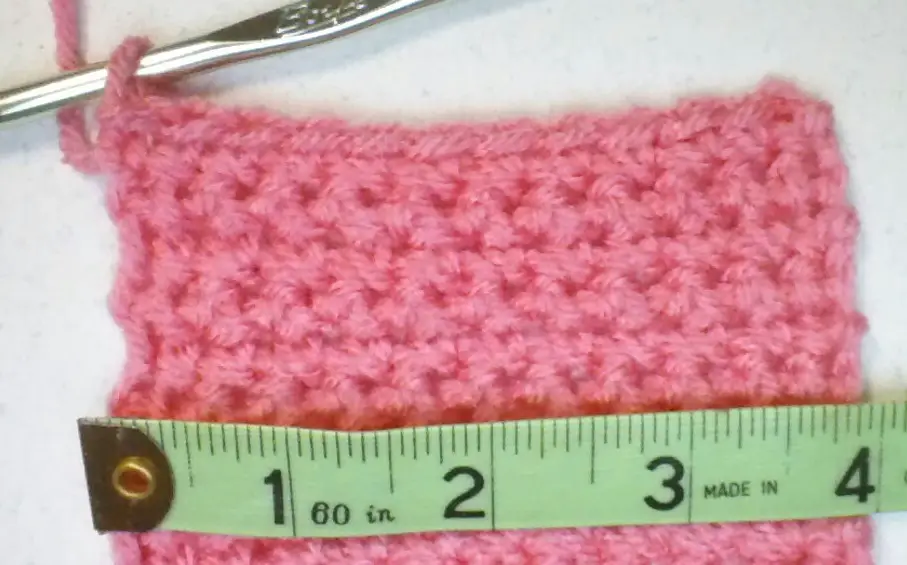
- Not working up a gauge swatch. Gauge refers to how many stitches and rows make up a 4 by 4 inch swatch of crochet fabric. The designer includes gauge so that your project will be the correct size. I know I’d hate to put hours and hours into a project only to finish it and find it is way too small or way too large.
Let’s say your pattern calls for a medium weight yarn and a size I/9 hook. In the examples below you can see, there are 8 rows in 4 inches of fabric and 12 single crochet stitches across 4 inches. Compare these numbers with the gauge on the pattern. If they are very close or match, you’re good to go. If not, you’ll either need to adjust your tension or use a different size hook. Granted some projects don’t rely on gauge, but if you’re making garments gauge is crucial.
- Using the wrong weight and type of yarn. Like gauge, the weight and type of yarn you use are important. Using a different weight yarn can greatly affect the size of the finished project. Let’s say you want to make a sweater for an adult and the pattern calls for a medium weight yarn, but all you have is a big bulky yarn. Sure you can work up the sweater, but it will be way too big. The same thing works in reverse. Using too fine of yarn will reduce the finish product’s size. You can substitute yarn as long as it is the same weight.
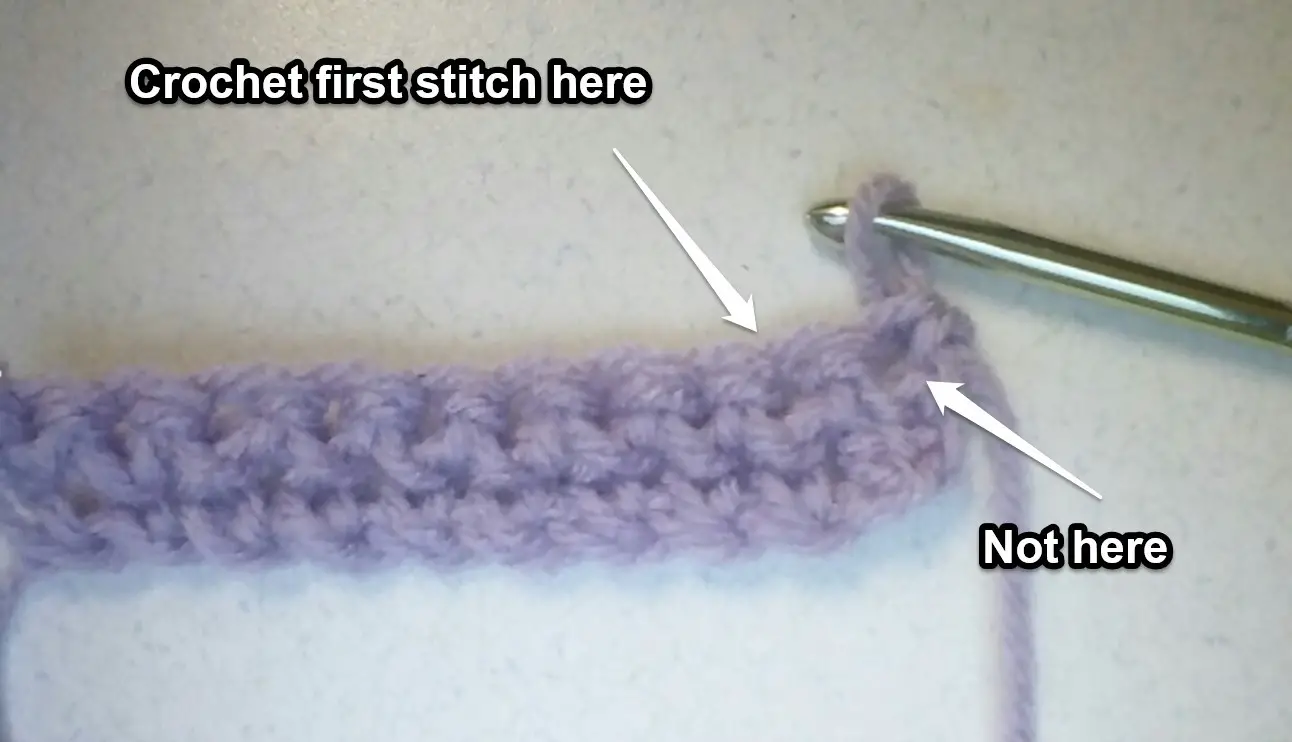
- The sides of your project grow or shrink. This is very common mistake beginners make. The keys to having nice even edges are to know where to work the first stitch of each row, where to work your last stitch, and how many chain stitches to work at the beginning of each row.
Insert the hook into the first stitch, not at the base of the chain stitches.
Here are the guidelines for beginning each row:
- Single crochet – 1 chain stitch
- Half double crochet – 2 chain stitches
- Double crochet – 3 chain stitches
- Treble or triple crochet – 5 chain stitches
Work the last stitch into the top chain stitch of the previous row. Also get into the habit of counting your stitches across a row. By starting and stopping at the correct places as well as counting stitches you’ll end up with nice even sides every time.
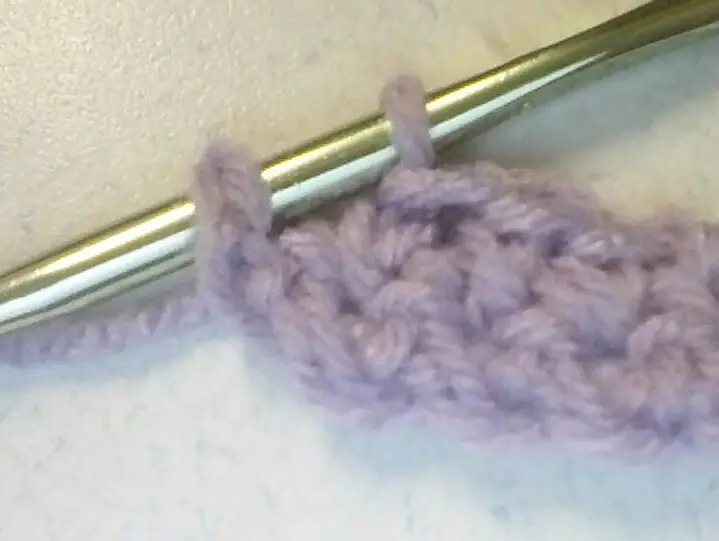
Work the last stitch into the top chain of the previous row.
- Crocheting too tightly or too loosely or varying the tension. It is important to keep your tension constant. One way to do this is to take your time. Speed will come later, right now concentrate on making nice even stitches. If you crochet too tightly you’ll have a hard time working the next row because you’ll be fighting with the hook trying to insert it into the stitches. If you crochet too loosely your gauge will be off and your work will look sloppy. If your tension varies a lot your entire project will be uneven and wonky.
- Not crocheting under both loops. If you look at a crochet stitch you will see the two loops on top where you insert your hook form a sideways “V”. These loops are where you insert the hook. Many beginners only insert the hook into the front loop, not both loops. Unless the pattern specifies back or front loop, always use both loops.
- Using the wrong crochet terms. Since so many patterns are available online, you may come across patterns written in UK terms. That’s great if you’re from the UK, but it you’re in the US you will need to know there is a difference in the terms from US to UK. A US single crochet is a UK double crochet. You can see how that would make a difference when working patterns. Use this handy table to translate UK to US terms.
| US Terms | UK Terms | ||
| Chain | Ch | Chain | Ch |
| Slip stitch | Sl st | Slip stitch | Ss |
| Single crochet | Sc | Double crochet | Dc |
| Half double crochet | Hdc | Half treble | Htr |
| Double crochet | Dc | Treble | Tr |
| Treble crochet | Trb | Double treble | dtr |
- Tackling patterns way above your skill level. It is fun to challenge yourself and try out patterns a bit above your skill level. But if you are a beginner and try to tackle an advanced pattern you’ll only frustrate yourself. Crochet, like all skills, takes time to master. Give yourself time to learn and practice. Work beginner and basic patterns first. You’ll be doing intermediate and advanced patterns in due time, but for now take your time and enjoy learning and practicing.
- Not reading the pattern before you begin. Sure, a new pattern is exciting and I’m sure you’re just itching to begin. But stop. Take the time to read over the pattern so you understand the terms and instructions. Check out the Notes section to see if the designer gives you any tips on how to work the pattern and if there are any special stitches. If you run into any stitches or techniques you’re not familiar with, and there are no instructions about them in the pattern, look on YouTube for tutorials and practice before you begin the pattern. If you read and familiarize yourself with the pattern before you begin it will be much easier to work the project and not get frustrated.
- Not weaving in the tails of yarn securely. Now, this is one I learned the hard way. I spent months crocheting a Granny square afghan. It was lovely. I had used bright colors along with black. I was very proud of it. The first time I washed it about a third of the blocks had holes in them. I was devastated. I had not weaved in the tails of the yarn securely and they had come loose in the washer. Lesson learned.
When you clip the yarn, leave at least a 6 inch tail. Thread a tapestry or blunt needle with the tail and weave it in and out of the stitches for a few inches. Turn your work and weave the tail in and out of the stitches for another few inches. Turn your work again and repeat the process. Now you can snip the tail and not worry about it working its way out.
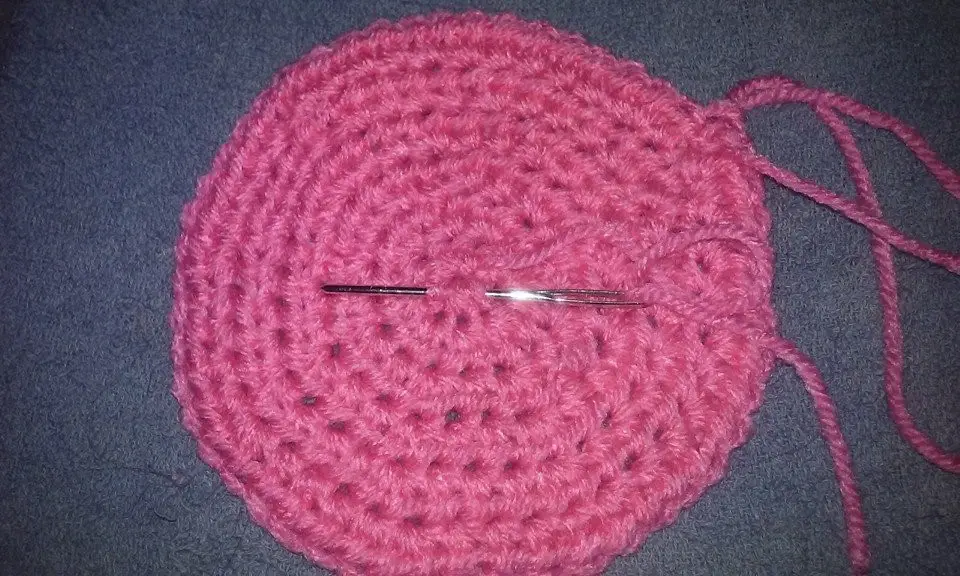
Weave the tail in and out of the stitches one way and turn your work.
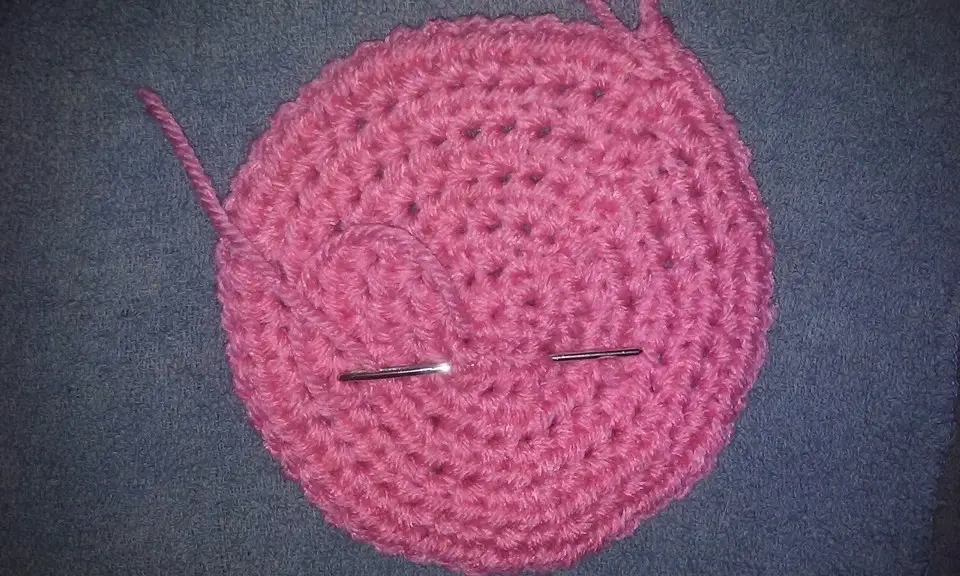
Weave the tails in and out for a few inches, turn your work.
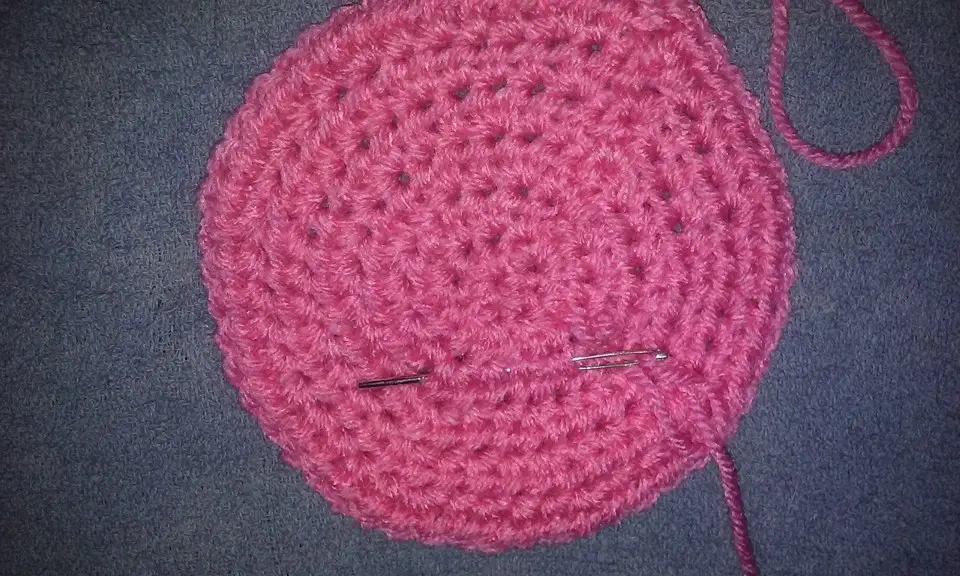
Finally, weave the tail in and out for the last few inches, snip the tail and your tail is now secure.
Even More Tips!
The list isn’t complete, but these are the mistakes most of us make from time to time, especially in the beginning. Here are a few more tips to help you avoid other mistakes.
- Understand yarn labels. The yarn label helps you choose the right yarn for your project. It should have the weight, fiber content, gauge with the suggested hook size, and laundry instructions. There may also be a dye lot (although most yarn does not have dye lots today). If there is a dye lot, purchase enough yarn for your project so that the color will be consistent.
- Know the US and European designations for hook sizes. US hooks are generally sized with a letter and a number. For example I/9. European and UK hooks are generally sized by millimeters. The same I/9 hook is a 5.5 millimeter hook. Here is a table to help you understand hook sizes.
| US Hook Sizes | ||||
| US Size | Millimeter Size | US Size | Millimeter Size | |
| B/1 | 2.25mm | J/10 | 6mm | |
| C/2 | 2.75mm | K/10 ½ | 6.5mm | |
| D/3 | 3.25mm | L/11 | 8mm | |
| E/4 | 3.5mm | M-N/13 | 9mm | |
| F/5 | 3.75mm | N-P/15 | 10mm | |
| G/6 | 4mm | P/Q | 15mm | |
| 7 | 4.5mm | Q | 16mm | |
| H/8 | 5mm | S | 19mm | |
| I/9 | 5.5mm | |||
- Block garments and fine work. Blocking relaxes the stitches and brings out the beauty of your work. It is essential for fine work such as shawls and doilies. Garments may need to be blocked to shape and size them properly. Generally, the acrylic yarn doesn’t need to be blocked, but fibers such as bamboo, cotton, linen, and hemp look best if blocked.
Blocking is very easy and a good habit to get into. Wet the fabric and roll it in a soft towel to remove the excess moisture. Lay it out on blocking squares and pin it onto the blocks shaping as you go. Leave the project to dry completely before you remove it. You can also pin the dry fabric onto blocking squares and use a spray bottle full of clean water to wet it. Let the project dry completely before you remove it from the blocking squares.
- Join an online or real-time crochet group. I’ve learned a lot from my fellow artists on the Facebook pages I belong to. I can get inspired, trade tips, and get my questions answered by like-minded people who love crochet. Ravelry is another site I enjoy for inspiration and fellowship.
I hope these tips and solutions help you enjoy crochet more. We all make mistakes, but instead of beating yourself up over them, look at them as learning experiences. Crochet is supposed to be relaxing and fun. So you messed up, so what! No one will know but you. We didn’t come into the world knowing everything. Like all skills, crochet is just practice, practice, practice. And then more practice.
Relax and enjoy. Until next time, keep on hooking!
If You Enjoyed this Article Please Share and Pin. It is Greatly Appreciated. 🙂


