Today let’s learn all about Granny Squares and how to Crochet them.
Hello, and thanks for stopping by! I hope you enjoy this blog and my other blogs. I certainly enjoy writing them for you. Today we’re going to learn how to crochet one of the most popular motifs in crochet – Granny Squares.

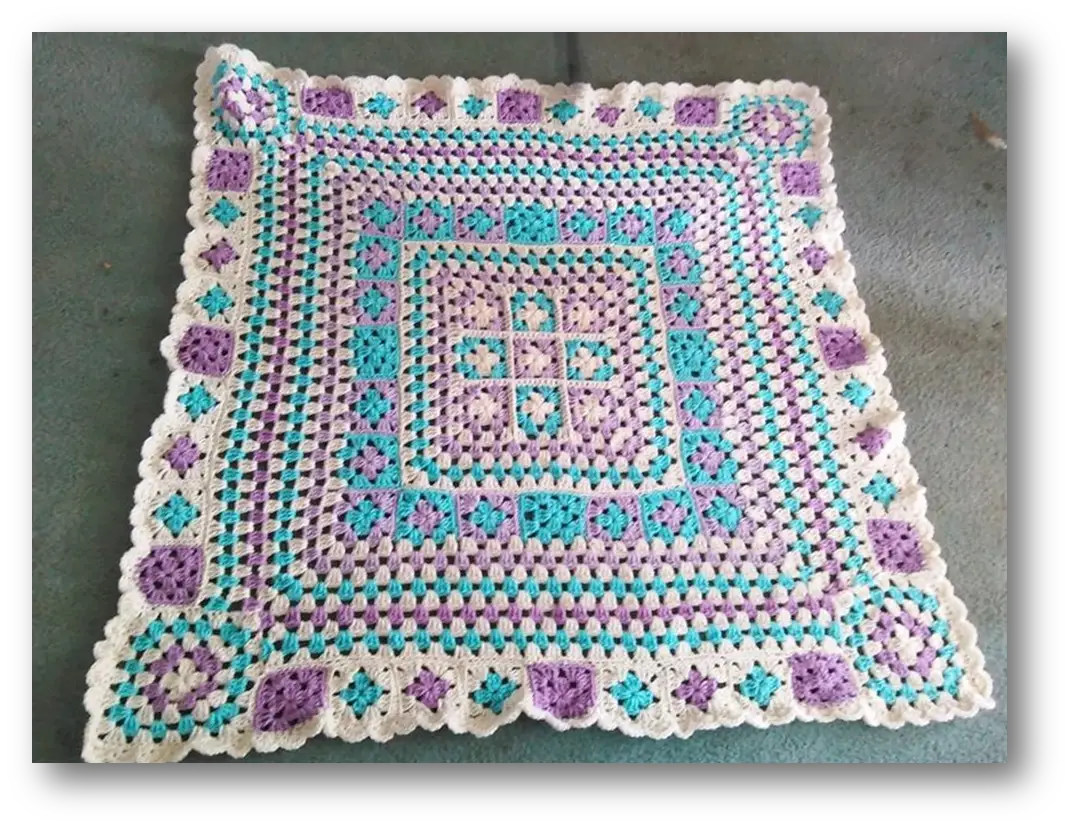
Perhaps one of the most endearing and enduring crochet patterns is the Granny Square. It is a pattern immediately recognized by crocheters and non-crocheters alike. Almost every home has a Granny Square afghan. But these classic motifs are for more than just Afghans. You can use Granny Squares to create garments, bags, home décor items, and many more fun projects.
Today we’re going to learn all about Granny Squares. We’ll go over the basic Granny Square pattern, joining options, and how to read a Granny Square diagram. Ready? Let’s get to it!
Basic Granny Square Pattern
Granny squares are crocheted in the round as flat motifs. You can make them small with only two rounds, or as large as you want with several rounds. Change colors by attaching the new color in a corner with a slip stitch.
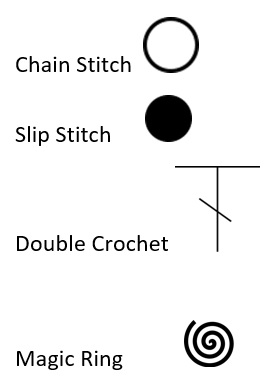
The stitches we’ll use include:
Chain stitch – ch
Double crochet – dc
Slip stitch – slst
The basic pattern is very simple. At each corner you crochet 3 dc, ch 3, 3 dc, ch1. At each chain 1 space you crochet 3 dc, ch 1. That’s it!
To begin chain 4 and join with a slip stitch into the first chain stitch.
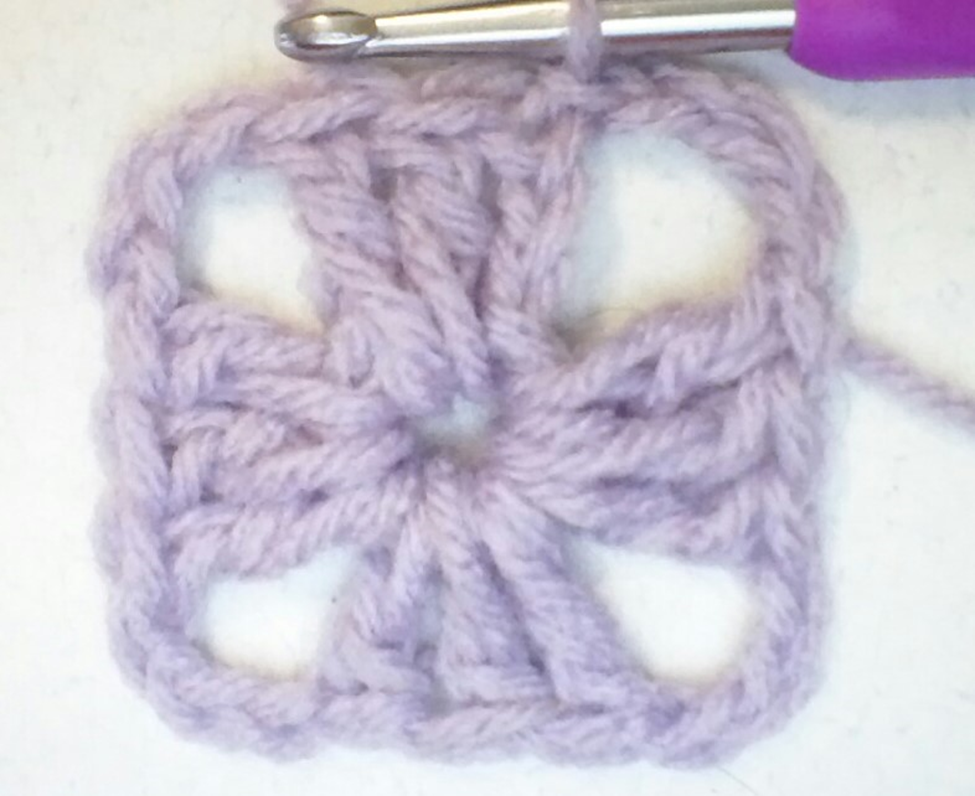
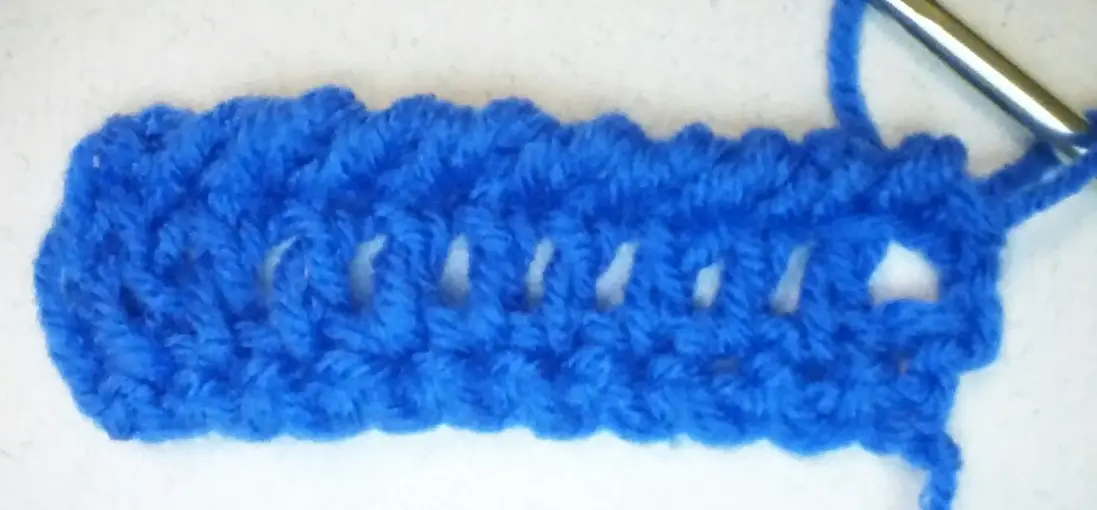
Round 1: Chain 3. Into the center of the ring crochet 2 dc, ch 3 *3dc, ch3* rep 3 more times. Slip stitch into the 3rd beginning chain. The ch 3 spaces are now the corners of the Granny Square.
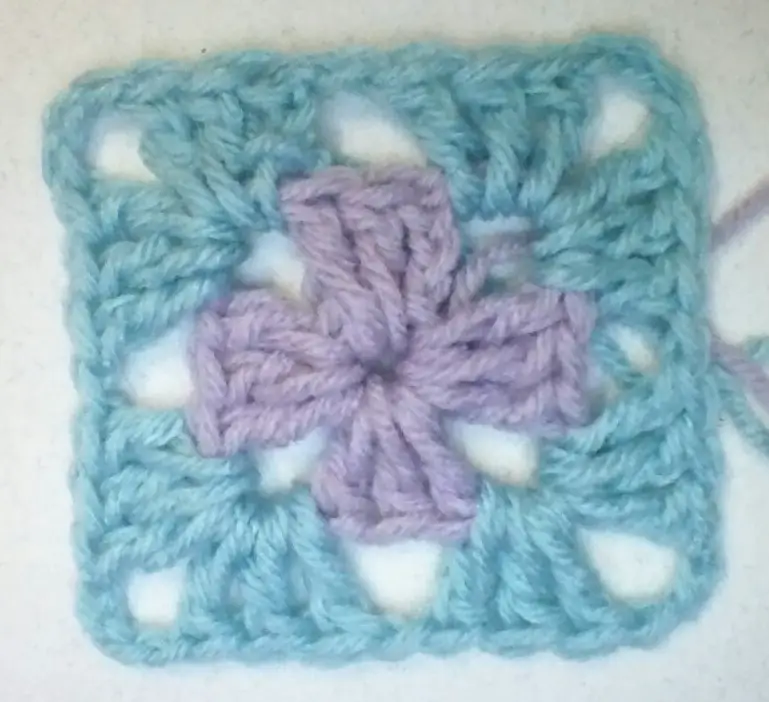
Round 2: Attach a new color in a ch 3 space. Ch3, 2dc, ch1 into ch3 sp, *into the next ch3 sp crochet 3dc, ch3, 3dc, ch1* rep around square, join with a slst into the 3rd ch st of the beginning chain.
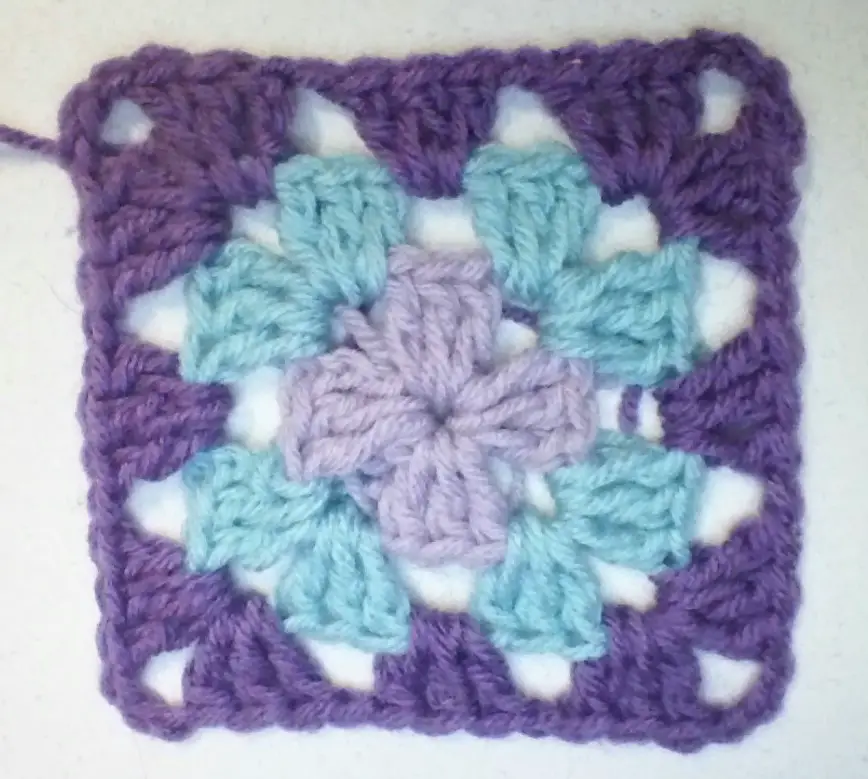
Round 3; Join new color in a ch3 space. Ch3, 2dc, ch3, 3dc, ch1 *3dc, ch1 into the next ch1 sp, 3dc, ch3, 3dc, ch1, into the next ch3 sp* rep around and join with a slst into the 3rd ch of the beginning ch.
Continue adding rounds working ch3, 2dc, ch3, 3dc into the first corner space. Work 3dc, ch1 into each ch1 space, and 3dc, ch3, 3dc into each ch3 space.
Once you have the number of rounds you desire to crochet a border of single crochet into each stitch. This will give you an even and uniform border to use when you join the squares.
If you are using only one color either slip stitch to the next chain 1 space and begin the round or turn the square and begin the round in the corner space. If you turn the square after each round, the center of the square will remain straight. If you go around and around without turning your work, the center of the square may get crooked. This is the natural result of the stitches and tension on the yarn.
Granny Square Diagrams
I really like to use diagrams for motifs including Granny Squares. To me, a diagram is much easier to understand than a written pattern for this type of project. Designers use a standard set of symbols in crochet diagrams. These are the symbols used in Granny Squares.
Diagrams are read from the center out. Begin at the symbol for the magic ring and work each round joining the stitches with a slip stitch into the last chain stitch of the beginning round. To change colors, leave at least a 6-inch tail to weave in and snip the yarn after completing a round. Join the yarn with a slip stitch into any chain 3 space. If you aren’t changing colors you can either slip stitch to the next chain 1 space and begin or turn the square and begin in the chain 3 corner. If you turn your square this will prevent the center of larger squares from tilting. The center of larger squares tilt naturally because of the tension of the stitches.
This is the diagram for Round 1 of a Granny Square. Using the symbol guide, you can see the center symbol indicates beginning with a magic ring. Chain 3, 2 double crochet and chain 1. 3 double crochet and chain 1 are repeated three more times. Join with a slip stitch into the 3rd chain stitch of the beginning chain.
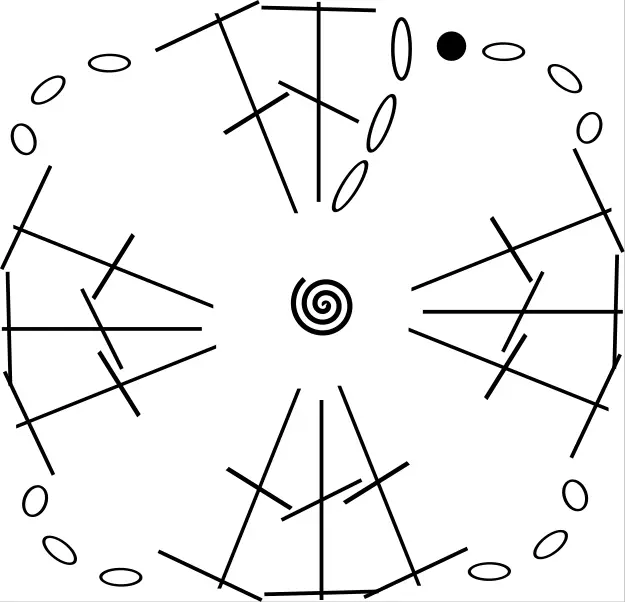
Round 2 begins with chain 3, 2 double crochet, chain 3, 3 double crochet, chain 1 into the first chain 3 space. Into each chain 3 space, work 3 double crochet, chain 3, 3 double crochet, chain 1. Join into the 3rd chain of the beginning chain with a slip stitch.

Round 3 also begins with chain 3, 2 double crochet, chain 3, 3 double crochet, chain 1 into the first chain 3 space. Into each of the chain 1 spaces work 3 double crochet and chain 1. At each chain 3 corner space work 3 double crochet, chain 3, 3 double crochet, chain 1. Work around the Granny square and join with a slip stitch into the 3rd chain of the beginning chain.

Add as many rounds as you like following the pattern for each round. Attach new colors in a corner space with a slip stitch.
Joining Methods for Granny Squares
There are several methods of joining Granny squares. In this tutorial, we will learn how to use a whip stitch, slip stitch, single crochet, and join as you go method.
Whip Stitch
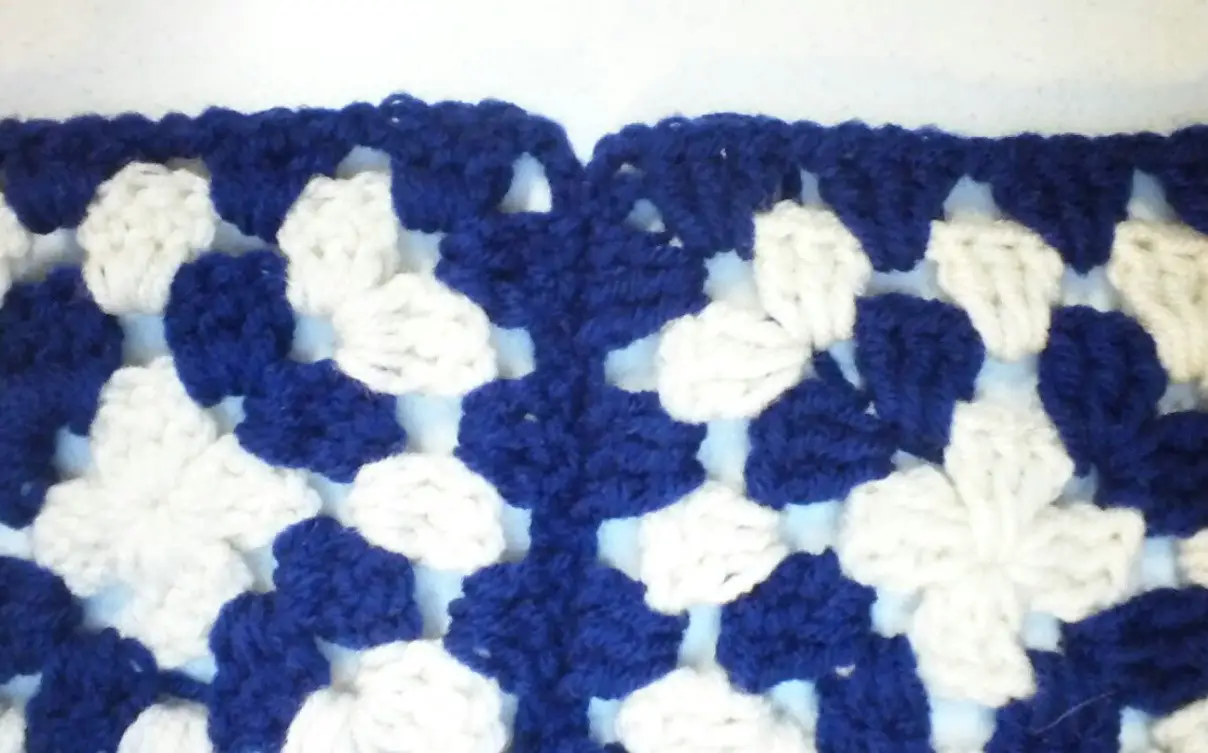
I like to use a whip stitch to join Granny squares. Hold two squares with right sides facing. Thread a tapestry needle with a long piece of yarn. Pick up only the outer loops of the border stitches and draw the yarn through them. Pick up only the outer loops of the next stitches and draw the yarn through them. Continue across the side of the square until you reach the end. You can either pull up a long tail and cut the yarn or pick up two more squares and continue to whip stitch them together.

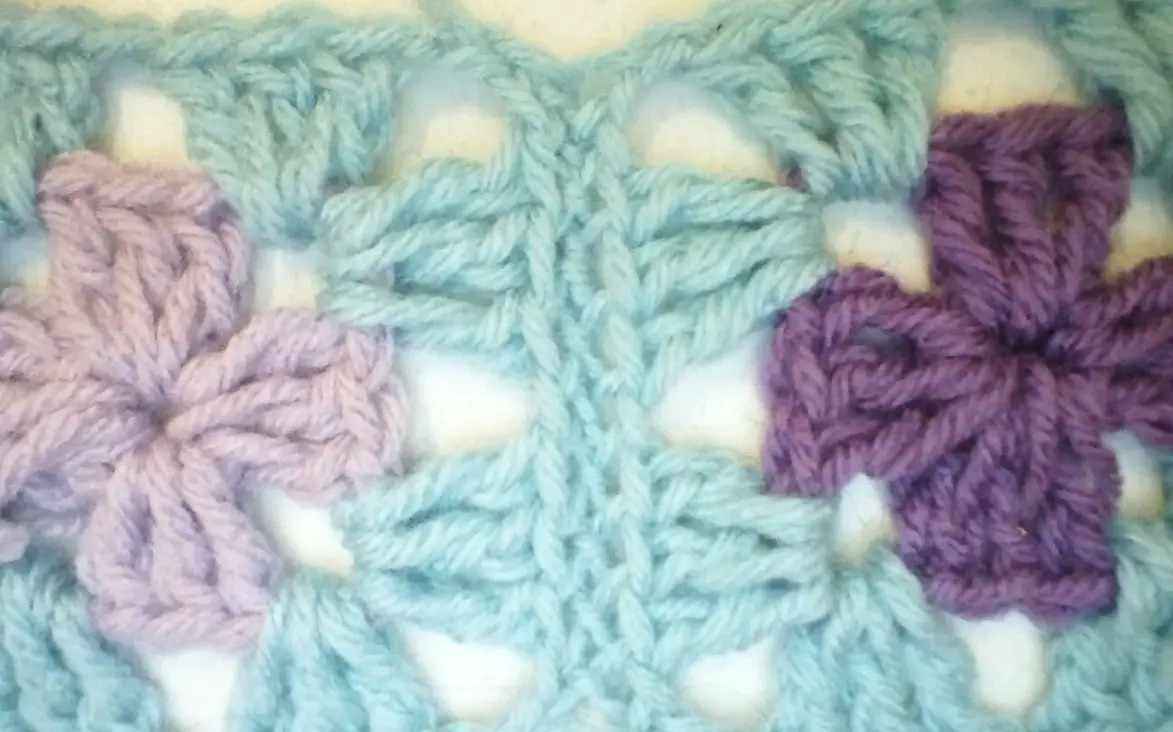
This is the pretty seam you get when you use whip stitches to join Granny squares. I like how it looks almost lacy or braided.
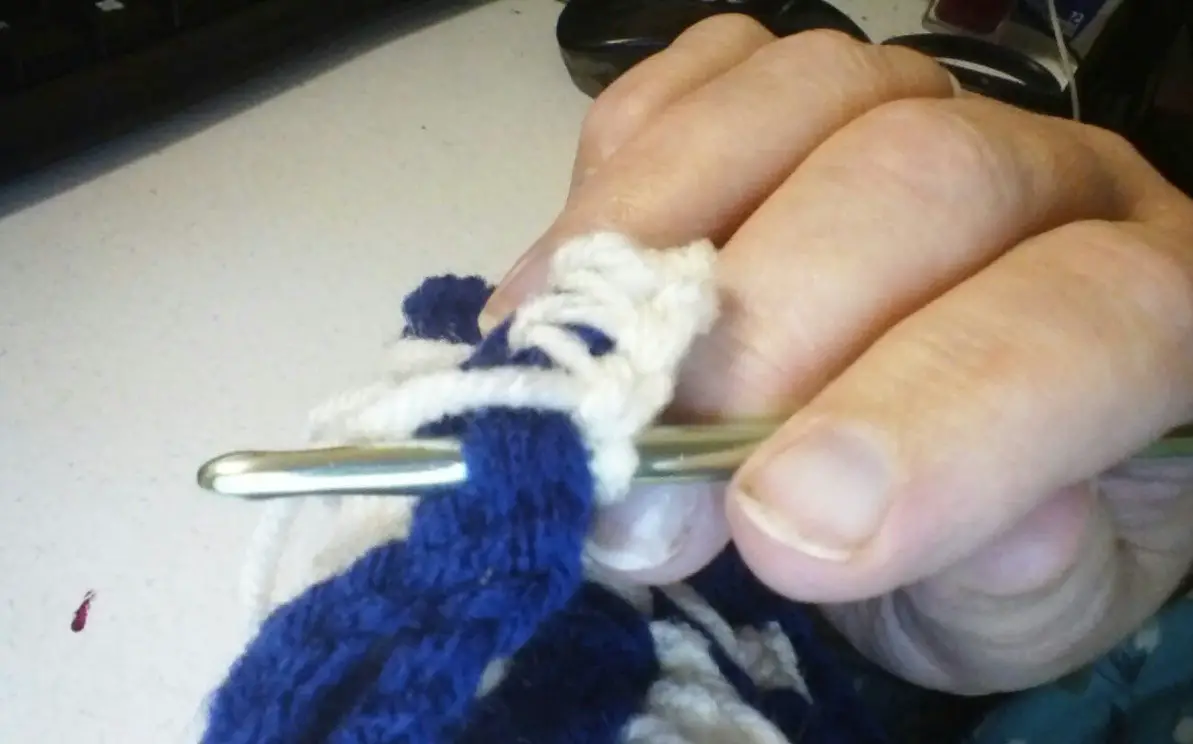
Slip Stitch Join
The slip stitch, as the name implies, uses slip stitches to join the Granny squares. Hold two squares with right sides together. Insert the hook under both loops of each border of the squares. Yarn over and pull the yarn through the stitches and through the loop on the hook. Insert the hook into the border stitches of both squares, yarn over, and pull through the stitches and the loop on the hook. Continue until you get to the end and either snip the yarn or pick up two more squares and continue to join them with slip stitches.
Slip stitch join
Single Crochet Join
The single crochet join creates a raised border around the squares. Hold two squares with the wrong sides together and insert the hook into both loops of each border stitch of each square. Yarn over and pull through the stitches, yarn over and pull through the two loops on the stitch. Insert the hook into the next set of border stitches, yarn over and pull through the stitches, yarn over and pull through the two loops on the hook. Continue across the square. You can either snip the yarn or pick up two more squares and join them.
When you have a column of squares joined and you’re working on joining more squares, slip stitch under the single crochet stitches in each corner. This will give you a nice clean transition.
Single crochet join
Join as You Go Method
I really like the join-as-you-go method. One of the reasons is as you work on your project you’re joining each Granny square. Once you have all your squares crocheted you also have them joined. It’s like killing two birds with one stone.
Complete the first square. Work the second square to the last round of stitches. Work the first three sides until you reach the first corner of the fourth side. Now let’s work 3 double crochet, chain 1, pick up the first square and match a corner to the square you are working on and slip stitch into a chain 3 space. Chain 1 and work 3 double crochet into the chain 3 space. When you come to the chain one space (spaces) on the last row of the fourth side instead of chaining 1, slip stitch into the chain 1 of the first square. When you reach the last chain 3 space work 3 double crochet, chain 1, slip stitch into the chain 3 space of the first square, chain 1, 3 double crochet and join in the 3rd chain of the beginning chain.
By slip stitching into the chain 3 and chain 1 spaces, you are joining the squares as you crochet them. You can now join the Granny squares in rows or columns. Remember to work the last row matching the sides and slip stitching into the proper chain 1 and chain 3 spaces.
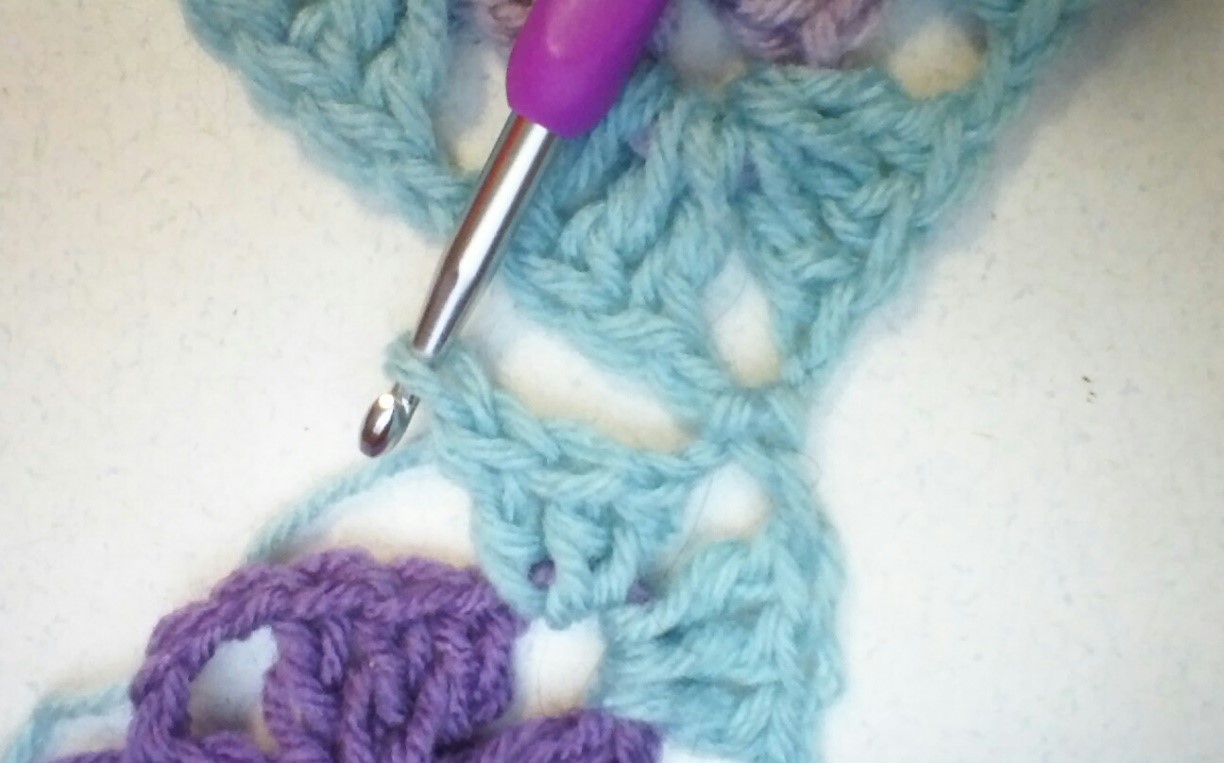
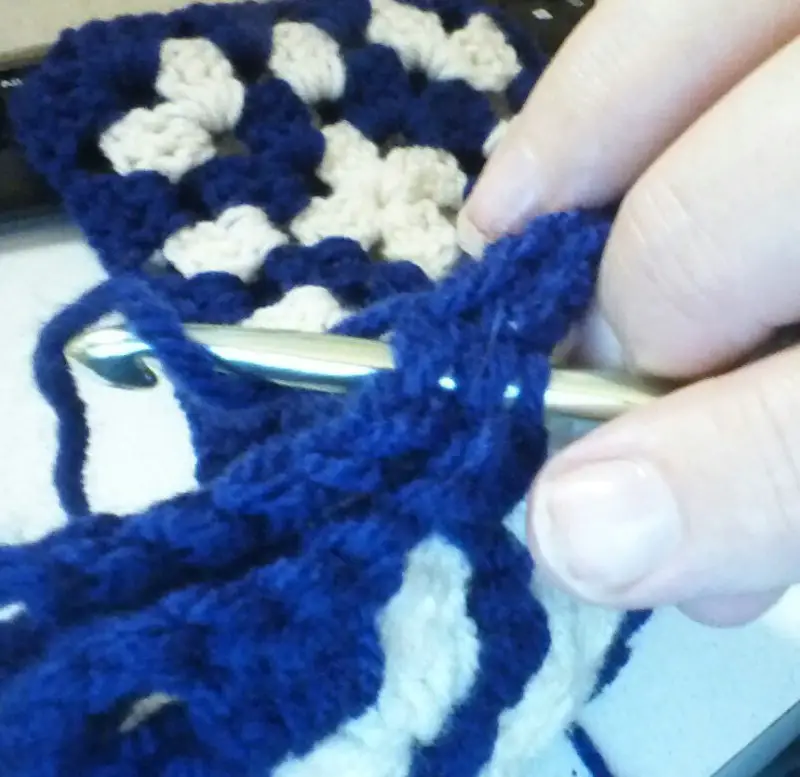
Here is a close-up of a corner
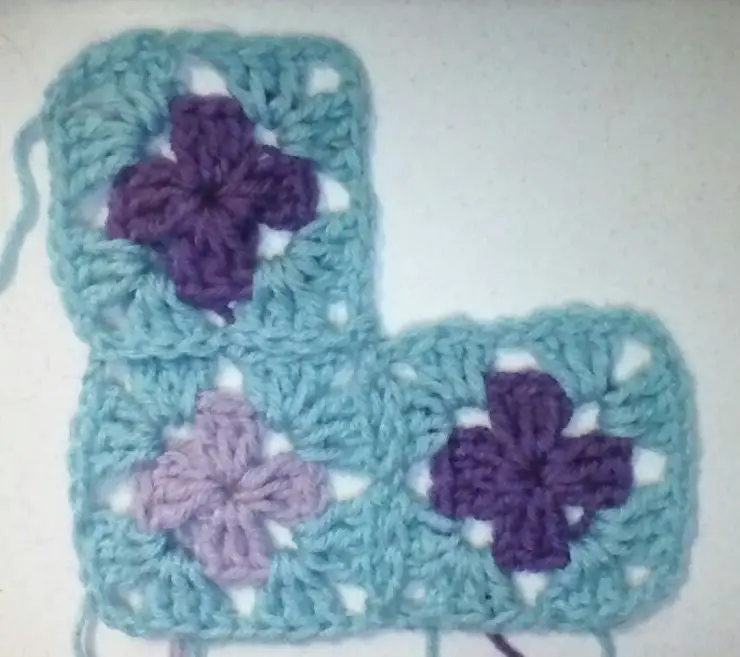
Here is a close-up of the join-as-you-go method. Notice how the corner spaces are worked with 3 double crochet, chain 1, slip stitch into the corner space of the adjoining square, chain 1, 3 double crochet. At each chain 1 space simply slip stitch into the corresponding chain 1 space of the adjoining square.
Border Options
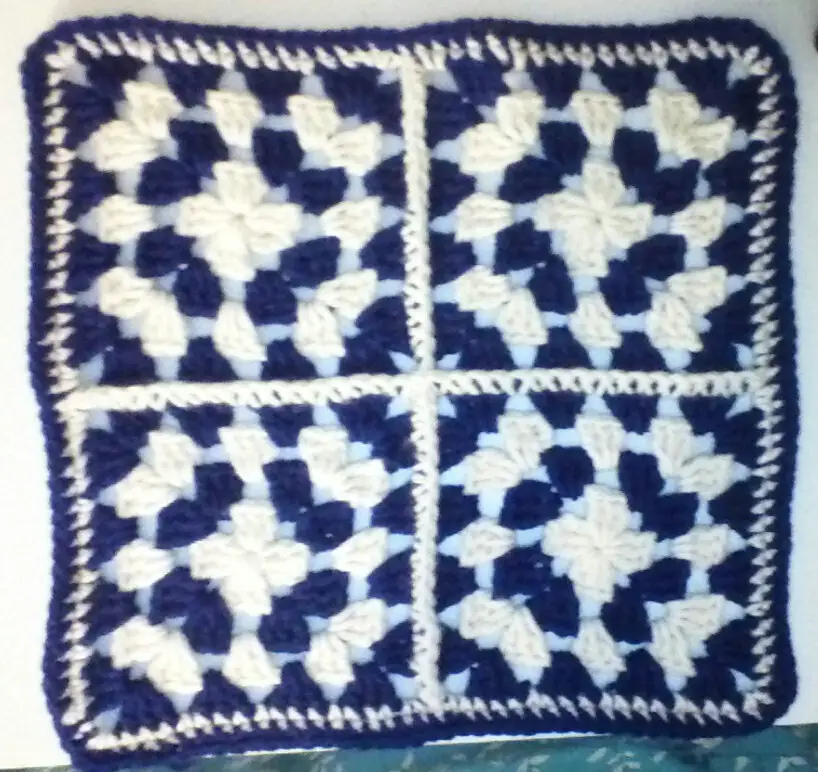
Before I crochet a border, I like to crochet at least one round of single crochet stitches around the entire project. This gives me a nice even round of stitches to crochet the border stitches onto. I also think it gives the projects a more polished, pulled-together look. Be sure to remember to work 3 single crochet in each corner to keep your projects shaped correctly.
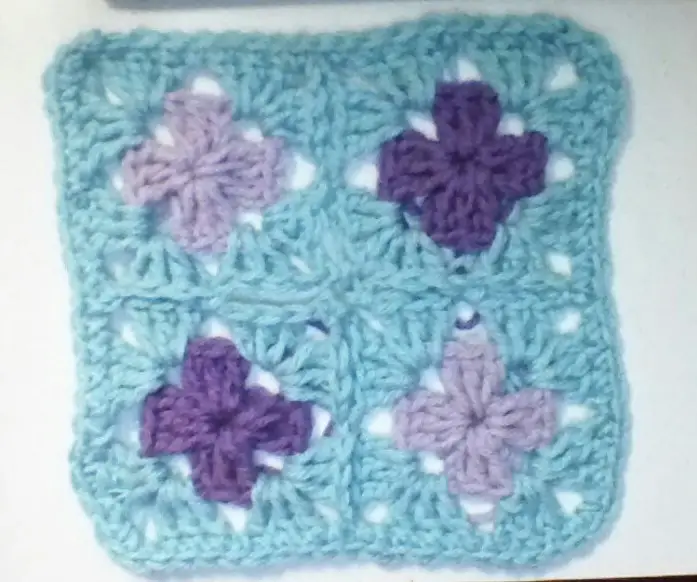
Here is a small example of a border and how it cleans up the Granny squares.
Shell Stitch Border
The shell stitch border is one of my favorite go-to borders. It looks good on almost any project and it is easy to do. Join the border yarn in any second stitch of a corner. Chain 3, work 2 double crochet into the next stitch. Skip 1 stitch, single crochet into the next stitch, skip 1 stitch, 3 double crochet into the next stitch. Repeat this pattern around the project joining with a slip stitch into the 3rd chain of the beginning chain.
If you want a more ruffled look, simply work 5 or 7 double crochet stitches into each stitch.
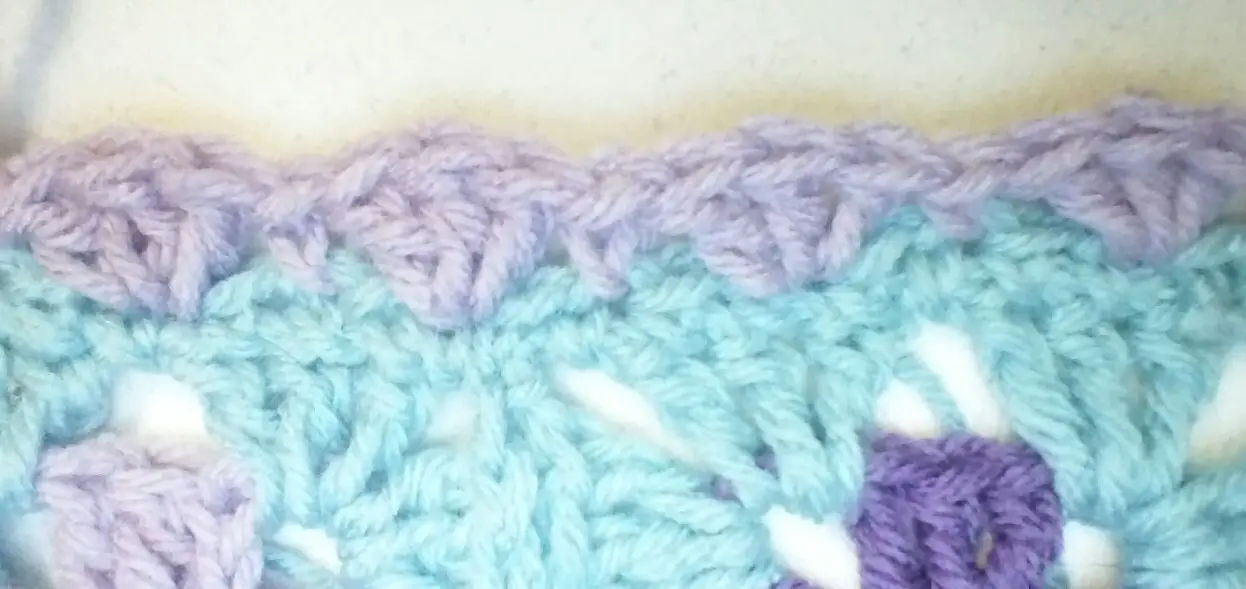
Shell stitch border
Scalloped Border
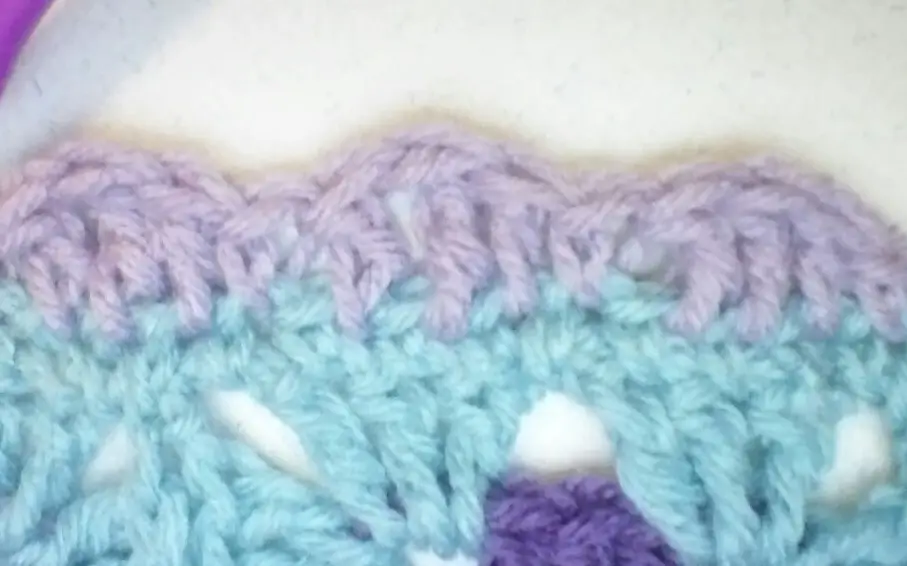
The scalloped border is very similar to the shell stitch border. Join the yarn into any 2nd stitch of a corner. Chain 1, work in this pattern around the project: 1 half double crochet, 1 double crochet, 1 half double crochet, 1 single crochet.
If you want more definition work 1 half double crochet, 1 double crochet, 1 treble crochet, 1 double crochet, 1 half double crochet, and 1 single crochet around.
Join in chain 1 at the beginning of the round.
Crab Stitch
The crab stitch, or reversed single crochet stitch, gives your projects a pretty rope-like border. Instead of working from right to left, you work the crab stitch from left to right. Join the yarn into any stitch and chain 1. Insert the hook into the next stitch to the right of the hook. Yarn over and pull through, yarn over and pull the yarn through the two loops on the hook. Insert the hook into the next stitch to the right to begin the next stitch. Workaround your project from the left to the right and join in chain 1 of the beginning.
End Notes
Thank you so much for stopping by today. I hope this tutorial on Granny Squares helps you understand how to crochet them, and how to use a crochet diagram. Please feel free to ask any questions you may have in the comments. I will do my best to answer them. Also, if you have any suggestions on topics you’d like to see me cover, I’d love to hear from you. Be sure to check back soon for more tutorials, free patterns, and lots of cool stuff.
Until next time, take care, and keep on hooking!
If You Enjoyed This Article Please Share and Pin. It is Greatly Appreciated. 🙂


