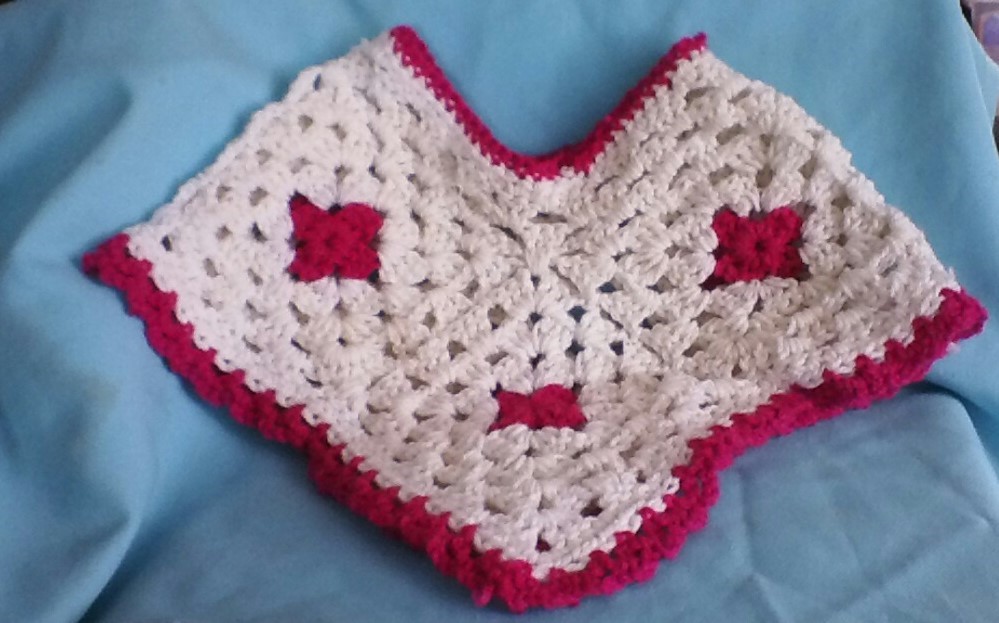
The complete guide to Crocheting the Spring Granny Square Poncho
Hello and welcome to today’s blog! I was blessed with two grandchildren last year. My son and his wife had a little girl and my daughter had a boy. My grandkids about a month apart in age and right now are just over a year old. I enjoy crocheting things for them like blankets, hats, garments, and lots of stuff.
My son and daughter in law like to take their daughter on walks and to a nearby park. I was looking for a pattern to crochet a light jacket or coverup for her. I have always like crochet Granny squares and I saw an idea on Pinterest for a crochet Granny square poncho. So, I got my designer’s hat on and took a shot at designing my own version. I was really happy with the result, and I hope you like it too.
You only need basic crochet skills to crochet up this cute poncho. If you need to brush up on your skills check out my Crochet Tutorial #1 – Basic Stitches. But first we’ll learn all about Granny squares.
Granny squares are perhaps one of the most iconic patterns in crochet. You can use crochet Granny squares for so many other projects besides afghans and blankets. This crochet poncho pattern fits 12 to 18 months, but you can make it smaller by using smaller Granny squares or make it larger with bigger Granny squares or more squares added to the pattern.
Basic Crochet Granny Square Pattern
Granny squares are crocheted in the round as motifs. To begin chain 4 and join with a slip stitch.
Round 1: ch3, 2dc into ring, ch3 *3dc, ch3* rep 3 times, join in 3rd ch st
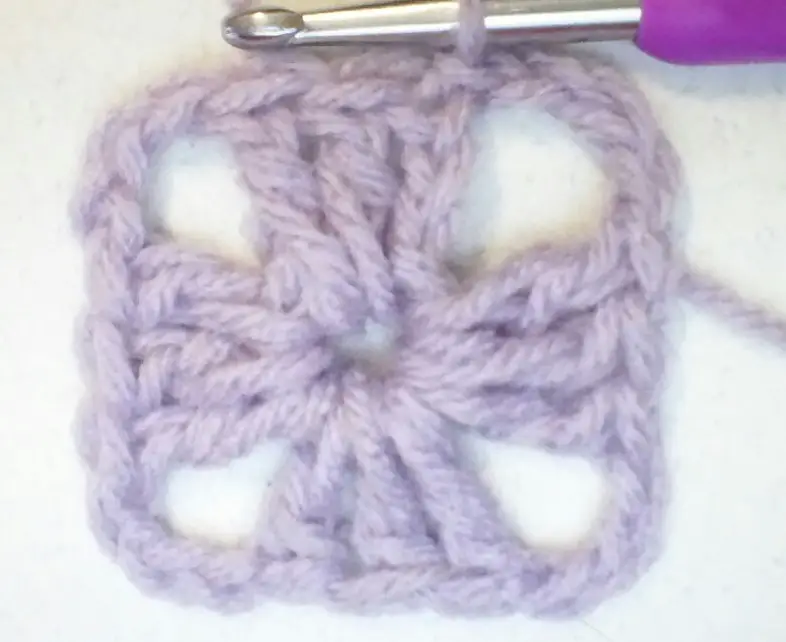
Round 1
Round 2: Join new color in a ch3 sp or sl st to next ch3 sp, ch3, 2dc, ch3, 3dc, ch1 into first ch3 sp *3dc, ch3, 3dc, ch1* into each ch3 sp around, join in 3rd ch st
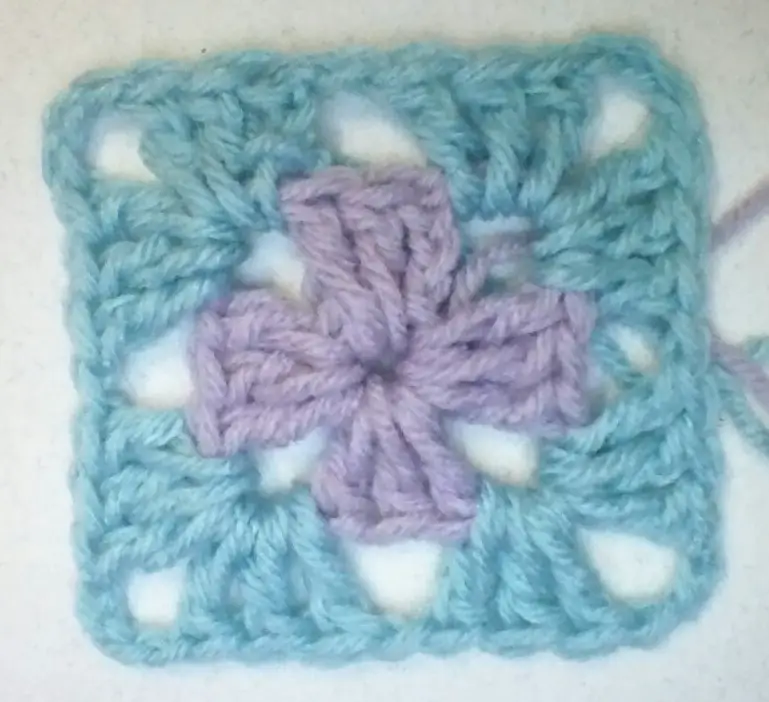
Round 2
Round 3: Join new color in ch3 sp or sl st to next ch3 sp, ch3, 2dc, ch3, 3dc, ch1 into first ch3 sp *3dc, ch1 into next ch1 sp, 3dc, ch3, 3dc, ch1 into next ch3 sp* rep around and join in the 3rd ch st
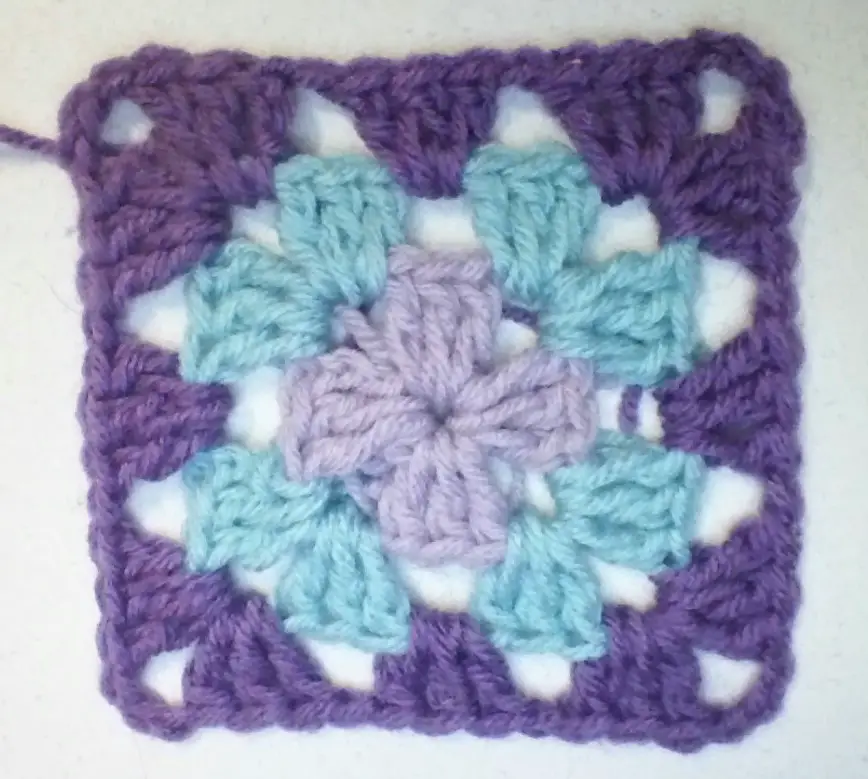
Round 3
Add more rounds to increase the size of the Granny square working 3dc, ch3, 3dc, ch1 into each ch3 space. Work 3dc, ch1 into each ch1 space around the Granny square. As you increase the size of your square the inside round will start to lean. This is natural because of the tension of the stitches. If you don’t want the lean simply turn the square each time you begin a new round.
Spring Granny Square Poncho Pattern

You will need:
2 colors of medium weight yarn, I’ve used Red Heart Super Saver in White (Color A) and Hot Pink (Color B). You don’t need and entire skein of each color, so this would be a good stash buster pattern.
Size I/9 5.5mm crochet hook
Tapestry Needle
Notes: I used the join as you go technique, but you can sew your Granny squares together if you like.
The first round of the Granny squares is crocheted with Color B. The rest of the squares are crocheted with Color A. Two rounds of Color A form the first border and Color B is used to crochet the final two rounds of border.
If you are going to follow the pattern and join as you go, crochet the first Granny Square completely. Crochet the second Granny square to the last round, but don’t crochet the last side.
Join as You Go
The join as you go technique joins the Granny squares are you crochet them. This is one of my favorite joining techniques because it looks pretty and once I get all of the squares crocheted, I’m done joining them. No going back and crocheting or sewing the motifs together.
The first square is crocheted completely. Crochet the second square up to the last side of the last round. Work 3dc, ch1, slip stitch into a ch3 space of the first square, ch1, 3dcs, slip stitch into the next ch1 sp. As you work around the square, slip stitch into the chain 1 spaces and work 3dc, ch1, slip stitch into the ch3 space, ch1 into each chain 3 space.
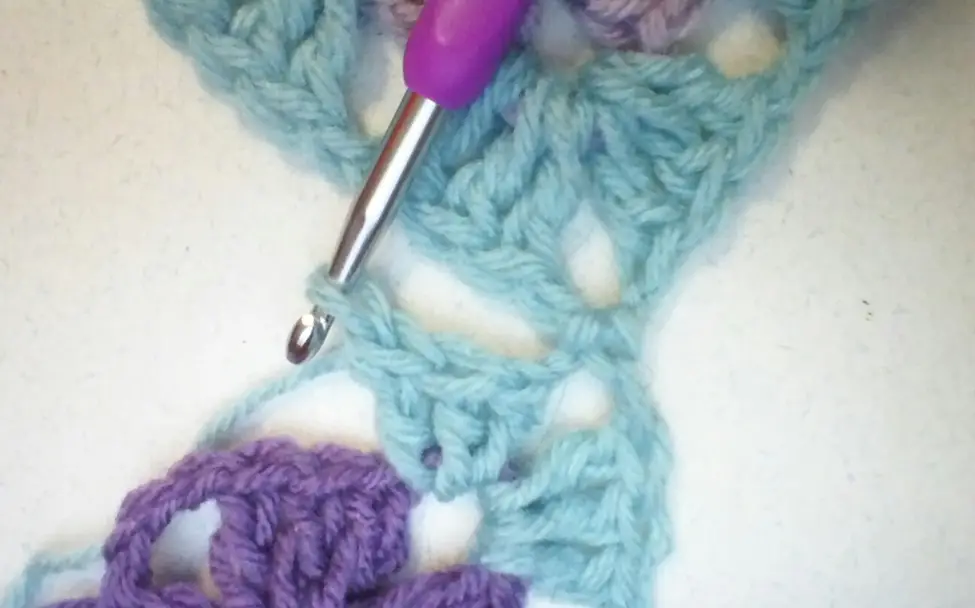
Close up of corner
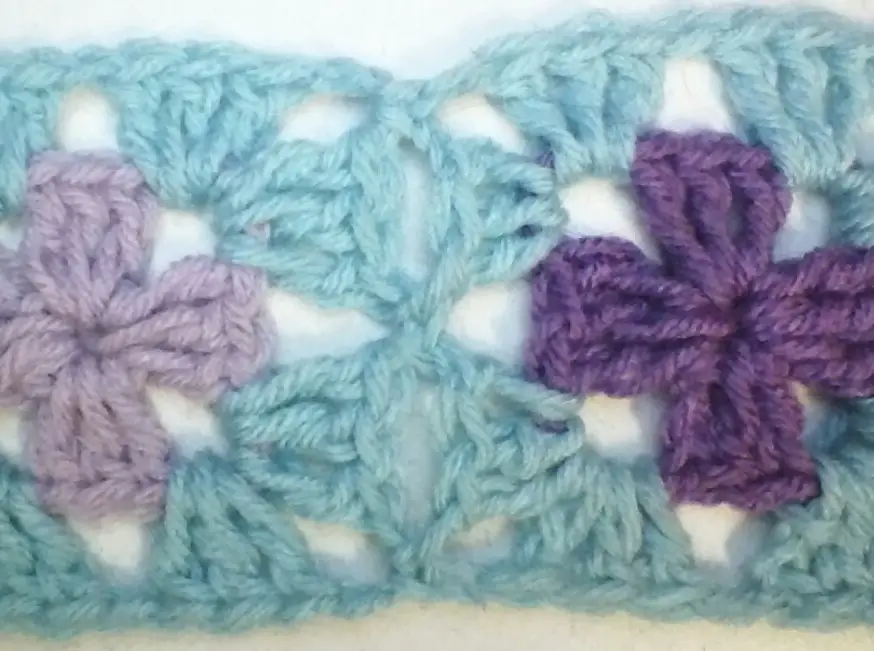
Close up of side
Work the third square to the last round. Crochet three sides and follow the above directions for the fourth side joining it to the first two squares according to the diagram.
Work the fourth square up to the last two sides of the last round. Join the third and fourth square according to the diagram. Continue joining the squares until you end up with a circle of Granny squares.
The diagram represents the placement of the Granny squares, although I couldn’t get the blocks to bend so that they formed a circle.
Border: Round 1: Once all six squares are crocheted and joined, join Color A to a chain 3 space and work 3dc, ch1 into each chain 1 space. At each tip of the poncho (front and back) work 3dc, ch3, 3dc, ch1. Crochet in this manner all of the way around the poncho. Do not break yarn.
Round 2: Chain 1 and work a single crochet into each stitch around and join in chain 1. Break the yarn and leave a long tail to weave in.
Round 3: Join Color B in any stitch. *Chain 3, skip 1 st, sc into next st* rep around and join into joining space
Round 4: Slip stitch into the next ch3 space. *ch3, sc into the next ch3 sp* rep around and join into the 1st ch st, break the yarn and leave a long tail to weave in
Neckline: Round 1; Join Color A in the back center chain 3 space between squares 2 and 6. Ch3, 2dc, ch1 into joining space. Work *3dc, ch1* into each chain 1 spaces. When you come to the point where squares 2, 3, and 4 are joined, work 3dc, ch1 in that space. At the point where squares 4,5, and 6 are joined work 3dc, ch1 in that space. Work around the neckline, do not break the yarn.
Round 2: slip stitch into the next chain 1 space, ch3, 2dc, ch1 into this space. Work *3dc, ch1* into each chain 1 space around, join in slip stitch.
Round 3: Ch1, single crochet into each st around, join in ch1, break yarn and leave long tail to weave in
Round 4: Join Color B into back neckline, ch1, single crochet into each stitch, break yarn, weave in all tails
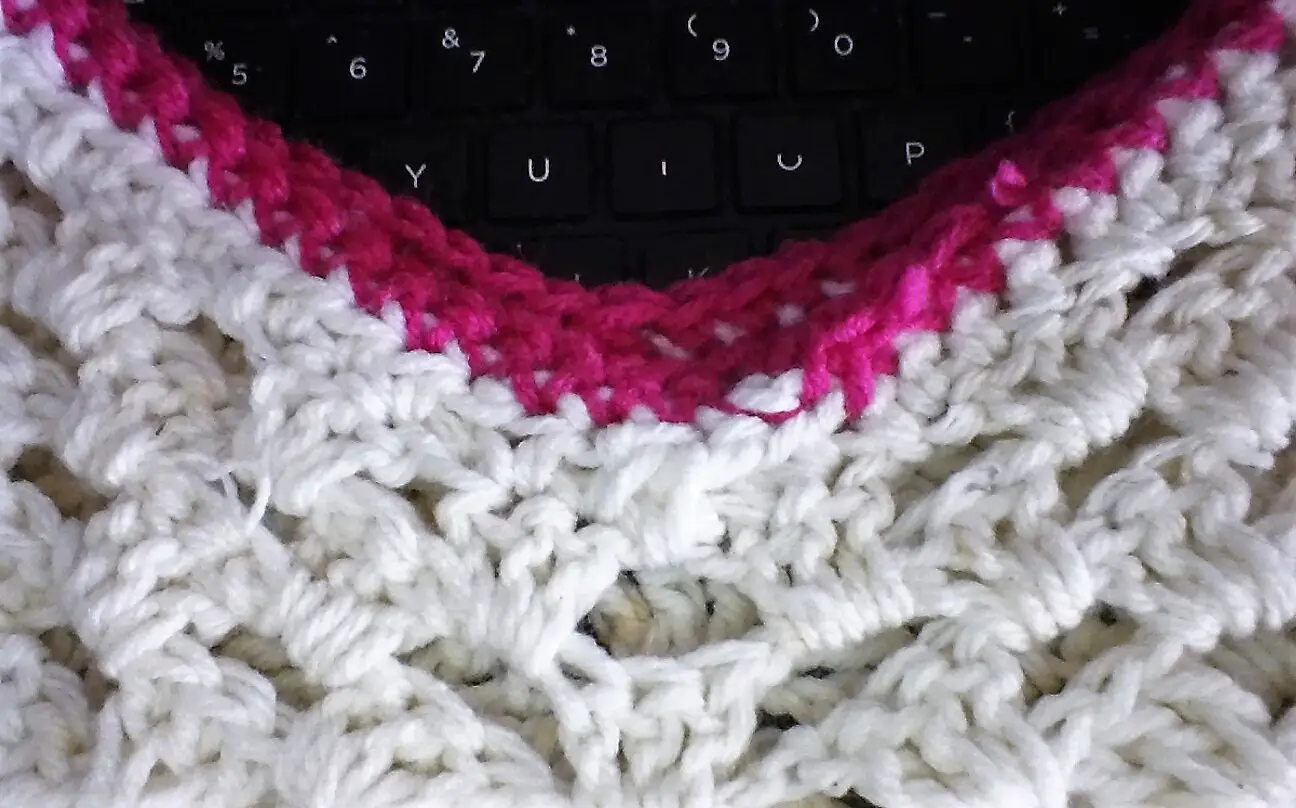
Center neckline

Spring Granny Square Poncho Diagram
End Notes
Thanks again for stopping by. I hope you enjoy crocheting the Spring Granny Square Poncho. Please feel free to sell any items you make with my patterns. All I ask is that if you want to share the pattern, please share the link to this blog instead of copying and pasting the pattern.
Do you have an idea for a future blog? Got a question? Please leave your idea and questions in the comments and I will do my best to get right back to you.
Take care and until next time, keep on hooking!
If You Enjoyed this Article Please Share and Pin. It is Greatly Appreciated. 🙂


