Hello and welcome! Today I want to share with you how to crochet the popular ripple and chevron patterns. These are classic patterns that have been handed down from generation to generation. I think what makes these patterns perennial favorites is their beauty and simplicity. You have the chance to express your creativity in not only the stitches of the pattern but the endless color combinations.
There are several variations on the ripple and chevron patterns and we’ll cover some of the today. Are you ready to begin? Great, let’s get to it.
Stitches Used in this Tutorial
We will be using basic stitches today. If you know how to single crochet, double crochet, and chain, you can work the ripple and chevron patterns. If you need to learn how to do these stitches, check out my Crochet Tutorial #1 first.
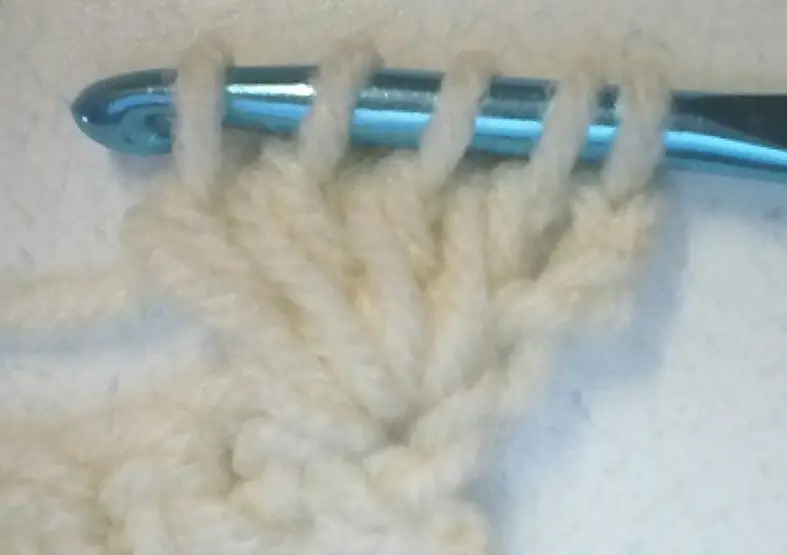
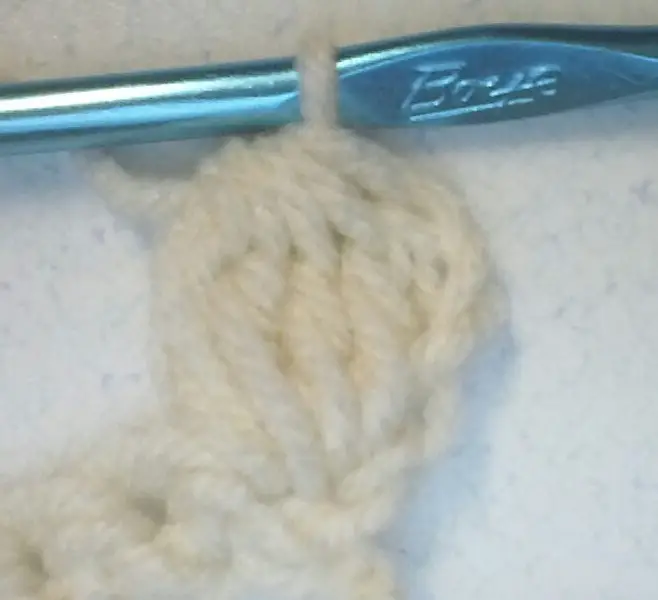
The peaks of the ripple and chevron patterns are created by crocheting three stitches into one or more spaces. The valleys are created by crocheting three stitches as one across three stitches. This is known as double crochet 3 together (dc3tog). Yarn over and insert the hook into the next stitch. Yarn over and pull through the stitch. Yarn over and pull through the first two loops on the hook. Do not complete the stitch. There are now 2 loops on the hook.
Yarn over and insert the hook into the next stitch, yarn over and pull through the stitch, and yarn over and pull through the first two loops on the hook. Do not complete the stitch. There are now 3 loops on the hook.
Yarn over and insert the hook into the next stitch, yarn over and pull through the stitch. Yarn over and pull through the first 2 loops on the hook. Do not complete the stitch. There are now 4 loops on the hook.
Complete the dc3tog by a yarn over and pull it through all four loops on the hook at once. This combines the three stitches as one and forms the valley of the pattern.
The process is the same if you are using single crochet. Insert the hook into the next stitch, yarn over and pull through. Do not complete the stitch. There are now 2 loops on the hook.
Insert the hook and yarn over, pull through and stop. There are now 3 loops on the hook.
Insert the hook and yarn over, pull through the stitch. You now have 4 loops on the hook. Yarn over and pull through all 4 loops at once to complete the stitch.
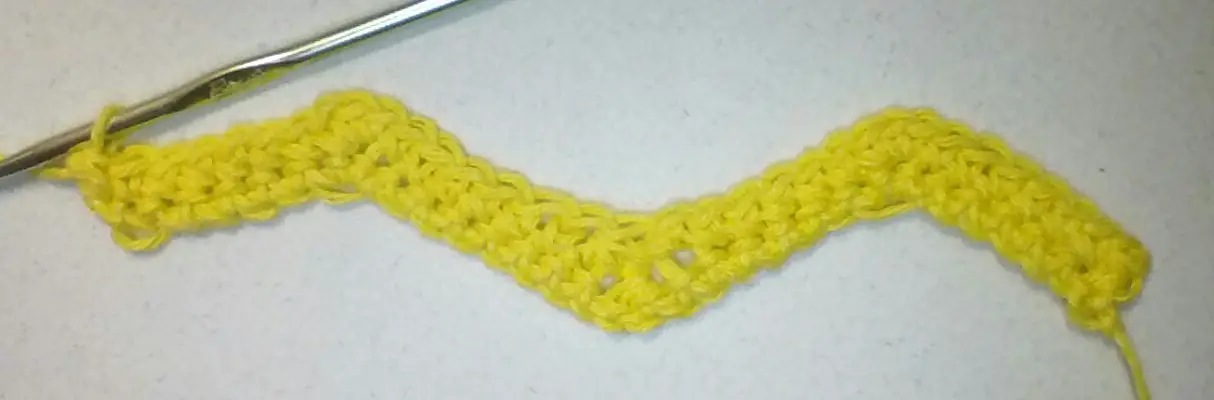
Single crochet ripple
Crochet Diagrams
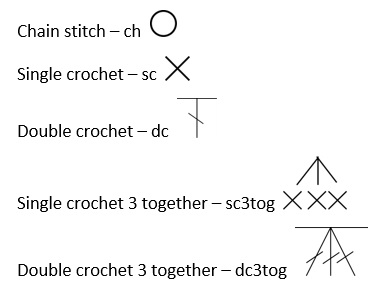
Many times designers will use crochet diagrams in place or in addition to written patterns. I like crochet diagrams. They help me see how the stitches come together and give me a visual representation of how the pattern should look. There is a standardized set of symbols used in crochet diagrams. Here are the crochet symbols we’ll use in this tutorial.
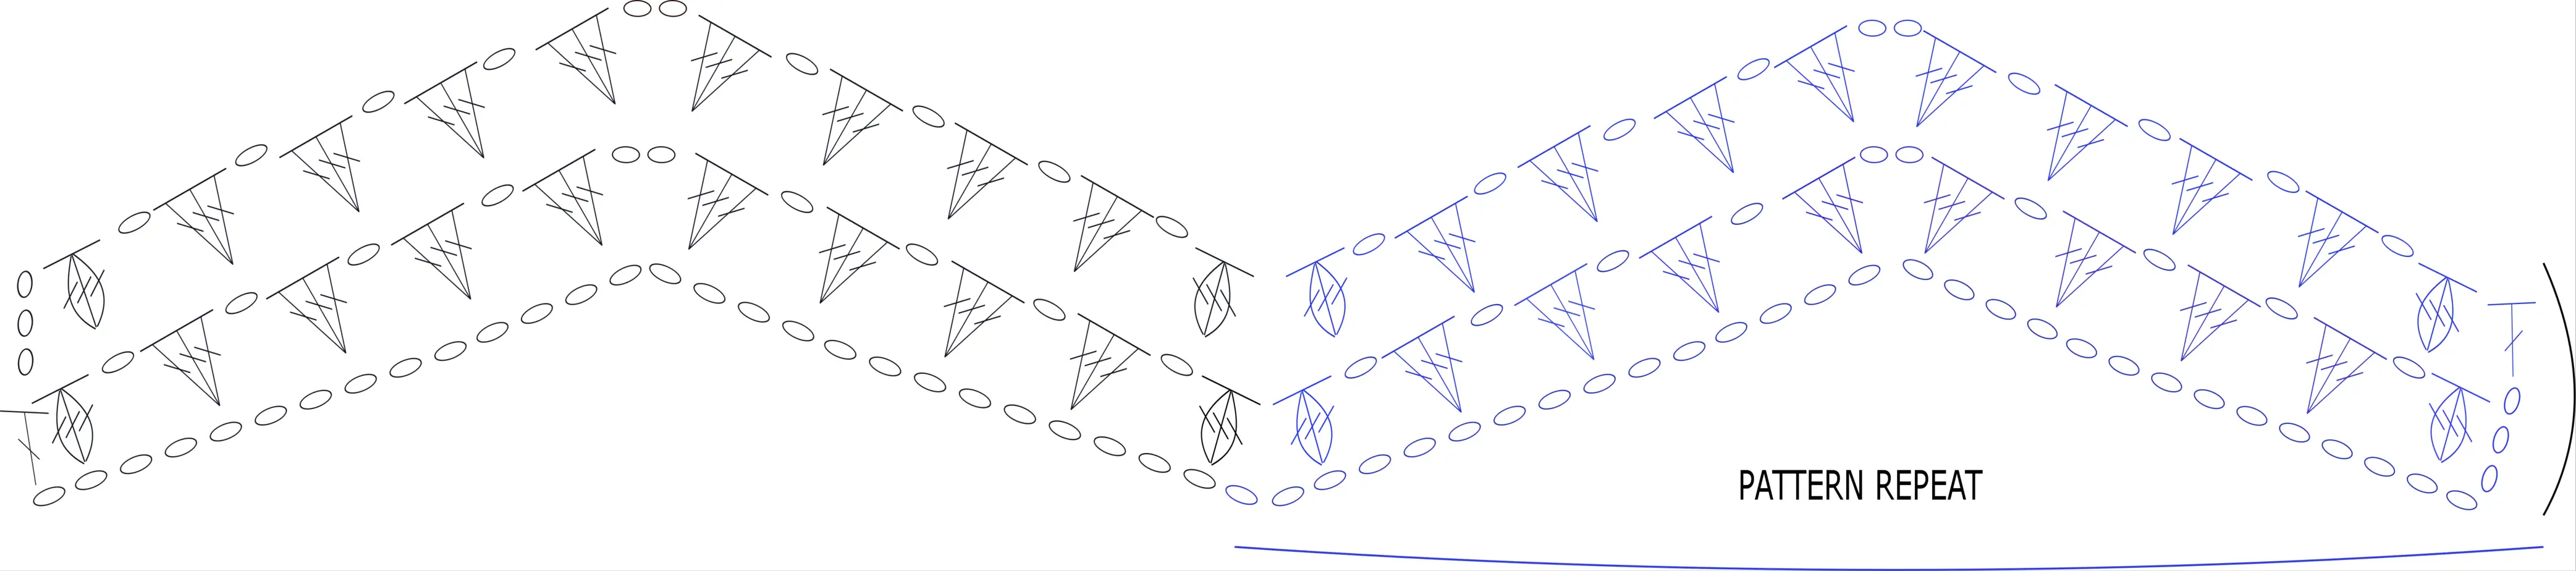
Diagrams are read from the right to left for Row 1 and left to right for Row 2. Each odd row is read from right to left, and each even row is read from left to right
The following example is a single crochet ripple pattern. Each peak and valley is separated by 10 single crochet stitches.

Here is the written pattern:
Chain in groups of 10 plus 1
Row 1: sc into each of the next 6 ch sts, sc3 sts into the next stitch, sc into each of the next 6 sts *sc3tog, sc into each of the next 6 sts, 3sc into the next st* rep to last 6 sts. Sc into the next 5 sts, 2sc into the last st
Row 2: ch1, sc into the next stitch, sc into each of the next 5sts, *sc3 sts into the next stitch, sc into each of the next 6 sts, sc3tog into the next st* rep to last 6 sts, 1sc into each of the next 5 sts, 2sc into the last st
Repeat Row 2 until the desired length is reached.
(The stitches between the asterisk are repeats.)
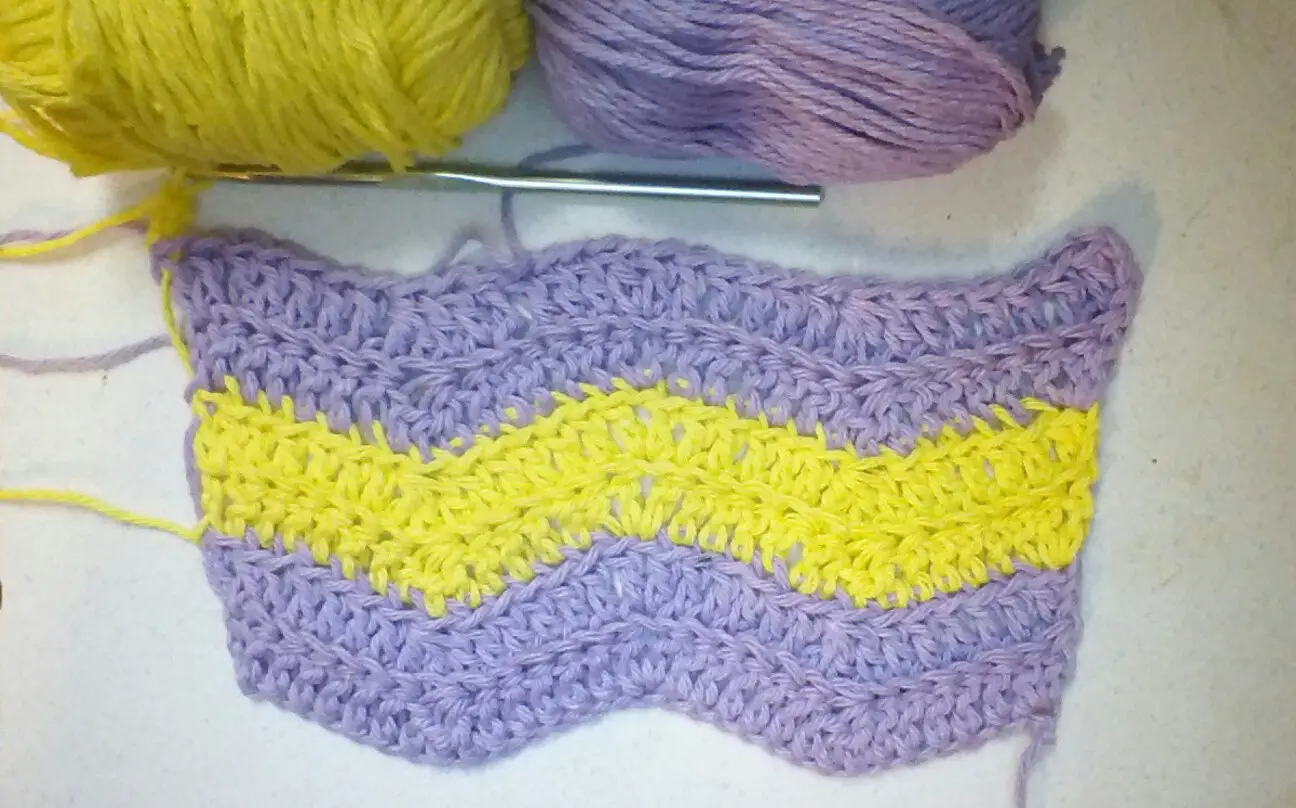
Basic Ripple Pattern
All ripple and chevron patterns contain peaks and valleys. These form the pattern and are created by increases and decreases across the rows. Each peak and valley line up across the pattern so it makes it easy to see if you’re on track.
Peaks and valleys are separated by single, double, half-double, or treble stitches. The number of stitches helps determine if your pattern is more pronounced or more relaxed.
To create your own ripple pattern, decide how many stitches will separate your peaks and valleys. Begin a row with the correct number of chain stitches for the stitches you are using (single crochet – chain 1, double crochet – chain 3), and work one more stitch into the first stitch of the row. In the above example 6 stitches separated the peaks and valleys, but in the first set of stitches subtract a stitch since the chain stitch(es) at the beginning of the row counts as one stitch. This means you would work 5 stitches.
Now begins the pattern repeat. Repeat this group of stitches as many times as you need across the row to the last 5 stitches. Work 3 stitches into the next stitch to form the peak. Crochet a stitch into each of the next 6 stitches and work a sc3tog or dc3tog across the next 3 stitches to form the valley. Work a stitch into each of the next 6 stitches and begin the pattern repeat across the row.
When you reach the last 6 stitches, work one stitch into each of the next 5 stitches, and 2 stitches into the last stitch.
In other words, decide on how many stitches will be between the peaks and valleys. Work the beginning chain stitches and 1 stitch into the first stitch. Subtract a stitch from the grouping between the peaks and valleys and work that number into the chain. Work 3 stitches into the next stitch to form the first peak. Work the appropriate number of stitches and then either a sc3to or dc3tog across the next 3 stitches to form a valley. Continue in this pattern to the last group of single stitches. Work 2 stitches into the last stitch to complete a row. Repeat this until you have the desired length.
Basic Chevron Pattern
Chevron patterns are like ripple patterns but use less stitches between the peaks and valleys. Peaks and valleys are also worked into two sets of stitches. This creates a tight fabric with sharper peaks and valleys than a ripple pattern.

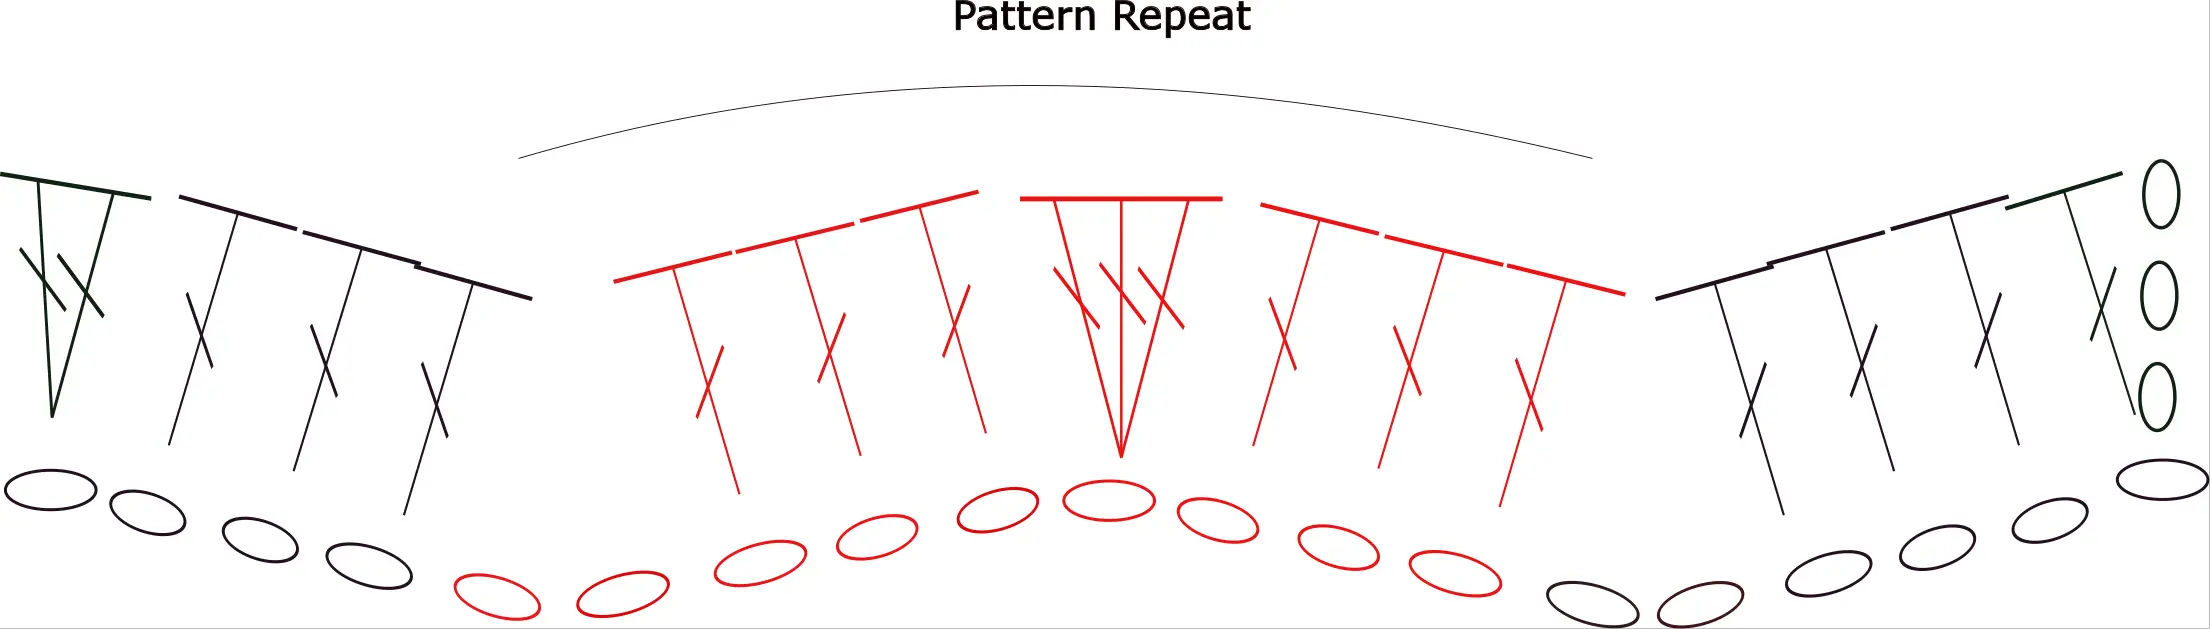
In this example you can see the chevron pattern is worked like a ripple, but there are two sets of dc3tog and 3dc worked into two stitches. This creates sharper peaks and valleys than in the ripple pattern.
The written pattern for this diagram is as follows:
Chain sets of 28 plus 3
Row 1: 2dc into the fourth chain from the hook, dc into each of the next 10 sts, dc3tog *dc3tog, dc into the next 10 sts, 3dc into the next st twice, dc into each of the next 10 sts, dc3tog* repeat across the row ending with a dc into each of the next 10 sts, 3dc into the top of the turning chain
Row 2: ch3, 2dc into the first st, dc into each of the next 10 sts, dc3tog *dc3tog, dc into the next 10 sts, 3dc into the next st twice, dc into each of the next 10 sts, dc3tog* repeat across the row ending with a dc into each of the next 10 sts, 3dc into the top of the turning chain
Repeat Row 2 to desired length
Double crochet chevron pattern
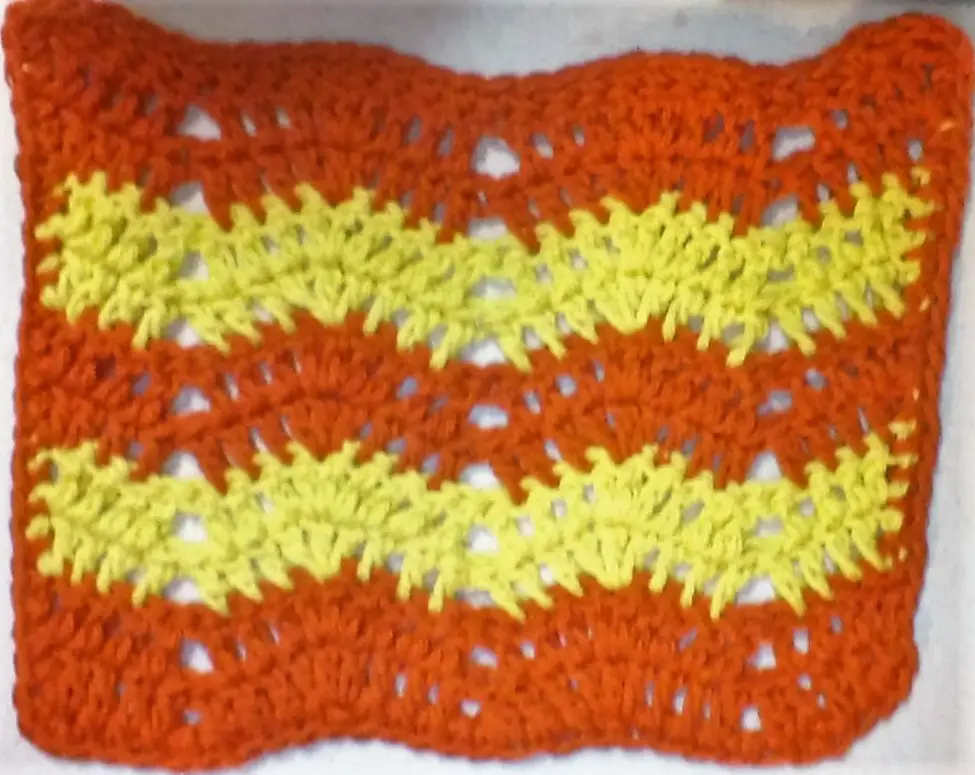
Eyelet Ripple Pattern
One of the prettiest ripple patterns is the eyelet ripple pattern. Instead of working stitches into the valleys, two stitches are skipped. This creates a nice eyelet look in the crochet fabric.
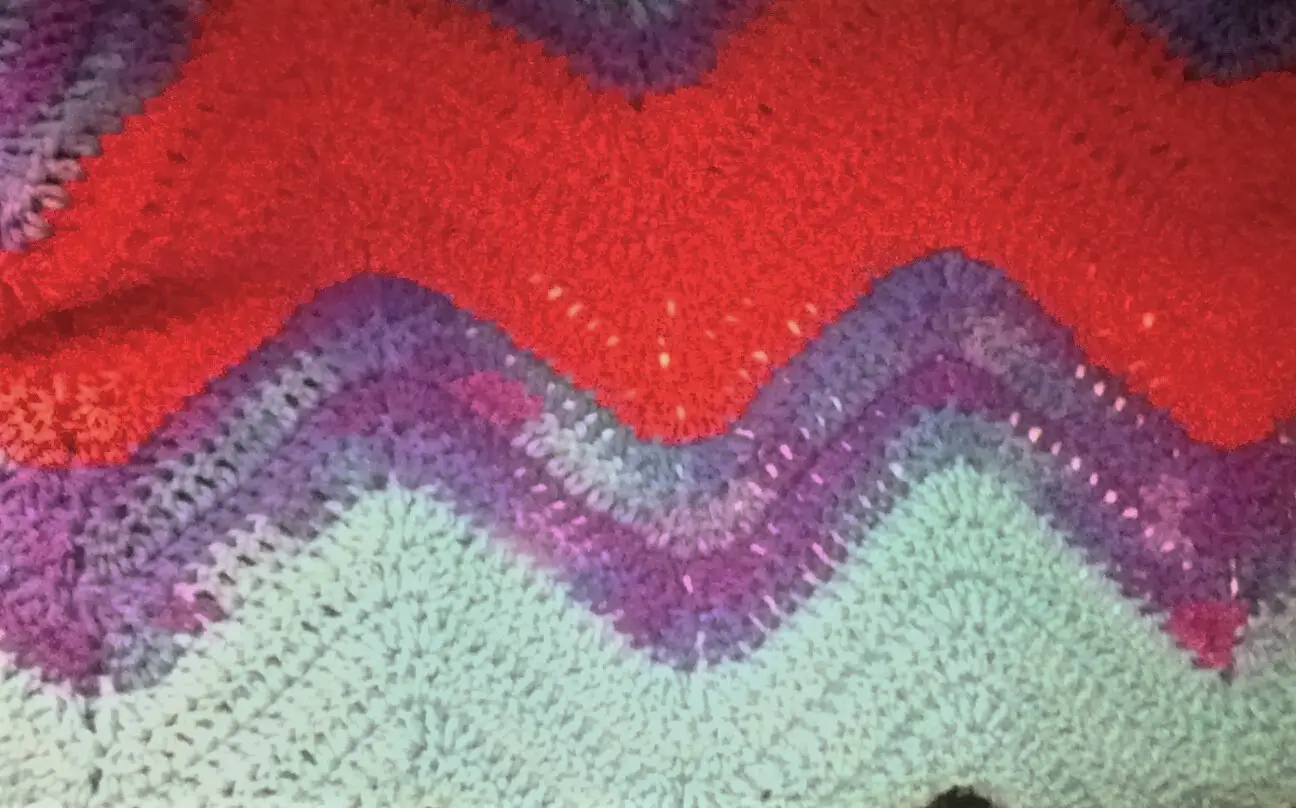
Ridge Ripple Pattern
The ridges in the Ride Ripple Pattern are formed by crocheting into the front and back loops. If you look at a crochet stitch you will see the top forms a “V”. Normally you would insert the hook under both loops of the stitch.
When you work a front loop stitch (flodc), insert the hook under only the front loop. When you work a back loops stitch (blodc), insert the hook under only the back loop. The pattern uses front loops stitches in one row, and back loop stitches in the next row. Alternate front and back loops stitches as you work the rows.
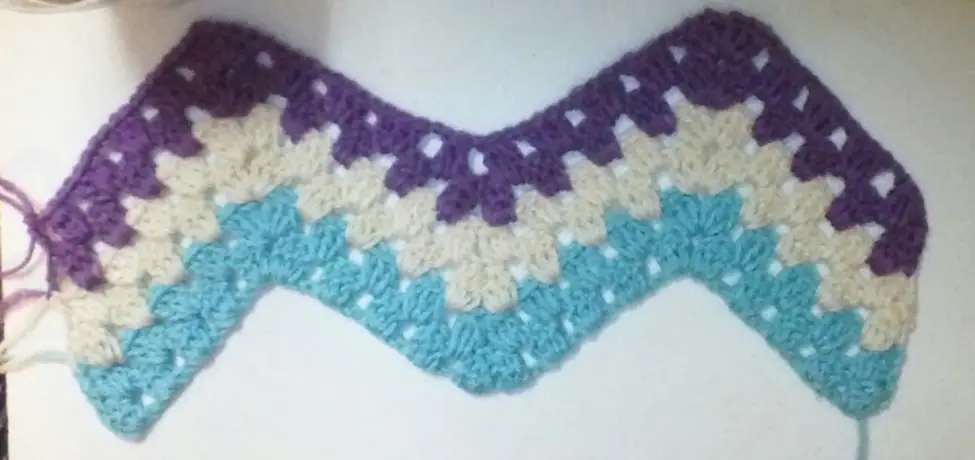
Granny Ripple Pattern
The Granny ripple pattern uses groups of 3dc and chain 1 to form the pattern. The peaks are formed by two chain stitches between two sets of 3dc shells. The valleys are formed by two cluster stitches and two skipped stitches.
A cluster stitch is crocheted by yarn over and inserting the hook into the next stitch. Yarn over and pull through the stitch, yarn over and pull through the first 2 loops on the hook. Repeat this process twice, yarn over, and pull through all 4 loops on the hook at once to complete the stitch.
Here is what the diagram for the Granny ripple pattern looks like.
Here is a sample pattern for the Granny ripple:
Chain sets of 28 plus 3
Row 1: Cluster st, in the 5th chain from the hook, ch1 **sk 2 sts, 3dc into next st, sk 2 sts, ch 1* rep three times, sk 2 sts, 3dc into next st, ch2, 3dc into next st *3dc, ch1,sk 2 sts* rep three times cluster st into next st, sk 2 sts, cluster st into the next st, ch1 *sk 2 sts, 3dc into next st, ch1* rep three times, ch1, 3dc into next st, ch1 *sk 2 sts, 3dc into next st, ch1* rep three times, ch1** cluster st into next st, dc into last st, turn
Row 2: ch3, cluster st into the next st, ch1 **sk 2 sts, 3dc into next st, sk 2 sts, ch 1* rep three times, sk 2 sts, 3dc into next st, ch2, 3dc into next st *3dc, ch1,sk 2 sts* rep three times cluster st into next st, sk 2 sts, cluster st into the next st, ch1 *sk 2 sts, 3dc into next st, ch1* rep three times, ch1, 3dc into next st, ch1 *sk 2 sts, 3dc into next st, ch1* rep three times, ch1** cluster st into next st, dc into last st, turn
Repeat Row 2 until the desired length
End Notes
Thanks again for stopping by. I hope this short tutorial on crochet ripple and chevron patterns helps you understand how the patterns work. You can find lots of free patterns online to try. And be sure to check back for future tutorials and free patterns.
Please feel free to ask any questions in the comments section. I’ll do my best to answer them and help you out. Do you have a suggestion for a future blog? I’d love to hear from you.
Until next time, take care, and keep on hooking!
If You Enjoyed this Article Please Share and Pin. It is Greatly Appreciated. 🙂


